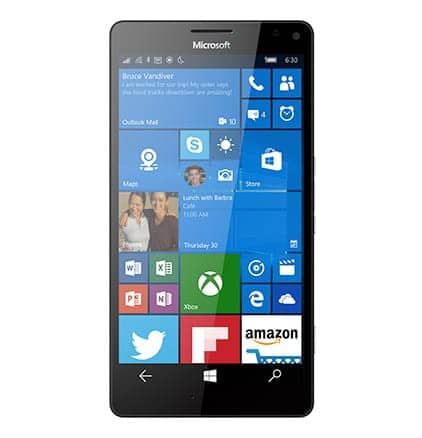
Sneak Peak into Microsoft’s Latest Lumia 950 XL
Microsoft Lumia 950 XL is set to release next month. The handset is set to mesmerize the mobile consumers worldwide with its striking beauty and elegance. The device is preloaded with the Windows 10 to offer high-speed internet access and download facility. For the lovers of Windows Phone, this soon-to-be launched handset is definitely an irresistible one. It looks brilliant and offers a lot of useful features that make it the best tablet to buy at this price range.
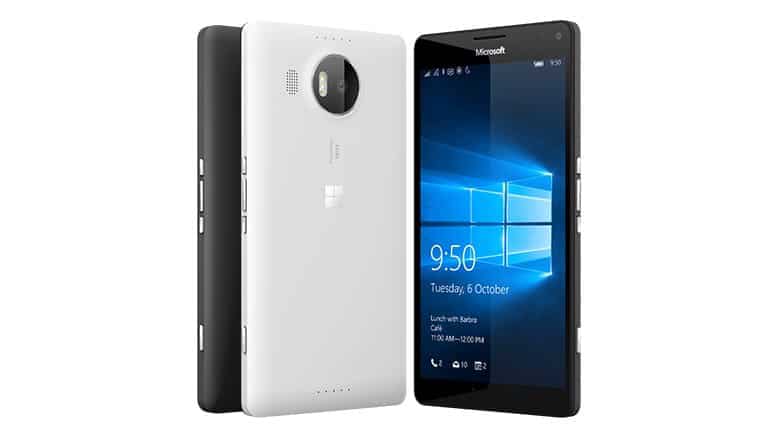
Apple’s iPhone 6s plus is expected to be the biggest competitor of Lumia 950 XL considering their flagship products at stake. The Microsoft’s latest has a wonderful design that is sure to enthrall you for sure. The device has been rightfully touted as phablet for its magnificent glossy finish and features that you can’t obtain at this price range. Similarly, you can buy various gadgets online at their most convincing price through Amazon Coupons.
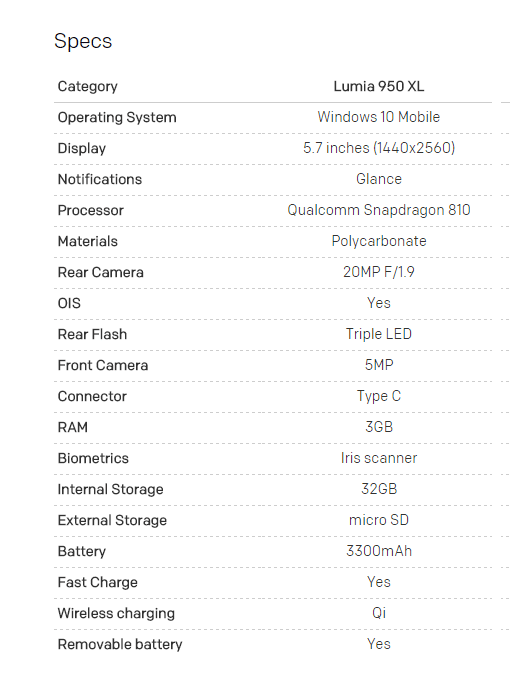
Microsoft Lumia 950XL : Product Specifications At A Glance
- Date of Release: The Microsoft’s next Lumia 950 XL will be officially released on Oct. 6 at 10 p.m in New York.
- Processor: The device is pre-loaded with Qualcomm’s Snapdragon 810, Octa core processor.
- Screen Size & Resolutions: The handset offers 5.7 inch QualHD display in Corning Gorilla Glass 4 with 1440 x 2560 pixels resolutions.
- Camera: The latest phablet from Microsoft is set to woo the users with its high-performing 20 MP rear camera and 5 MP front camera as well for video calling.
- Camera Quality: Lumia’s camera lens will have high quality Zeiss optics, dual-LED flash and auto focus facility as well.
- Operating System: The Lumia 950XL is pre installed with the latest Windows 10 OS.
- Memory Capacity: The device offers 3 GB RAM and 32 GB storage capacity with an option to enhance further storage capacity through external microSD card up to 128 GB.
- Battery: The handset comes preloaded with 3300 mAh battery offering you with uninterrupted talk-time for longer hours.
Detailed Spec Sheet :
The Expected Price of the Microsoft Lumia 950 XL
At the time of writing this article, not much information about price of the handset could be ascertained. However, several sources have indicated that Microsoft’s Lumia 950 XL will be available at an alluring rate for the consumer. The tablet is set to compete with Apple iPhone 6s, which is currently being sold at a rate of around $745 plus depending upon regions.
Microsoft claimed to have set the rate of its upcoming device a little below than the price that Apple is charging for its iPhone 6s with 16 GB. In other words, Lumia 950 XL will be sold below $745. But final price of the device will only be announced at the official event of the launch of the handset in New York next month in the US. You can buy Microsoft Windows tablet devices directly on virtual shopping outlets as well. Log on to an ecommerce portal that will help you grab various spectacular handsets at compelling rates through paytm offers.
Good accessories for the tablet devices are also important. It is only at online shops that you will get the perfect accessories for your branded gadgets or device. As the Microsoft Lumia 950 XL will be launched shortly, I urge every consumer or those who wish to purchase this handset to actually check its look and price on the net as well. The best way forward to make proper comparison of the similar devices and proceed to buy the one that fulfills your expectation.


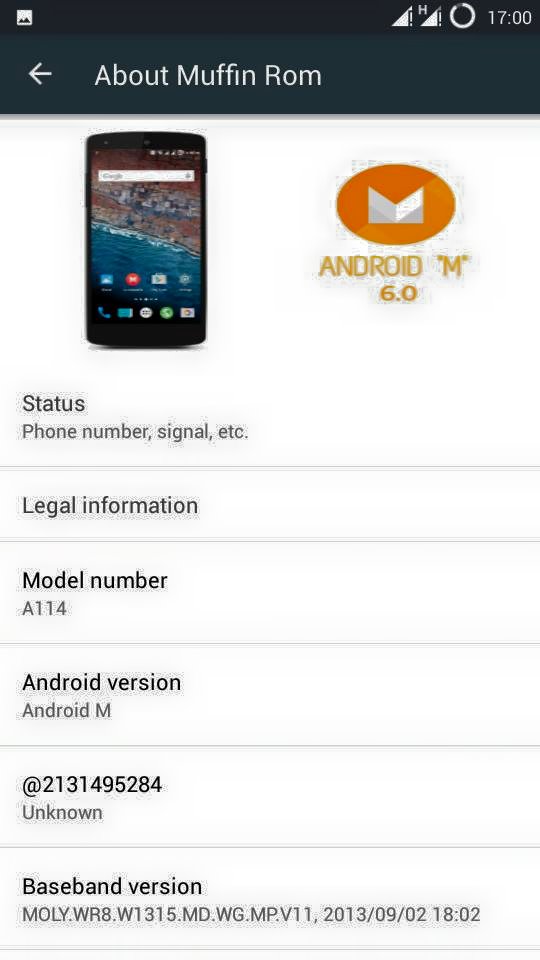
![Latest CM 12.1 Lollipop Rom for Xiaomi Redmi 2 [Fixed]](https://thebroodle.com/wp-content/uploads/2015/05/CM12-For-Xiaomi-Redmi-2-768x369.jpg "Latest CM 12.1 Lollipop Rom for Xiaomi Redmi 2 [Fixed]")