With the modern world moving further and further online, cybercriminals are finding additional ways in which they can conduct their criminality. Android users worldwide are having to stay on top of the latest tricks and scams online criminals use. Otherwise, it’s easy to fall victim to any one of the methods they tend to employ.
One way in which Android users can guard against any security threats is by installing an app or a piece of anti-viral software. They’re both useful, although apps tend to be more popular for users as they’re generally a tad cheaper and are capable of boosting your phone’s security. They don’t use many resources either, although it does depend on what type of security app you download. There are password managers, anti-viral creations, device managers, and a whole host of other apps worth trying out.
To help you assess what is the best security app for your Android device in 2021, here’s a look at some of the best and most popular security apps in 2021.
GlassWire specializes in giving its users an overview of the type of apps that are consuming your data and keeping you in the loop in regards to which apps you might want to remove with your data preservation in mind. GlassWire provides helpful live graphs, on top of notifying you when a certain app is draining your data. It’s a useful tool in terms of seeing if any security threats could be occurring in the background also. If you’re keen to avoid hitting your data cap, then GlassWire could be for you.
Remembering all of your passwords or even coming up with a safe and secure password can be tough in the modern world, especially as there are so many to keep track of. Whether you’re keen to login to a gaming account for some slots fun at mansioncasino.com/ca/slots/heart-of-the-frontier/ or you want to sign-in to an email provider you occasionally use, Bitwarden Password Manager will store all of your passwords behind a master password, giving you impressively sound security. The app comes with a password generator too, also allowing users to sync various devices as well. Bitwarden has done well with this one.
A relatively new app on the scene, Bouncer manages your permissions to essentially allow your locations to be hidden more frequently when you’re surfing the web. For example, if you give temporary access to an app, but you don’t want the access to be permanent, Bouncer will sort that out for you. Bouncer performs a small but important task, especially if you don’t like your location being known all of the time.
A privacy browser, Firefox Focus allows you to view an array of websites online in incognito mode. The app doesn’t log any activities during a long session, you can remove advertising and other things such as trackers, although it doesn’t protect you from everything. It is definitely worth using, though, especially if you’re keen to surf the online world in private.
Using a VPN allows you to access various websites that you might not be able to from your country, but it also adds another layer of security to a mobile phone. With ProtonVPN, it comes with unlimited data all at a reduced speed too. It also allows for a solid and secure internet connection as well as helping fight off any prying eyes that could be tracking your browsing online.
Other useful security apps on Android are Find My Device by Google, LastPass, Resilio Sync, Tor Project, Malwarebytes, Nox and Signal Messenger.
There is no one theory on how to nail an interview, but there are certain things that you should keep in mind before you go for that really important meeting or call. Here are some common tips that will help you slay that interview:
1. Prepare your questions:
Preparing your questions in advance can help you better navigate a conversation with the employer or interviewer. Make sure your questions are not vague or irrelevant. It shouldn’t look like you’re asking questions just for the sake of asking. Think of your interview as a two-way conversation where you get to know the employer and your work as much as the interviewer is getting to know you.
2. Do your homework:
If you are applying for a technical job role, like cybersecurity for example, then you should focus on being prepared for any technical questions that may come your way. It wouldn’t be a bad idea to go through your training notes that you received in your ethical hacking course or network defense course. In case you don’t have access to your study material, you can always go online and do your homework there. If you are applying for a non-technical job, then your homework will mostly include knowing about your field.
Virtual interviews are becoming the new normal but that doesn’t mean that you don’t need to dress appropriately. Surely you wouldn’t be wearing any pajamas but you shouldn’t be wearing casuals either. The way you dress says a lot about you and creates subconscious impressions about you in the minds of your audience. Make sure that you are wearing formals and looking the part in your Zoom call or Skype meeting.
4. Listen intently:
When the interviewer is speaking, you should be listening intently and not just waiting for them to finish their part so that you can respond to it. Everybody wants to be heard. It is important that you have a genuine heart to heart conversation with the interviewer rather than a mechanical talk.
5. Keep your qualities ready:
It’s very important during an interview to remain confident about yourself, and at the same time, to make the interviewer see why you are a good fit in the first place. Surely, the person must have liked something in your profile that they chose to interview you further, but you should not take that for granted during the call or meeting. Have your qualifications ready at your tongue and make sure that you are able to express clearly why you should be preferred over other candidates. For example, if you are applying for a CEH course holder position, then you could tell them about your problem-solving and critical thinking abilities and share some examples of how you have demonstrated thinking out of the box in the past.
6. Don’t try to impress, be honest:
We all think of interviews as a chance to impress our employers and pitch ourselves to them in the most advertising-oriented way possible but that’s not the case. You shouldn’t be focusing on impressing the interviewer, rather you should be focusing on being honest and getting to know what your work would be like and making sure that, through the conversation, they get a clear picture of you so they can make a better decision regarding the recruitment.
7. Stick to the clock:
Time is a valuable thing. A lot of people have indiscipline and non-punctuality as a pet peeve and therefore you should always assume the same about your interviewer and stick to the clock. Start on time and end on time. Especially if you are expecting a virtual interview, then you should prepare in advance and give yourself a buffer time to make sure that the software, the internet, the microphone, and audio-video settings are working properly
Cryptocurrency is an exciting and rapidly expanding market. Currencies such as Bitcoin and so-called altcoins like Ethereum and Litecoin can be a wise investment for people who understand how to manage their funds wisely.
A number of exchanges have cropped up in the past few years, some of which cater to investors looking to transfer funds from a mobile device. But the sea of opportunities can be intimidating and overwhelming.
Cryptocurrency investors have many options for managing their assets while on the go. We’ve tested many of the options on the market to help you determine which is the best iOS cryptocurrency app to help you manage your money.
Each of these seven apps offers fantastic features, but some are better tailored to certain types of crypto enthusiasts. Let’s examine each so you can make an informed decision as you work to choose the best iOS cryptocurrency app for your unique circumstances and preferences.
Coinbase is a popular and well-established trading platform. If you are new to trading cryptocurrency, Coinbase is a fantastic introduction to this exciting market. It allows users to purchase crypto with fiat, or government-backed money such as the U.S. dollar.
Coinbase’s app is easy to use while mimicking many of the options available to desktop users, so you will not lose functionality even if you do much of your trading through the app.
Coinbase operates out of San Francisco, California, and is a leading exchange in the U.S., overseeing the transfer of more than $20 billion in domestic assets.
Coinbase charges higher fees than some of its competitors, which may be an issue for some investors. However, it offers attractive features such as the Coinbase Earn program, which allows investors to earn crypto as they use the app. The platform also provides a digital wallet and allows users to purchase crypto easily using a credit card, which is not the case with all platforms.
Coinbase may be the best iOS cryptocurrency app if you are looking to get started in the crypto market and are interested in purchasing major forms of crypto such as Bitcoin and Litecoin.
Ledger’s mobile app has grown and expanded in the past few years to address clients’ concerns. If you were underwhelmed by Ledger Live in the past, it is worth reconsidering to see whether the new iteration fits your crypto strategy and investment style.
Ledger Live supports a wide variety of cryptocurrencies—more than 26 different types of coins as well as 1,500 tokens—and the number keeps growing. If you want to invest widely or speculate on some lesser-known investments, Ledger Live may well be the best iOS cryptocurrency app for you.
Managing those dozens of coins and hundreds of tokens is easy, and Ledger Live provides excellent security features to safeguard your funds against potential hackers.
The platform also gives you the opportunity to hide your token purchases when you view your investments. This does not get rid of those tokens but it is a useful tool that gives you a better and less cluttered bird’s-eye view of your assets.
The Ledger Live app is handy if you want to easily manage tokens with ease from your smartphone or tablet.
If you have heard of cryptocurrency, then you are probably already familiar with Bitcoin, the industry veteran and the yardstick against which all other coins are measured.
One of the issues with Bitcoin is that it processed slowly and limited how quickly miners and other investors could process transactions. Bitcoin Cash provided a faster way to exchange crypto pegged to the Bitcoin market.
The Bitcoin Cash App for iOS takes advantage of this feature and offers users speedy transactions. The app is perfect for people who want to use crypto quickly and often. Both set-up and transactions are a snap. With just a few taps, you can split a bill or pay back a friend. The app is secure, but if you need to pause your account for any reason, you can do so with a single click.
Users can invest in increments as low as $1, and buying stock with the Bitcoin Cash App is inexpensive because it is done without a commission fee. If you are interested in using crypto for daily transactions, the Bitcoin Cash App is a good choice and maybe your best iOS cryptocurrency app.
Serious crypto enthusiasts should check out Blockfolio. The platform’s app offers an invaluable tool to easily view and manage a vast array of funds. Because Blockfolio supports hundreds of cryptocurrencies and coins, you may invest widely, and the app’s ability to distill your most important information is extremely helpful.
If you are ready to take a deep dive, the Blockfolio app can provide all kinds of industry news articles, charts, and order books to help you decide how to leverage your investments. You can also check the exchange rate between cryptocurrencies and dozens of fiat currencies.
The app allows users to set notifications when exchange rates hit certain thresholds so they are ready to seize opportunities and invest quickly and wisely.
Blockfolio provides the best iOS cryptocurrency app for experienced investors ready to take precise control of their funds. If you need to rely on an app because you travel a lot, rest assured that Blockfolio can offer coverage all around the world.
Hong Kong-based Binance offers some of the best transaction rates on the market depending on where clients are located. Anyone looking to buy cryptocurrency primarily with other forms of crypto should give the platform’s app a look.
Though headquartered in Asia, Binance serves clients around the globe and partners with local companies to comply with national regulations, such as Binance-US for American crypto investors. However, users cannot make purchases in U.S. dollars. Users can make a wire transfer to buy crypto with another fiat such as Canadian and Australian dollars, as well as Euros, and this payment method does not incur any transaction fee. Americans also face credit card service fees that can climb as high as 3.5%.
Binance iOS app is best for anyone looking to buy crypto with Canadian, Australian, or European fiat. The app is secure and easy to use, and Binance provides helpful multilingual customer support. The platform supports spot trading and peer-to-peer transactions and has a good industry reputation.
That being said, its country-specific fees make it less appealing to investors looking to buy crypto with American fiat.
The BlockFi app is another sound choice for crypto veterans. If you already own crypto and are knowledgeable about the market, BlockFi may just be the best iOS cryptocurrency app to help you reach the next level. It is also appropriate for investment groups that are up to date in the industry and are willing to invest with little guidance in exchange for very low service costs.
The BlockFi app is user-friendly, and the company is able to operate a platform that is almost free of fees because it does not spend money on personal investment advisors. Smart crypto traders can both save and earn money easily with the app. You can save money because there are so few fees, and you can earn money because BlockFi offers high-interest earnings up to an 8.6 annual percentage yield (APY).
The platform promises to deliver the future—not just of crypto, but of the entire financial sector. To that end, it provides services you may have traditionally associated with a brick-and-mortar bank. For example, investors can request a crypto loan or even borrow American dollars for real-world expenses such as making the down payment on a house.
Consider BlockFi for unique services and potential savings if you are already a confident crypto investor.
CoinMarketCap
CoinMarketCap’s crypto app is another good iOS app for traders on the move. The platform provides extensive tracking and can give you quick information on more than 16,000 crypto markets and tell you the daily historical open, high, low, close, and volume (OHLCV) values. This is very helpful when you want to keep an eye on your holdings and monitor trends in the market so you can plan your next move.
You can also compare crypto values against fiat from around the world or bullion such as gold and palladium.
You may ask the CoinMarketCap app to send you an alert when prices reach a certain threshold so you can dive in with a transfer when market conditions are ideal.
This can be the best iOS cryptocurrency app for crypto enthusiasts who like to compare exchange rates around the world. Tools like the historical daily OHLCV data, plus numerous charts and books, make this a dream for crypto statisticians who like to wrap their heads around a bunch of numbers to determine the best trade opportunities. Of course, if you would like some help, the CoinMarketCap app also provides up-to-date news on the crypto market and blockchain technology.
Creating a YouTube video seems easy but involves a thorough insight into various aspects and a lot of work! Being a prominent content market, Youtube comes second in the rank of most used search engines.
You can find answers to any questions, and content on every topic is readily available with just a click. It is also a hub for some of the most talented people you can come across. With the help of views and likes, any individual with potential can become a celebrity overnight. But what makes a video go viral?
How to gain maximum likes and get your channel subscribed? Well, this article will help you in finding answers to all these questions. From researching to video optimization, this post will unravel the mystery of a successful YouTube career.
Researching And Planning
The first and foremost step towards engaging youtube content is research and planning. As a novice, you need to script the video well to avoid errors and retakes. Yes, it’s time taking, but a little effort in the start will give out astonishing results. Below are some tips you can include in the initial phase of preparation to improve your content quality.
Keyword Research:
Search which keywords are trending, and which content people are looking for the most. Please include them in the meta description and title. The inclusion of SEO tactics will help your video show among the top searches.
If possible, with a transcript of your video in the description to incorporate more and more keywords. Research on related content, find out what the other creators are missing out on, and boost your videos’ quality.
Cohesiveness:
Combine the elements in your video and see if they are all blending. One unmatched aspect could be a mood killer for the viewers! Do not wander around and stick to the definite niche. When you keep changing the mood of the content, viewers often feel lost.
Location:
Deciding on the location of the shoot is a crucial task. If you are planning to have an outdoor shoot, make sure it’s not overcrowded. Look into the kind of mass present at the site for interactive sessions.
The next step Is finding the right spot. Try different angles and camera setups to discover the perfect site with enough lighting. The background should resonate with the content of the video too.
Script:
Preparing a script is probably the most challenging part of video creation. It might take you hours to come up with error-free writing. Re-read the written form before execution. Chalk out the voice-over parts and write down the dialogues. Don’t overburden the speech with unnecessary jargon and complicated vocabulary.
Viewers don’t like rewinding a video to understand; instead, they will prefer switching to another video. Make your content more friendly and communicable.
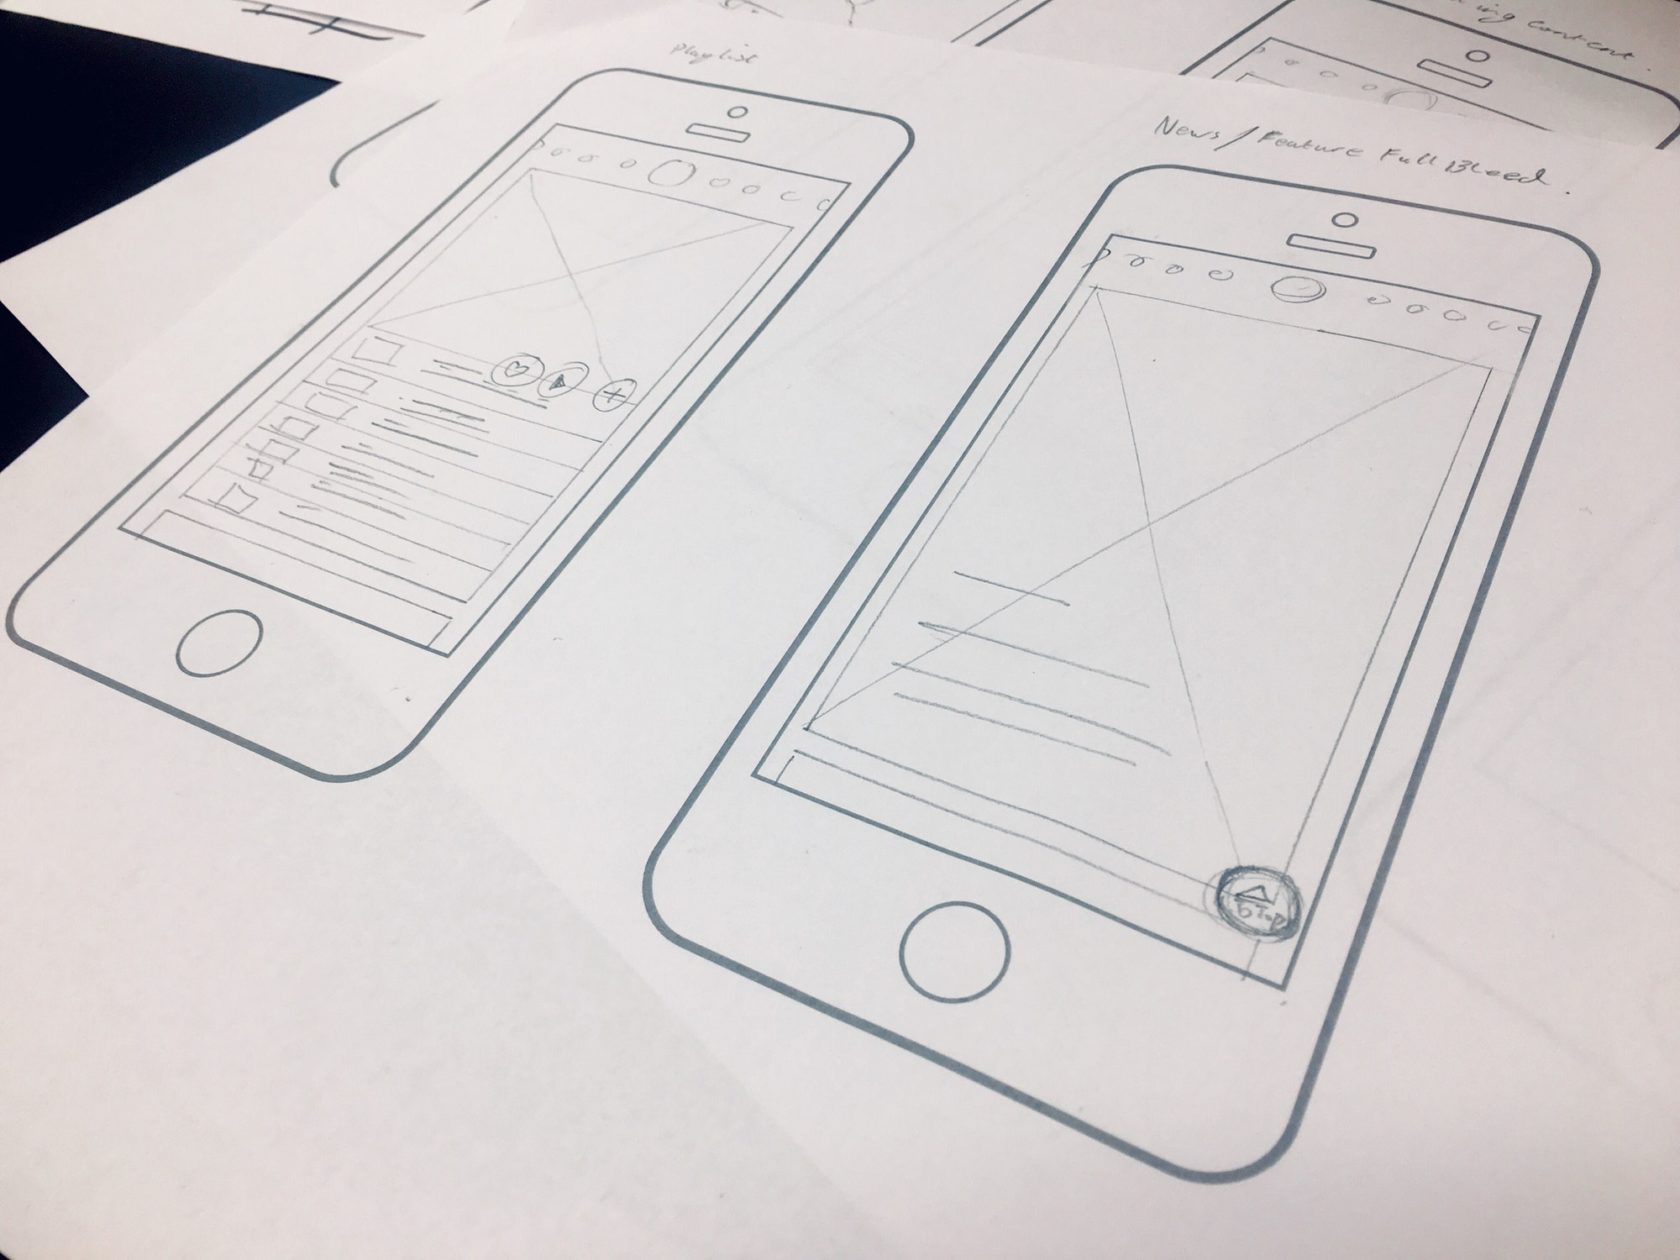
If you cannot visualize the script as a video, creating a storyboard might help. This process will hardly take you any time or labour as there are multiple storyboard apps present out there. With this software’s assistance, you will sketch out ideas even better and picture your script in action.
Best Equipments
If content creation is sobering you want to pursue as a career, prepare yourself with high-quality tools. With the help of this equipment, you will add a professional touch to your content and attract more viewers.
Camera:
A lot of phones today come with efficient cameras that can cater to your needs in the initial stage. To cut on the extra expense, you can create a YouTube video with the available tools. However, investment in an inexpensive tripod or stand will not burn a hole in your pocket and deliver surprising outcomes.
Lighting:
Great visuals will attract more viewers. If you have an unrestricted budget, buy a first-rate lighting kit. In any other case, natural light is the best to shoot outdoor videos. Try making a video at the golden hour or sunset to avoid distracting shadows. Do not forget to perform a lighting test before kicking the project.
Audio:
Ensure a quiet environment for the recording of audio. If your content revolves around music and singing, having a microphone for the job is highly advisable. You don’t want to make your video look or sound unprofessional. Bad quality can blow up the mood of the viewer. If you are going to use your mobile phone’s mic for recording, test it beforehand.
Place the device at a suitable height and angle to capture audio without any breathing sound or other undesirable commotions.
Editing:
Editing is the backbone of the whole process. Even when you can obtain the best footage and audio, your work remains hollow without combining them into one video. Not just the combining, but video editing software enables you to perform many more functions. From adding overlaying text to changing audio levels, your labour will get reduced to half with suitable editing software.
There are numerous free editing apps present online, but their features are limited. If you are more on the professional side, go for Movavi editing software for the best results. Get more information about this app here.
Optimization:
Optimizing the video data is a valuable tool in the creator’s hand to increase the chances of showing up the top searches’ content. To make your youtube video more deliverable, here are some tips you can follow:
First Impression
Pick a catchy and trendy title. With in-depth research, you will get to know what the masses are looking for at present. Go through your competitors’ content for reference. Make the title more compelling and impactful. This way, you will induce curiosity in the viewers and provide them with an idea about what to expect.
The Importance Of Keywords :
As discussed earlier, keywords play an essential part in making your content more popular. You can insert keywords anywhere in the description box, but their presence in the title makes your video additionally notable.
Tagging:
Adding tags to youtube videos is no rocket science. Tagging is a fundamental tool in social media to increase your content’s reach and works the same way on youtube too. Add multiple tags for the same title, and phrase and rephrase the sentence to create more tags. Your previous keyword research will help you in coming up with tags as well.
Thumbnail:
Believe it or not, there are all kinds of people browsing through YouTube feed. Some might just be gazing at their phones to kill time. Selecting a thumbnail that catches the attention of visually-minded individuals is a reasonable strategy. Go for a thumbnail that complied with the content of your video. Many YouTubers deceive people through false thumbnails and lose credibility. Try staying away from such practices.
Conclusion
The regularity of content helps one in achieving a strong viewer base. It is often observed that people with good potential give up early on video creation due to a lack of subscribers. Be persistent and have patience.
Your content might take some time to get noticed, but once you grab the attention of a like-minded audience, the sky’s the limit! Take the help of the tips mentioned above and tricks and make your content stand out.
Online shopping is now preferred by many people for its simplicity. With only a gadget in hand, people have easy access to a catalog of every product imaginable, from kitchen appliances to sports equipment.
That’s why many businesses opt to start selling their products online. Having an online presence helps them reach new customers and increase their profit.
Most of them may choose to sell their products on big eCommerce platforms since they don’t have to build their own store from scratch. However, creating your own unique eCommerce brand will have its own advantage.
Once you have a recognizable brand, loyal customers will come in more easily than by competing with other businesses in existing eCommerce platforms. On top of that, you won’t need to pay for commissions.
This article will guide you through all the steps in detail and help you create a successful eCommerce brand on your own.
1. Know Your Purpose
Before getting started, you’ll have to first know the purpose of your eCommerce brand. For example, big brands like Google and Apple have a unique story behind them that makes them stand out from their competitors.
Having a brand purpose beyond making a profit will help you connect better with your customers. It creates meaning and allows your brand to make a bigger impact.
2. Define Your Values
A significant part of a brand’s purpose is in its values. If you look at big eCommerce brands, they all have their own unique values that set them apart from other brands.
For example, Amazon’s core value is to be a customer-centric company.
It focuses on putting out products with the lowest price and inventing ways to bring its products to customers in the fastest, easiest, and most efficient way possible.
On the other hand, eBay’s focus is to include everyone to contribute and connect through its eCommerce platform.
To find your brand’s values, focus on what experience you want to bring for your audience. On the opposite, identify what experience you don’t want your customers to get from your brand.
Find the middle ground to turn it into values for your brand.
3. Identify Your Target Audience
Once you have found your brand purpose and values, the next step is to identify your target audience.
A specific target audience helps you narrow down your products and services and sell them better. It helps you understand their needs and market to them more effectively.
Businesses usually define their audience based on demographics, like income level, age, location, and gender.
You may choose a target audience based on your eCommerce brand’s values and purpose and confirm your choice through market research.
4. Create an Online Store
Every great eCommerce brand needs an impressive online store, including yours.
Nowadays, there are lots of platforms available to make your own online store. You can use social media, a big eCommerce platform like Amazon or eBay, or you may also launch your own website.
However, if you choose to build your own eCommerce brand, having your own website has a lot of advantages. A website will make your brand look more professional and trustworthy.
Many website builders and platforms also have features that help eCommerce owners to create and manage their store, so you don’t have to build your website from scratch.
Some great examples are Online Store by Zyro and WordPress with its WooCommerce plugin.
5. Choose a Brand Name
To establish an online presence, you also need a remarkable brand name.
Big eCommerce brands like eBay, Amazon, and Alibaba all have one thing in common: They have a short and catchy brand name. This makes them easy to remember.
If you need to brainstorm for ideas, you may check sites like Thesaurus.com to find words that relate to your business and your target audience.
There are also free name generators like Wordlab and Namelix that can randomly generate a business name from the keywords that you input.
6. Create Your Logo
A logo is also a significant part of a brand and its identity. There are two main types of logo, wordmark or lettermark, and pictorial mark.
Wordmark and lettermark logos include your brand name in the logo. It can be your full brand name (wordmark) if your brand name is short enough or its initials (lettermark) if your brand name is longer. Some examples are Google, CNN, and NASA.
On the other hand, a pictorial mark includes only a symbol in the logo. It can be an image like Twitter’s bird, or an abstract symbol like Nike’s logo.
When designing a logo, make sure to also consider its versatility. An impressive logo can be printed in many sizes, surfaces, and put on different colored backgrounds.
7. Establish a Brand Identity
With a brand name, a logo, and clear values, you’re now set to create a brand identity.
A brand identity is about choosing the right elements to represent your brand. Some of them are the logo, the colors and shapes you include in your product, and the tone and language you use to communicate with your audience.
When establishing brand identity for your site, consistency is key. Make sure you include the same elements in all your marketing efforts.
8. Customize Your Online Store
Once you have a clear guideline for your brand identity, it’s time to customize your online store according to it.
Choose background colors that match your brand’s color guideline and pick fonts that you feel match your brand most.
Most website builders have themes that you can pick from. When choosing a theme, be sure to also consider its look on multiple platforms and how easy it is to navigate with it.
9. Create Content
Now that you have a well-polished online store, you can start creating content for your eCommerce site.
Creating content is part of digital marketing, and it helps drive traffic to your site and keeps visitors interested in your business.
The point of content marketing is to create useful content that is relevant to your customer’s needs.
You should also consider the tone, voice, and style of your content. Define your brand’s characteristics and personality, and create a chart to describe the dos and don’ts.
10. Tweak and Analyze
When you’ve reached this point, it means you already have an eCommerce brand and an online store of your own.
However, your journey doesn’t end there. Building your brand means you have to regularly evaluate how your audience perceives your brand and if there are improvements that can be made.
Include data in your analysis to make stronger points. Check how many visitors you get and how many of them are converted into buyers, how they found your website, and how many become repeat customers.
Once you already have a considerable number of customers, you may also want to create segmentation and divide them into groups to market to them better.
Conclusion
Building your own eCommerce brand may be more complicated than starting an online store in an established eCommerce platform, but it has its own advantages.
Now that you know all the steps you need to build your brand, it’s time to start brainstorming for ideas and create your eCommerce brand.
How often do you experience your laptop for graphic designing running dead slow and you pulling your hair out of the frustration of being unable to open your project? Quite frequently? Not really? Yet to buy a laptop? Whatever is the answer, a handy portable design device powerful enough to handle the complicated tasks you perform is all you need.
Before you even start looking for your next or first graphic design laptop, understand your work and work requirements thoroughly. If it is more of a 3D design stuff, go for a high-end laptop, if working predominantly on 2D designs, a mid to low-end laptop will do it for you. Set your budget and other expectations in the design laptop of your dream. It is a decision worth spending time on and you need to be super careful when buying one.
Now that you have it sorted, let’s get back to the point. I had penned down 6 things to look for when buying a laptop for graphic design. So without further ado, let’s get started.
1. Operating System
This is more of a personal choice and like. If you are looking for a seamless design experience with amazing hardware, Mac is just the right one for you. On the other hand, if you prioritize customization, app compatibility, and the facility to upgrade the hardware components, then Windows is much better.
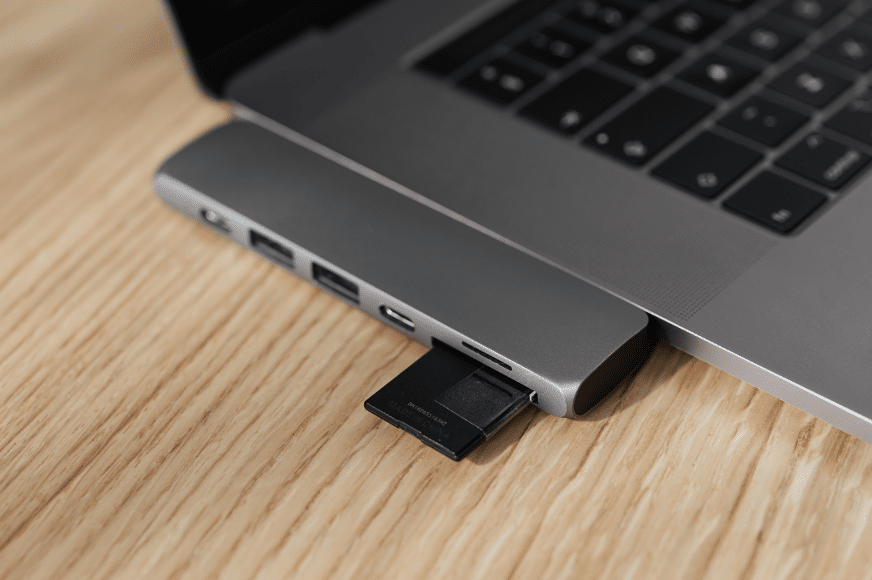
Of late, Apple is removing the ports from its devices to make them look slim and stylish. I believe this will be one of the frustrations in users as they’d find it difficult to plug-in multiple accessories. Otherwise, Apple laptops offer great performance to meet your design requirements.
The choice is yours, both the OS are really good. Read on to know the other factors worth considering when buying a graphic design laptop.
2. Processor
A processor or the CPU decides how fast your laptop would run. Graphic designing calls for a powerful processor to run the complex design software. It is highly recommended you go for an i5 or i7 processor laptop with a quad-core processor.
Secondly, check out the graphics card. A graphics card performs quick calculations while allowing the processor to perform other tasks. It speeds up the creation and rendering of graphics. For 3D designs, you may need a dedicated graphics card which will cost you extra bucks. If your designs are limited to 2D, an integrated graphics card chip is enough to run basic design software.
3. RAM
RAM or Memory holds all the essential information your system needs to access at any instant in time. If you are a multitasker with multiple complex applications running in the background, try to choose a laptop with as much memory as possible, ideally an 8GB RAM.
Make sure your laptop has the facility to upgrade the RAM as RAM is paramount to your design applications. Go with a decent 8GB RAM and later on if need be, you anyway have the memory expansion option.
4. Storage capacity
Hard Drives are the permanent storage in the computers. Strictly speaking, Hard Disk Drives are outdated. They are quite affordable but in a laptop with HDD, speed would surely take a hit.
Typically, laptops come with a 500BB or 1TB HDD. 1TB HDD should just be fine for storing the design software, complex files, and projects. Seagate is the top hard drive manufacturing company and most laptops come equipped with it.
The Solid State Drive (SSD), however, is the most preferred one these days as it makes rendering and fetching of files and projects seamless. The good news is that SSDs are getting affordable with tech advancing every single day.
5. Screen Size And Display
Who likes to design and create on a small screen? With all the design software flooded with menus, tools, font and color palettes, templates, and more elements, it becomes almost impossible to draw in that miniature workspace. Look for laptops with a screen size of more than 15 inches and you will find yourself a great workspace to execute your ideas.
The display is yet another key factor to check out for while planning to buy a graphic design laptop. Smaller resolution screens with 1366Χ768 resolution and lesser don’t precisely define your designs, which is of course not healthy for your designing endeavors.
A laptop running with a resolution of 1920X1080 is all you need for your momentous designing projects. If you need an even larger workspace, you would have to slack your pocket on a 4K TV or monitor.
6. Color Accuracy
Colour accuracy represents the ability of a display to produce colors and shades as intended. Inaccurate colors can ruin all your hard work as it impacts the audience’s emotions and can ultimately shape into a nasty user experience.
It is measured in terms of Delta-E which indicates whether the display is completely color accurate or not. A lower Delta-E score is a good indicator of healthy accuracy. The recommended number is 5 or below.
Talking about color accuracy goes with a color gamut. The range of colors any device can produce or record is known as a color gamut. Why is it important for you? All the color-utilizing devices with the likes of digital cameras, smartphones, PCs, laptops, tablets, scanners can correctly produce sRGB color gamut. This means that images can be reproduced across devices consistently without quality degradation.
Final Word
Summing it up, these were the most important things to look for when buying a graphic design laptop. I hope you found this purchase guide useful and that it added some value to your pursuit of buying the right laptop for your design endeavors. Wish you the very best in your creative career!
However, using a Human Resource Information System’s (HRIS) performance management tools is wrong for your business. And in this article, we explain briefly with a concrete example.
Outdated User Interface
HRIS is designed with a primary goal to handle challenging admin tasks. It can manage attendance, recruitment, and overtime calculation very well.
But, performance management is an entirely different league as it demands regular feedbacks on employee engagement.
Notably, the user interface is clumsy because HRIS is not designed to satisfy the user experience. HRIS performance management tools don’t fit with the employees’ workflow.
On the flip side, an ideal performance payroll software is user-friendly and is built to cater to the employees’ usability.
With the help of a paystub maker, you will be able to efficiently keep track of your finances, secure bank loans, obtain credit cards and use the stub as proof of income and a strong work reference.
Paycheck stubs creator streamlines payroll processes by automating wage calculations, deductions, taxes, and benefits. These software solutions save time, reduce human error, and ensure compliance with labour laws. Implementing such tools in your business boosts efficiency and promotes transparency, improving overall employee satisfaction.
The compensation
Usually, HRIS tools deal with legalities and compensations. However, performance management and compensation don’t go hand in hand with each other in a single software.
One of the significant differences is performance reviews. It is the best option to connect with fellow employees, set weekly and monthly goals, thus improves the career.
If this performance reviewing process occurs in HRIS, it is tedious to discuss the payroll and salary revisions. It can even result in leaving a negative impact on workplace culture.
Performance payroll software is built to focus the bull’s eye target on the work and not on the compensation, thus assuring real-time feedback, peer review, and self-assessment.
Therefore, both the HR managers and employees can view the complete picture and concentrate on performance management.
Unsuitable for Agile Teams
Performance payroll software is created with an intent for the agile teams. Clearly, HRIS lacks agility.
Suppose your employees are working as a team, and they need to execute a specific set of tasks and view the timeline simultaneously for which they a proper agile friendly software.
In that case, HRIS is not the best option as its adoption rate is low, eventually making the entire process expensive.
Many HR professionals have trialed and tested the collaboration of performance management and HRIS and evidently realized the restrictions.
Dull Performance
Every performance payroll software requires research and specialization features in it which is missing in all HRIS.
Undoubtedly integrating HRIS and performance management systems, don’t serve the purpose of project management.
Performance management software must be an employee-based that provides an uninterrupted user experience that shouldn’t hinder the HR functions.
Underdeveloped features can come up in the way of employees’ performance. Moreover, many HRIS support teams have no answers for questions and issues concerning their own performance payroll management tools.
This proves the statement mentioned above that the main focus of HRIS is only the admin side, not employee engagement.
Businesses that specialize in performance management devote their time to examining best practices, researching the tactics that work, expand using advanced technology, thus marking their leadership power.
To achieve all these, a performance management partner stays away from HRIS tools.
Conclusion
Explicitly, an HRIS tool is a must-have software for dealing with heavy admin tasks. Nevertheless, it is not true that HR software and performance payroll software can perform outstandingly together.
It is why HRIS is not built to cooperate with the employee performance, engagement, and development process. So, make a wise choice by purchasing a separate performance payroll software.
Also, kindly share with us your views on HRIS tools and performance management tools in the comments.
Every business owner wishes their business to thrive. That’s why they create business websites to attract customers and provide them with a simple one-click shopping experience. Website speed optimization is the factor that affects the awareness and conversion rates of any business greatly. Because according to the statistics, only 40% of users are ready to wait three seconds for the website to load, and 47% of users wait less than two seconds before they leave the site for good.
This literally kills conversion, as statistics show that pages that loaded 5.7 seconds had a conversion rate less than 0.6%, while pages with 2.4 seconds of load speed had almost 2% conversion rate. In May 2020, Google disclosed an algorithm update that will be focused on website performance measurement, where pages and site speed will be the main factor of ranking. The update will be set up in May 2021 that gives entrepreneurs plenty of time to check their website speed and take immediate actions on its optimization. Here we will give some helpful tips on how to increase site load speed effectively.
If you checked your website speed and the results were not satisfying you have two options. The first one is to turn to professionals so that they build a perfectly optimized site for you. And the second option is to improve the situation on your own using 9 advantageous tips on how to optimize website speed that we prepared for you. At any rate, here are the tips.
1. Keep your website compressed and optimized
Make sure that all your images are of the same size, not too big, and of the right for your site format. PNG format is better for graphs and diagrams, but for pictures, JPG is better. Additionally, utilize CSS sprites that will collect all your frequently used images in one image, which will speed up the page load noticeably. As for the videos, use MP4 format that is easy to compress.
2. Optimize TTFB (Time to First Byte)
The time to the first byte (TTFB) is different from website speed. In plain English, it is the period of how long the user’s browser expects the first byte of facts from the website server. So, basically, it’s the evaluation of how rapidly a website responds to users’ actions. Google recommends having it under 100 ms or at least under 200 ms. You can optimize TTFB when operating on a quick site host such as SiteGround, Bluehost or WPEngine, advocating caching on your site, adopting CPN (Content Delivery Network), turning to high-class DNS (Domain Name Systems) providers such as Amazon Route 53, Godaddy DNS, ClouDNS and others.
3. Cache it “till you make it”
Caching is about producing stationary HTML files and storing them for later utilization, and this reduces server loading speed greatly. Market proposes a wide range of caching plugins such as W3Total Cache, WP Rocket or WP Super Cache for you to install and use. No matter what plugin you choose – all of them will help your site decrease loading time and, as a result, improve your customers’ experience.
4. Reduce DNS lookups
In plain English, Domain Name System lookup is a process of deciding which IP correlates with this particular domain. This process might take from 20 to 120 ms, but sometimes it’s much longer. To reduce DNS lookup, we should cut the number of hostnames, store third-party files, diminish the quantity of CNAME records and, as mentioned above, utilize swift DNS providers.
5. Use CDN (Content Delivery Network)
Nobody canceled the laws of Physics and the farther the site from its visitors the slower the load speed is. Our recommendation is to use the Content Delivery Network (CDN) that will sort of create a clone of your site on the server that is closer to your customers. The best CDNs are Cloudflare, KeyCDN, Amazon Cloudfront and Akamai.
6. Reduce the number of HTTP requests
Logically, the fewer HTTP requests, the more rapidly the site loads. Here is how we can scale down the quantity of HTTP requests on your site: get rid of unnecessary media files, optimize media files in size and format, lessen the number of the external HTTP requests and combine similar files in one file, for example, JavaScript files in one JS file or image files in one CSS file, so on.
7. Check mobile page speed
More and more people use mobile devices, and with that in mind, it would be critical to pay attention to the mobile page speed. But first, let us remind ourselves what speed is good enough. According to Global CDN provider Akamai, 53% of consumers give up on the website if it takes longer than 3 seconds to load. Google claims that under 2.5 seconds is a fine speed. Therefore, you’ll need special tools such as Page Speed Insights, WebPageTest or GTmetrix to measure your website speed. If the results are not satisfying, you can compress media files, combine JavaScript and CSS files, cache pages in time and adopt AMP (Accelerate Mobile Pages) plugins such as AMP, or weebrAMP.
8. Use Lazy Loading option
Lazy loading is the technique when media files are loaded while visitors scroll down the page, but not all at once. This noticeably speeds up the page load. Be careful with background images though, lazy loading will not work for them, <img> tag is important. Use a3 Lazy Load or Autoptimize WP plugins to implement lazy loading for your site.
9. Opt for a lighter theme
The theme of your website is the foundation for everything and the “heavy” theme will slow down even a perfectly optimized site. Having that in mind, we propose you to choose one of these “lightweight” WP theme options: Astra, Generate Press, Neve, Zaka or Ocean WP. All of these pre-built platforms will allow you to create a well-designed website with “lightweight” themes that will help load the pages fast and not lose visitors.
Final thoughts
In May 2021, Google will implement the algorithm update we mentioned above, and those sites that have page load speed of more than 3 seconds will have trouble with ranking and conversion. With that in mind, we strongly recommend business owners to pay much of their attention to the website load speed and undertake immediate steps on improving the situation, if necessary. We hope our tips have been helpful, but in any case, entrepreneurs can always turn to professionals to build a well-optimized site with fast page load speed.
DDI Development company brings a unique combination of e-business experience and solid technical proficiency to provide high-quality web and mobile digital solutions in a friendly and creative way. We help businesses achieve their goals by offering professional services. Our expertise spans several industries including e-commerce, CRMs, e-learning platforms, recruitment, and financial systems, etc. Our experienced team has delivered 150+ completed projects.
Here begins the brief assessment of Flutter vs Android Studio. Flutter UI development kit developed by Google. This Flutter framework is used to develop apps for iOS and Android, Linux, Windows, Mac, Google Fuchsia, and much more. With Flutter, developers can construct native feel applications that can work on different platforms such as android and iOS devices. In fact, Android Studio is an IDE (Integrated Development Environment) for Android apps.
Android Studio offers significantly more features that improve your benefit when building Android applications. Both Flutter and Android are created by Google
Each organization needs a mobile app in this competitive market. Flutter is an open-source software development Kit (SDK). It offers responsive views without any JavaScript.
Application development has increased due to the competitive market and popularity of the mobile app. Both the Android studio and Flutter help to build cross-platform apps using a single programming language. Android Studio is the official IDE (Integrated Development Environment) for Android apps. Flutter apps are smooth and slick like native applications. Both Flutter and Android studio platforms are unique. Flutter utilizes Dart as a programming language whereas Android studio depends on Java or Kotlin.
In this article let’s look at feature insights & the pros and cons of both Flutter and Android Studio.
What is Flutter?
Flutter offers reactive views without JavaScript; it is an open-source SDK (Software Development Kit). With the single codebase, developers can build native-looking Android and iOS applications. The code reusability on different platforms, reactive performance, reusable UI blocks are major reasons for the developers to choose the Flutter framework for cross-platform app development.
How Flutter works
The core thought behind Flutter is the utilization of widgets. With the combining of different widgets, developers can create the entire UI. Each widget defines the Stylistic elements, layouts, structural elements, and much more.
OEM widgets are not utilized by Flutter but it provides the native look ready to use the widget for developing on iOS and Android applications. It provides reactive-style views for the developer. Flutter framework uses Dart programming language. Flutter is a powerful and easy-to-use application development tool; with the help of flutter you can resolve any complexity of the project. The latest version is Flutter 1.20.
Developers with knowledge of C++/Java can easily relate to Dart. Flutter works with existing code. It is an open-source and free software used by many organizations and developers across the world. Flutter reduces the cost & complexity of the app across different platforms and also speeds up the development process. Flutter helps the designer to deliver the original design without loss or compromise
Here are the amazing apps examples that are developed on the flutter frameworks including top brands. For example Alibaba, Reflectly, Birch Finance, Hamilton, Coach Yourself, Hookle, CryptoGraph, SG BusTracker, and much more
Why Flutter Framework? Top advantages of Flutter
Flutter before you choose it. Let’s take a closer look at how Flutter app development is better than other frameworks
1. Faster Coding
Coding on laptop
Flutter means more dynamic and faster app development. Developers can change the code and see it straight away on the app. This feature is known as hot reload. Hot reload normally takes only milliseconds to add a bug fix, features and it is faster to experiment. In native app development, they need to be rebuilt and it also consumes much time but in flutter, most of the code changes can be hot reloaded. Flutter reduces the time in the development process which will automatically reduce the app production cost.
2. Single Code for 2 Platforms
With the use of flutter, developers need only one code base for application development for both the Android and iOS platforms. Flutter doesn’t rely on the platforms as it has its design and widgets. You can develop the same app for different platforms. If you want to opt for a difference in the app on the platforms also possible with the flutter framework.
3. Less Testing
The testing process becomes faster as the framework uses the same code for two different platforms. The developer needs to perform the testing process only once and can assure the quality of the app for both platforms. The quality assurance process becomes faster and it helps to launch the application sooner in the market
4. Same app UI on older devices
With Flutter your new app looks the same even though the mobile device has the older version of iOS and Android. There is no extra cost associated with supporting older version devices. This framework works on newer versions and older versions like Android Jelly Bean. Similarly on iOS 8 and newer iOS updates. Flutter that allows sharing both the UI code and the UI.
5. Reduced Code Development Time
Flutter’s “hot reload” feature allows you to see the applied changes almost instantly, without even losing the current application state. Flutter app development is several times faster due to the increased development speed.
6. Designs that Your Users will Love
Design made easy with flutter. You can create your widget or you can modify or customize the existing one. This feature helps you to develop apps that make engaging with your users and also increase your brand values.
7. Flutter coding
Flutter is a perfect choice if you need to deliver the app quickly. The designers and developers can work in real-time to develop the application. The hot loading feature helps the developer and designers to UI changes instantly. And also less time is spent on the testing process.
8. Perfect for Minimum Viable Product (MVP)
Flutter framework is perfect for creating minimum feature applications to satisfy the investors as well as the app users in the early stage. It also helps to get feedback for further improvement on the application. When you have little time and need an MVP for your investor then Flutter is a perfect choice.
9. Increased Time-to-Market Speed
Flutter development framework functions are quicker than other alternative frameworks. Any 2D-based UI can be implemented with the help of Flutter frameworks.
10. Support
As you know Flutter was developed by google you can scale up the application with Google Firebase support. Flutter is the fastest way to deliver a well-performing cross-platform mobile application. Flutter is an ultimate cross-platform UI framework.
Key benefits of flutter app development are simple & fast development, Great performance, Better compatibility, Open-source, High productivity.
What is Android Studio?
Computing and coding are faster than ever with Android studio. It provides the fastest turnaround time for coding and workflow. Both the developer tool and code editing are incorporated in Android studio. Android studio is a Java incorporated development environment for programming.
Apps usage and demands of android apps are growing every day and now play stores have nearly 1.6 million apps and it is predicted to be increasing in the upcoming days. Let see the major advantage of Android studio 2.0 on application development. Now Android Emulator and Android Studio can be run easily by all the android developers.
Advantages of Android Studio 2.0 on Development
1. Instant Run
This feature has improved the workflows as the changes made on the code can be seen instantly on the emulator or the devices. All the changes can be seen live. This will make the development cycle more proficient. At the point when you click the instant run button the changes are analyzed and deployed in the quickest strategy. It works on all the android versions devices or emulators.
2. Android Emulator
The new Android Emulator is quicker in CPU, RAM, and I/O when related with past versions.
Building an application on an Emulator is much faster than developing the app on real device operations.
3. Cloud Test Lab
Cloud Test Lab can play a wide scope of crash tests, legitimately from Android Studio itself. This grants developers to test the application over various devices and device setups.
4. GPU Debugger Preview
Creating OpenGL ES games particularly those which are especially graphic designs serious, the new GPU debugger can guide the app developers to examine, distinguish and investigate the graphics rendering issues with a wide range of data about the GL state
5. App Indexing
With the help of app indexing API now the user can search the app on the google search engine very easily. Android Studio helps with providing the best URL structure in the application code and moreover allows the engineer to add attributes in the AndroidManifest.xml record with no issue.
Both these features help in Google App Indexing. The developer can validate code later and test the result to get the best outcomes.
Final thoughts
Best cross-platform apps can be built with both Android Studio and Flutter. Both have advantages and disadvantages of their own. Android studio is a great tool and Flutter is better than Android Studio because of its Hot Load feature. With Android Studio native Android applications can be created which preferable better features over the applications have created with cross platforms.
Applications created with flutter will like native applications. Flutter has many more advantages for application development as well as business and development. It will be a great choice if you want to build mobile apps that want to fit your custom needs and requirements and high-performance mobile app for both iOS and Android. With the help of Flutter, you can build a scalable, delightful native experience with faster development. Mobile app development using Flutter will speed up the app development process. The choice of the Flutter and Android studio depends on developer requirements. The above key features of both the Android studio and Flutter will help you to identify the best for your Mobile application development.
Designers need powerful and portable laptops with long battery life to run heavy programs like Photoshop or Adobe Premiere Pro and work with graphics, which is called on the go.
The Pro range consists of several models, from the 13-inch entry-level i7 (2.3 GHz) to the 15-inch i9 (2.3 GHz) with touchpad. The latter, of course, is more expensive.
This range of notebooks is generally the most expensive among MacBooks, but it is designed to work with graphics. MacBook Air and 12″ MacBook are of course thin and cute, but not strong enough for creativity.
Pros:
productivity;
excellent Retina displays are great for designers.
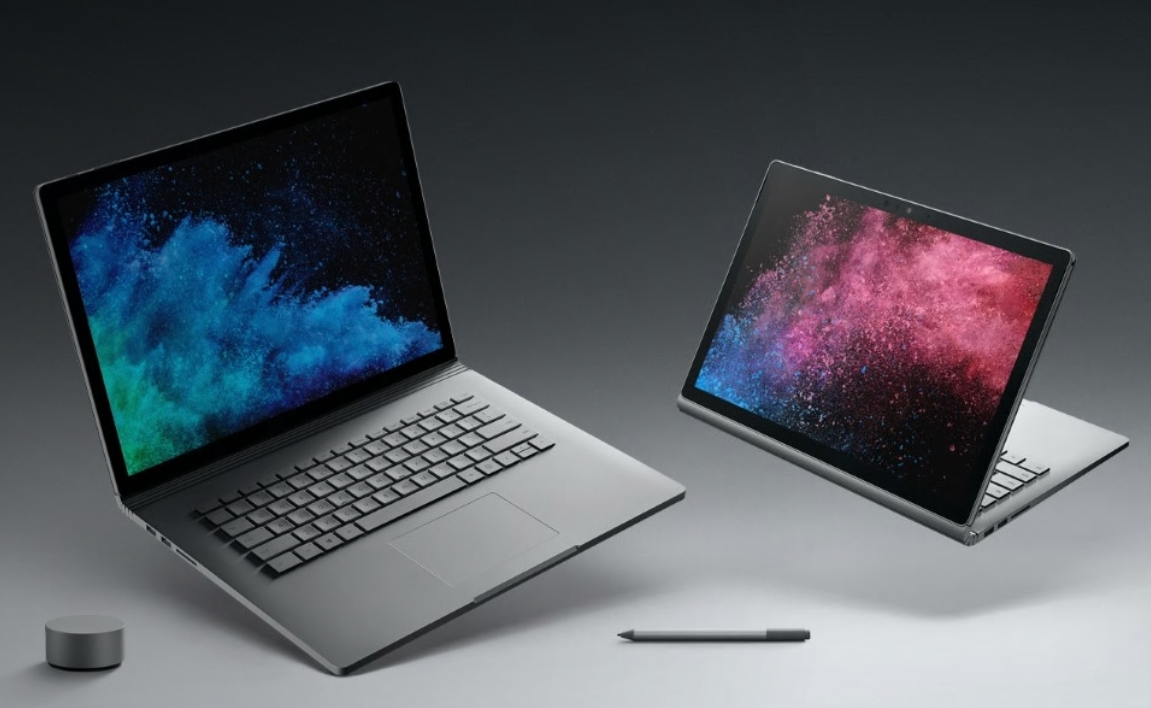
Microsoft Surface Book 2
Display: 13.5″
Processor: 8th generation Intel Core i7.
RAM: 16 GB.
Storage: 128GB to 1TB SSD.
Graphics: NVIDIA GeForce GTX 1050.
It has a removable touchscreen as in the first generation, so you can use it as a tablet or traditional laptop. Surface Book 2 also adds some new components (including the 8th generation i7 processor).
Touch Screen Surface Book has some advantages for designers, compared to a conventional display – it’s a great tool for creating sketches and adding comments to documents or images using Microsoft Ink. The stylus is not included and will have to be purchased, but it is more accurate than the index finger and allows you to perform some elegant tricks with a free iPhone mockup such as shading.
Pros:
an excellent touch screen display;
a powerful processor;
available up to 1 TB of storage;
can be used as a tablet.
Cons:
The stylus must be purchased separately.
Dell XPS 15 2-in-1
Display: 15.6″
Processor: 8th generation Intel Core i7.
RAM: 8-16 GB.
Storage: 128GB SSD to 1TB SSD.
Graphics: AMD Radeon RX Vega.
In terms of size, the notebook is closer to the 14-inch model, but thanks to the almost imperceptible frame, it has a 15.6″ screen. The thickness is only 16 mm at the thickest point. And it is also very light – only 1.8 kg, so it is convenient to take with you.
Pros:
15.6 inch screen;
lightweight;
one of the best notebooks with Windows;
AMD video card.
Cons:
little memory in the entry-level model;
Lenovo Yoga 920
Display: 13.9″
Processor: 8th generation Intel Core i7.
RAM: 8 GB or 16 GB.
Storage: 512GB or 1TB SSD.
Graphics: Intel UHD Graphics 620.
Lenovo Yoga 920 comes with an unusual screen size – 13.9 inches and has a unique hinge for connecting the rotary screen to the keyboard. This hinge has not only a swivel and aesthetic function, it also has a Wi-Fi antenna and ventilation holes.
Pros:
360 degree touch screen;
lightweight and portable;
excellent autonomy;
Cons:
few ports;
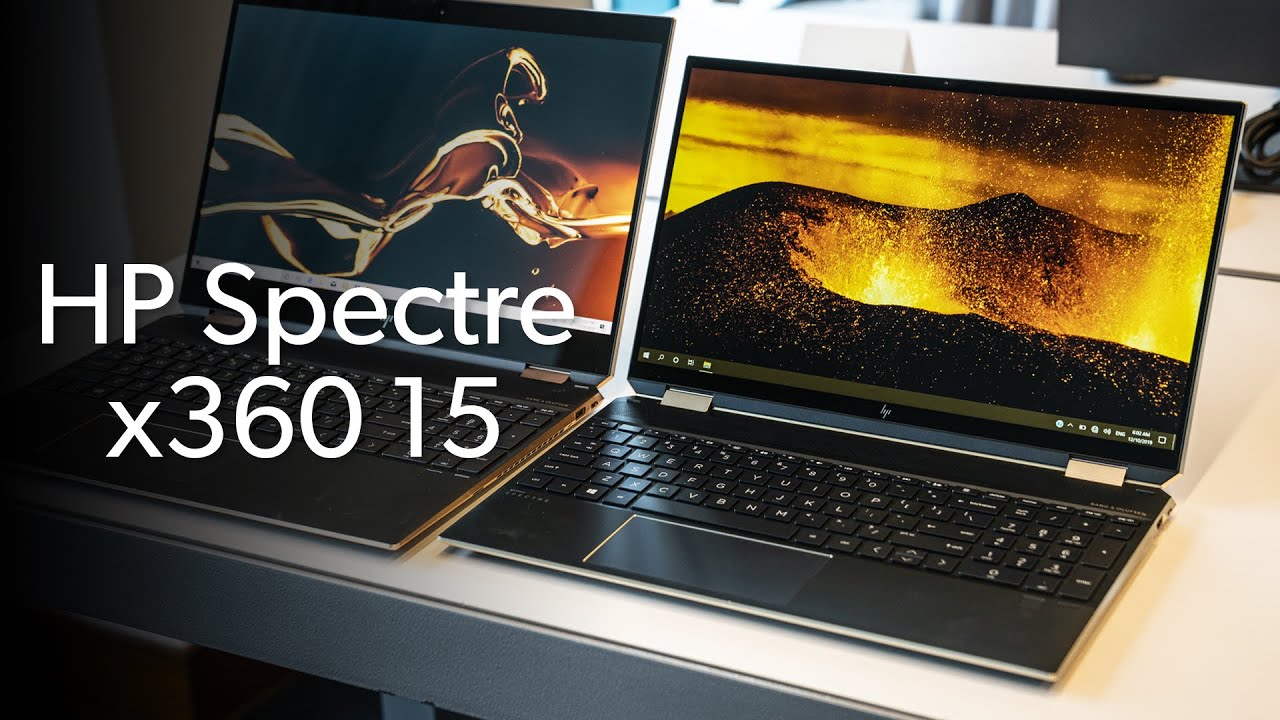
HP Spectre x360 15
Display: 15.6″
Processor: 8th generation Intel Core i7.
RAM: 16 GB.
Storage: 1TB hard drive plus 128GB SSD.
Graphics: Intel UHD Graphics 620.
Impressive notebook is equipped with a combined hard drive, unlike the others in the collection. This approach is more profitable than overpaying for 512GB or 1TB SSD.
Pros:
A large hard drive plus a fast SSD;
a generous number of ports;
a stylus in the kit;
high-resolution screen (top model) ideal for graphics work.