Above is the leaked roadmap that meuzinews managed to grap from Weibo. According to the chart, Meizu is expected to roll out the Flyme OS powered by Android Lollipop starting with the MX4 and MX4 Pro as early as April 28. Then, followed by the 18-month-old MX3 and the 28-month-old MX2 in May. Lastly the update will arrive on the m1 (possibly the m1 note also) in June.
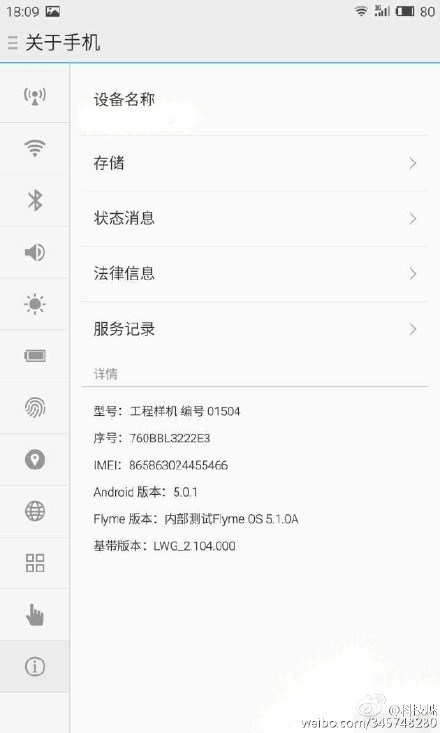
Last week a leaked screenshot of the upcoming Lollipop update surfaced on Weibo, with FlymeOS version 5.1.0A (Current version is at 4.2.0) running Android 5.0.1
However be warned, all of this is just a rumors, and as always be patient as the roll out will be gradual to all over the world when it is officially announced later.
How to guide for Installing Virtualmin / Webmin Control Panel in a VPS Running Ubuntu 14.04
What is Virtualmin?
If you have ever involved in Web Hosting field then you might have heard about CPanel, CPanel is a full featured easy to use most popular Web Control Panel for web Administrators, so you might be thinking why are we using Virtualmin instead of CPanel, well that’s because Virtualmin is absolutely free and Open Source and on the other hand Cpanel costs about $400 for an standard license. in short Virtualmin or Webin is a powerful and flexible web hosting control panel for Linux and UNIX systems. It makes it easy to manage your virtual domains, mailboxes, databases, applications, and the entire server, from one comprehensive and friendly interface.
How to Install?
Prerequisites :
A Virtual Private Server
Internet Connection on VPS
Freshly Installed Ubuntu 14.04
Installation :
We are using 1GB VPS Package from Godaddy which is completely self managed with no CPanel or anything, just a freshly install Operating Server, so we are going to install Virtualmin Control Panel Using Putty and SSH access.
Step 1 : Make sure that you have a freshly install Ubuntu 14.04 with root SSH Access.
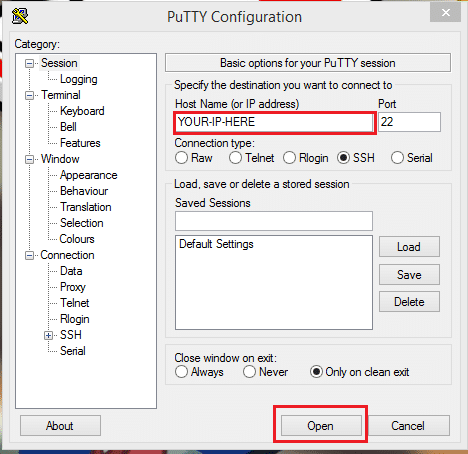
Step 2 : Now download and Open Putty (Putty is a SSH Client), you can download putty from the below link.
Step 3 : Now head over to your Server Control Panel and note down you IP Address.
Step 4 : Open Putty and Enter that IP address and click open, it will give your security alert just click on Yes.
SSH With Putty
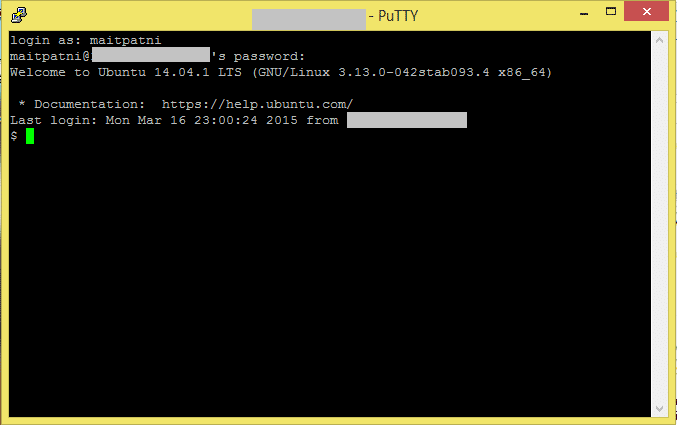
Step 5 : Now enter your username for SSH root user followed by password, generally username is ‘root’ and password is what you choose during installing OS (in my case username is ‘maitpatni’ that i chose during Ubuntu installation).
Step 6 : After logging in if you see just like below then you have been successfully logged in.
Accessing VPS with Putty
Step 7 : Now execute the following commands one by one to update your server to latest version.
sudo apt-get update
sudo apt-get upgrade
Step 8 : Next execute the below command to download the Virtualmin install script.
Step 9 : Now after downloading the script chmod +x script to make it executable.
sudo chmod +x install.sh
Step 10 : Next begin the installation by executing the below command.
sudo ./install.sh
Step 11 : During installation it will ask you for entering hostname FQDN (Fully Qualified Domain Name) just enter your domain name and click enter.
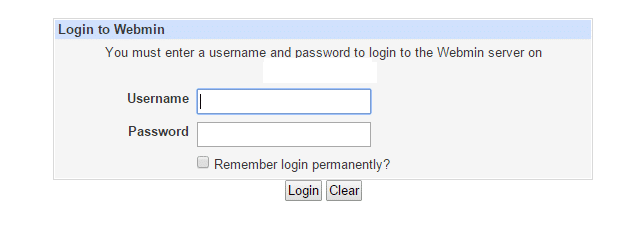
Step 12 : That’s it, in the end it will give you a successful installation message, you can access your Virtualmin Control panel by going to https://Your-IP:10000 . Your username and password will be your default ID and Password of your Server that you used in SSH.
After Installing Virtualmin you might want to enable Webmail Service then just follow our tutorials to do so, or head over to our Virtualmin Section for more Virtualmin Tutorials.
If you are looking forward to purchase a Virtual Private Server then might like Digital Ocean, our this Website is hosted on their server and i’m pretty impress by their service and for being our loyal reader we are giving a $10 credit to everyone who uses below link to sign up for Digital Ocean Cloud Servers.
Just like Roundcube, SquirrelMail is also an Open Source Web Based Email Client which is available absolutely for Free. SquirrelMail is a standards-based webmail package written in PHP. It includes built-in pure PHP support for the IMAP and SMTP protocols, and all pages render in pure HTML 4.0 (with no JavaScript required) for maximum compatibility across browsers. It has very few requirements and is very easy to configure and install. SquirrelMail has all the functionality you would want from an email client, including strong MIME support, address books, and folder manipulation and much more.
Install SquirrelMail in Virtualmin / Webmin Control Panel :
Before going further please make sure that you have a server running Virtualmin or Webmin Control Panel.
Step 1 : Access your Virtualmin Control Panel by going to https://your-domain:10000 and loggin in with your admin account.
Step 2 : After logging in to the Virtualmin select your primary domain from left side panel (if you don’t have one then add a domain) and then click on Install Scripts (See the below picture for reference).
Install Scripts in Virtualmin
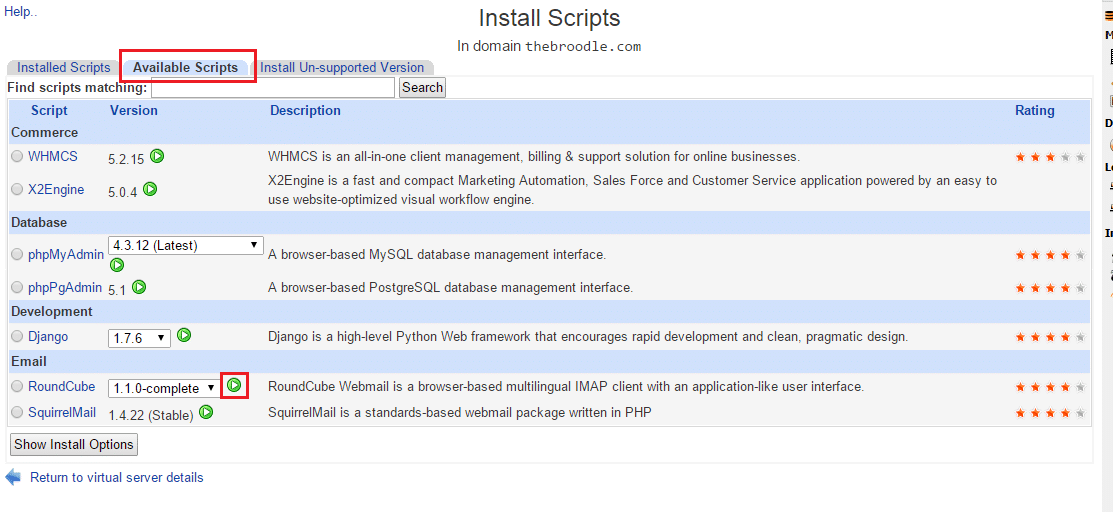
Step 3 : Now in install scripts page make sure that you are on Available Scripts page, now in Email section below you will see option for Roundcube and SquirrelMail, just click on the green play button for SquirrelMail to begin the installation Wizard.
Installing Available Scripts in Virtualmin
Step 4 : Now in the next page, leave all the settings to its default and click on Install Now button, that’s it, your SquirrelMail installation will begin and in the end you will get a message and link to access your SquirrelMail Webmail panel, usually that link is http://your-domain-name/squirrelmail.
Step 5 : Open the SquirrelMail Webmail page and login with the Email Address and Password that you have created in Virtualmin, if tou haven’t created any Email Address in Virtualmin then follow our guide on How to Create Email Accounts in Virtualmin.
That’s it, subscribe to our news letter for more Tips, Tricks and Tutorials like these and if you face any problem then leave a comment below.
If you have ever involved in Web Hosting field then you might have heard about CPanel, CPanel is a full featured easy to use most popular Web Control Panel for web Administrators, so you might be thinking why are we using Virtualmin instead of CPanel, well that’s because Virtualmin is absolutely free and Open Source and on the other hand Cpanel costs about $400 for an standard license. in short Virtualmin or Webin is a powerful and flexible web hosting control panel for Linux and UNIX systems. It makes it easy to manage your virtual domains, mailboxes, databases, applications, and the entire server, from one comprehensive and friendly interface.
Setting up Email Accounts in Virtualmin
Prerequisites :
A Linux or Unix Server or VPS
Running with fully functional Virtualmin Control Panel
A domain name hosted in virtualmin.
How to create Email Accounts?
Step 1 : Access your Virtualmin Control Panel by going to https://your-domain:10000 and loggin in with your admin account.
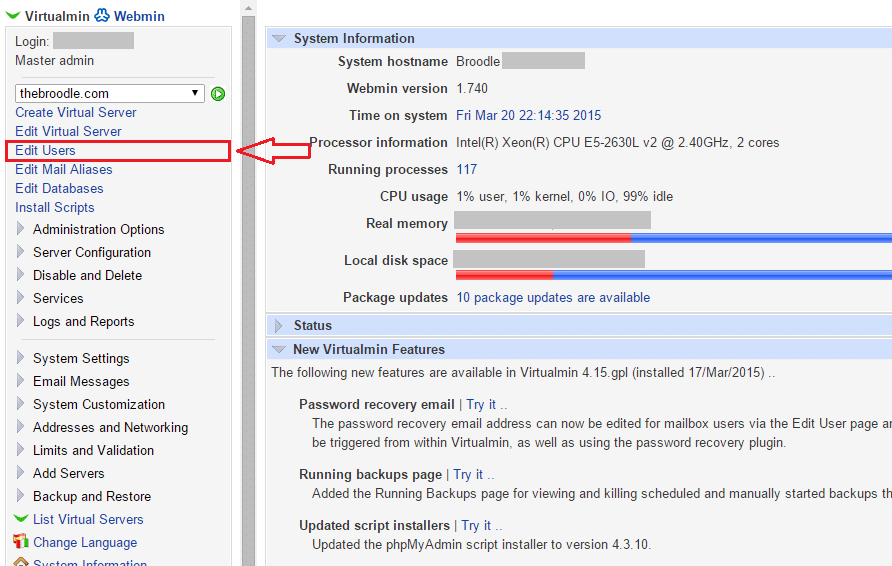
Step 2 : After logging in to the Virtualmin select your primary domain from left side panel (if you don’t have one then add a domain) and then click on Edit Users (See the below picture for reference).
Edit Users in Virtualmin
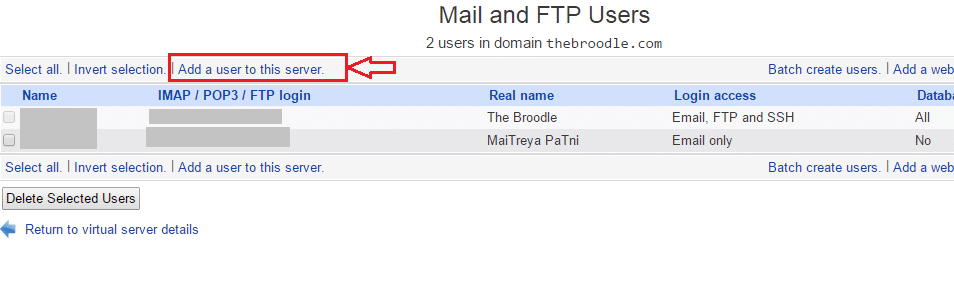
Step 3 : Now from the Mail and FTP Users page click on Add a new user to this server (See the below image for reference).
Mail and FTP Users in Virtualmin
Step 4 : Now in Create User page Fill up Email Address, Real Name, Password, leave the quota and home directory settings, Email Settings, Mail forwarding settings and Other User Permissions as default, if you want to forward this address to some other email then in Mail forwarding settings enable forward and enter your email address, after that click on Create to create your Email Address.
Step 5 : That’s it, your Email Address has been created, if you want to create more then follow the same step again.
Step 6 : For accessing your Email Addresses you can install a Webmail Client like Roundcube or SquirrelMail, to install them follow our tutorials :
RoundCube Webmail is a free Open Source Web Based Email Software written in PHP with and application like user interface and it gives you the full functionality that you expect from an email client, including MIME support, address book, folder manipulation, message searching, spell checking and more.
Install Roundcube in Virtualmin / Webmin Control Panel :
Before going further please make sure that you have a server running Virtualmin or Webmin Control Panel.
Step 1 : Access your Virtualmin Control Panel by going to https://your-domain:10000 and loggin in with your admin account.
Step 2 : After logging in to the Virtualmin select your primary domain from left side panel (if you don’t have one then add a domain) and then click on Install Scripts (See the below picture for reference).
Install Scripts in Virtualmin
Step 3 : Now in install scripts page make sure that you are on Available Scripts page, now in Email section below you will see option for Roundcube and SquirrelMail, just click on the green play button for Roundcube to begin the installation Wizard.
Installing Available Scripts in Virtualmin
Step 4 : Now in the next page, leave all the settings to its default and click on Install Now button, that’s it, your Roundcube installation will begin and in the end you will get a message and link to access your Roundcube Webmail panel, usually that link is http://your-domain-name/roundcube.
Step 5 : Open the Roundcube Webmail page and login with the Email Address and Password that you have created in Virtualmin, if tou haven’t created any Email Address in Virtualmin then follow our guide on How to Create Email Accounts in Virtualmin.
That’s it, subscribe to our news letter for more Tips, Tricks and Tutorials like these and if you face any problem then leave a comment below.


")