More
    Home Blog Page 52

    Wired vs Wireless Headphones: Which One to Choose?

    0

    A huge amount of equipment works today without wires, although for only a few decades this possibility seemed fantastic. Headphone segment new technology also touched. Due to such features as the absence of wires in the headphones, a person expands his capabilities in using technology and improves usability. But before you go for a new acquisition, you should thoroughly understand the question of which headphones are better to choose, wired or wireless.


    Features of an Innovative Headset

    As the name implies, the main distinguishing feature of wireless devices is their ability to transmit sound not through wires, but through an analog or digital signal. For this, the Bluetooth module is mainly used. There are several ways to transmit a signal at a distance, the signal quality and range depend primarily on this.

    To date, the most common are accessories that work on the use of radio point signals due to their ease of implementation, low cost. But nevertheless, more stable operation, good communication is provided by devices based on signal transmission via Bluetooth. There are several reasons for the stability of their work:

    • high stability of the transmitted signal;
    • the prevalence of equipment that is used as a source;
    • high quality.


    What are Wireless Headphones

    There is no point in talking about the designs of the headphones since they are almost identical for wireless and wired headsets. But it’s still worth stopping at the type of communication of wireless devices. To date, the most common three options for transmitting sound.

    Bluetooth

    Devices based on the use of Bluetooth are most often used for smartphones and laptops. Of course, when compared with a radio signal, the technology is significantly inferior in many respects. The signal range is not too large, the battery charge is consumed much faster, the sound quality is better. But today the development of this particular technology is progressing, and gradually a headset of even better and better quality appears on the market.


    2.4 GHz Radio Channel

    Devices operating on a radio signal with a frequency of 2.4 GHz are mainly used when working with personal computers, televisions, consoles. You can also find great solutions for laptops. A distinctive feature of such a headset is the best sound quality. It is generally accepted that such a transfer does not distort the sound, but this is more dependent on the source and the headset itself.


    IR Sensor

    Wireless devices, the operation of which is based on the use of an IR module, will be the perfect and most appropriate solution for lovers of high-quality music sound. Thanks to the use of the infrared channel, it is possible to transmit large data packets, while the sound remains voluminous, caressing. To make the sound richer, many of these models use built-in sound amplifiers that run on battery power.

    But such models have several drawbacks. First of all, it is a very high price with a small assortment of models in modern choice. Another point is the small radius of action. The headset and source should be within sight, so moving around the rooms in the house just does not work.


    Which is Better to Choose

    What is better to choose wired traditional or wireless headphones? This question worries many modern users. Innovative technologies are great, but not always behind them the traditional technology options. This also applies to the headset. Among the obvious advantages are:

    • ergonomic convenience;
    • ability to interact with other devices from a distance.

    But if you take other characteristics, then not everything is so beautiful and unique. If the question arose as to which device is better in terms of sound, it is worth noting that so far, by almost all selection criteria, wireless headphones are inferior to their predecessors. First of all, it is felt in the form of a constant distortion of sound and the appearance of extraneous noise. Also conditional is the issue and amenities. Despite the fact that the question with confusing wires has been removed, the power is relevant. A battery is an integral part of any wireless headset, and you need to constantly think about recharging it.


    Comparative Characteristics of the Two Types

    To understand which option is better for a particular situation is much easier if simple comparative characteristics are carried out.

    The advantages of models working at a distance from the source, in comparison with traditional ones, are obvious.

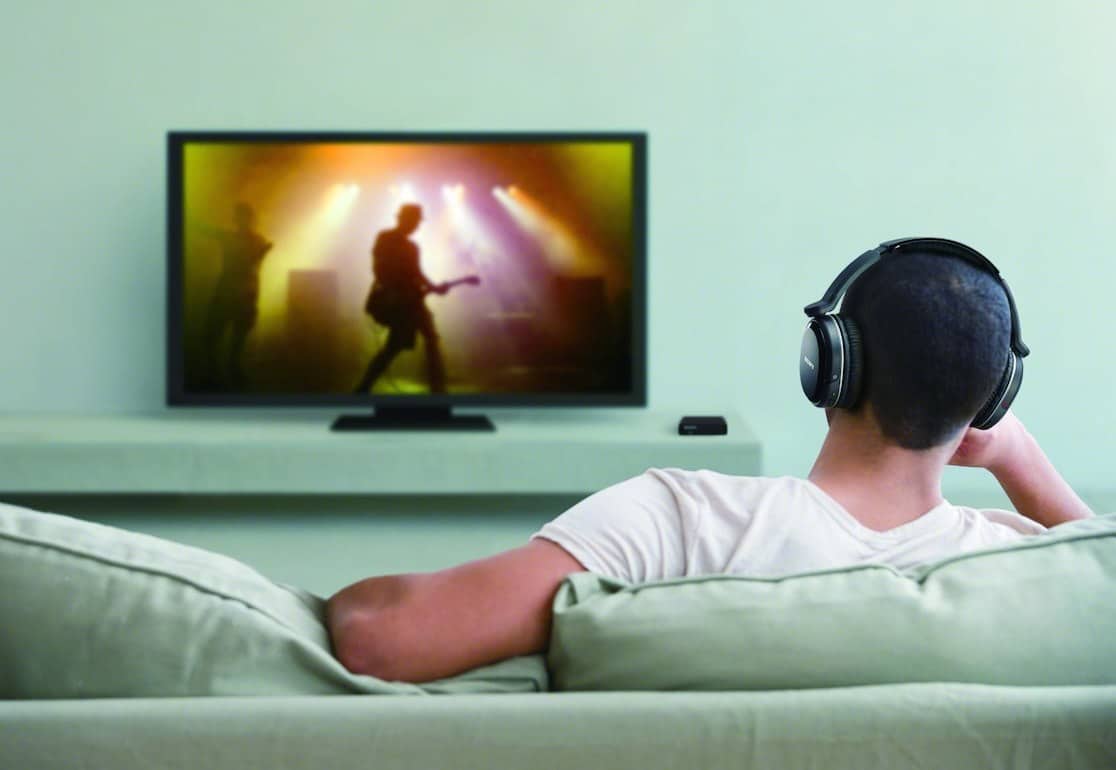
    1. Complete independence from wires: Now you can roam around the house in any direction, but, for example, the mobile phone remains on a charge. With a computer and TV, of course, everything is easier. To watch your favorite movie, you can conveniently sit in a chair, and not sit in front of the screen to which it is tied by wires.
    2. Long-range: Of course, the distance from the source to the headset has its limitations, but this is not a meter of wire. The range is several times greater than even the longest wires.
      Among the moments in which devices operating on a remote signal are significantly inferior to wired counterparts are the following.
    3. The need for constant charging: which at first may be a real problem. After all, traditional drive accessories did not require such care but simply lay in a pocket or on a shelf until they were needed.
    4. Some models of wireless headphones are inferior in sound quality to their wired counterparts. But progress does not standstill. As technology improves, the manufacturer plans to get rid of this inconvenience.
    5. There is no way to connect to the traditional audio output. True, if you try and search, you can find exceptions. Some modern models of wireless headsets have such features.
    6. Manufacturers offer high-quality wireless devices at a price that exceeds their predecessors by an order of magnitude. But budget headphones are no longer rare.


    Selection Based on the Technology Used

    Depending on the source with which the devices will be used, there are also certain nuances of choice.

    1. The best option for a TV that has a feature such as SmartTV will be headphones made using Bluetooth technology. Very rarely, infrared or radio transmission modules are built into the TV. Therefore, the choice is significantly limited, and you will need to pay attention to sound quality and functionality.

    Wireless headphones for tv


    2. Choosing a high-quality headset for a smartphone is a little more difficult since often they will have to be used on the street, in transport or in the office. Models on the radio signal are unlikely to fit since most modern smartphones contain only the Bluetooth module. So that the headphones do not let noise in, you should choose models with good sound insulation.


    3. Choosing a model for a computer is much simpler since such a technique involves several communication options – this is both a radio signal and Bluetooth. The signal length does not matter much, since rarely when using a person will be far removed. It is best when choosing in such cases to focus on sound quality.

    Naturally, with a long search, you can find a more universal option that will satisfy all the requirements and become a good choice for all types of equipment. But more often than not, multi-functionality negatively affects the sound quality and appearance.


    To Summarize

    In conclusion, I want to note that for all the obvious advantages of devices working on a remote signal, users are still stopped by their imperfection and lower sound quality. It is not surprising that many experts recommend using wired accessories to assess the full capabilities of speakers. And it’s best to choose hybrid models that, when close to the sound source, can be used with wires, and if necessary, a radio signal is used to transmit information. 

    As information technology develops, it becomes clear that soon the need to use wired and hybrid representatives will simply disappear, and they will be replaced by high-quality wireless headphones.

    How to Transfer Program Folders to Another Drive in Windows 10

    Despite the fact that modern computers put drives of at least 512 gigabytes, in practice, this vast space is not used. Notebook makers love dividing the hard drive into several logical drives, giving drive C: extremely little space, and non-system D: everything else. And the problem is: the disk is large, but there is no place to install programs!

    Also, laptops in the price range of 35-50 thousand rubles have found great popularity, in which two physical disks are installed: a capacious HDD (512 – 1024 GB) and a small SSD (64 – 128 GB). The first is a classic hard drive, slow and noisy. The second is a solid-state drive, which in essence is a very, very fast flash drive. The system installed on the SSD, run really really fast, in just a few seconds. But because of this organization of files, the C: drive is small and you need to transfer something to a slow HDD – documents that are rarely used by programs.

    The easiest and safest option when the programs are already installed and you don’t feel like messing with the computer is to transfer part of the data to another, more free disk so that nothing breaks.


    What takes up the most space?

    The heaviest folders on the C: drive are usually:

    1. C:\Windows – the directory of the installed operating system. There is nothing to delete there, although the size can be reduced using the “compact/compactos: always” command on the command line launched as administrator. This can halve the space occupied by Windows, I would not recommend getting carried away like that – responsiveness can be reduced, especially on PCs with a slow processor, any unnecessary compression/decompression operation will consume too many resources. Cannot be transferred. 
    2. C:\Program Files and C:\Program Files (x86) – most applications are installed here, specifically 32-bit applications. 
    3. C:\Users (the Users folder) – this is where the files of computer users are stored: documents, images, and desktop contents. Such directories can be transferred using Windows by opening the properties of such directories and using the Location tab. In Windows 10, you can not tinker with the properties of folders, but go to Start – Settings – System – Device memory – Change the storage location for new content and select another drive, the system will transfer the data itself, but not all. 
    4. C:\Users\Username\AppData – this folder, hidden by default, can take up a lot of space because in its wilds browser caches, game saves and service files of different programs are stored. It is undesirable to transfer all of it, although folders with caches can be moved. However, you can not bother with the transfer, but with the help of CCleaner or other programs to clean the disk periodically delete unnecessary files. Especially those stored in the C:\Users\Username\AppData\Local\Temp folder – a lot of garbage accumulates there. 
    5. C:\ProgramData – a hidden directory that stores program settings common to all Windows users. Do not touch.

    So, we don’t touch the Windows folder, we need to deal with C: \ Users according to the circumstances, but installed programs from C:\Program Files and C:\Program Files (x86) can be transferred, the instructions for which are below.


    Using the FreeMove Open Source Program

    There is a simple and safe way to transfer folders with installed software to another disk so that even the labels do not have to be changed – the free utility FreeMove creates symbolic links to folders.

    1. Download FreeMove.exe from the official GitHub page.

    Download FreeMove from GitHub

    2. Make the “Program files” and “Program Files (x86)” folders on the D: drive (or another, depending on where there is free space). You don’t have to create anything inside.

    3. Run the downloaded FreeMove utility as administrator.

    4. In the program that opens, use the Browse buttons to select what and where you want to transfer.


    5. Click the Move button to start the transfer. After a successful transfer, get the message “Done”.

    • If the “destination folder doesn’t exist” error appears, it means that the non-existing folder as indicated in the “To:” field.
    • The error “You do not have the required privileges to move the directory. … ” means that the program was launched not on behalf of the administrator.

    6. Repeating steps 4-5, transfer the remaining program folders in turn. By the way, the “Program Files” folder itself cannot be transferred due to possible problems, only the directories of individual programs are inside. The author has built-in “protection against the fool”, so it cannot transfer system directories.


    What FreeMove Does?

    This software creates symbolic links – special filesystem objects that work with pointers to a directory or file. Unlike the usual shortcut, which massively clutters the Desktops, symlinks from the point of view of programs are no different from ordinary folders and files. Therefore, for a seamless transfer of directories from SSD to HDD, they are best suited.

    A symbolic link can point to a non-existent object, nothing bad will happen – when you try to open, an error will appear from the absence of the file. And if you delete the link, then the folder or file that it points to will not be deleted.

    Essentially, FreeMove does the same as the mklink system program but provides users with a convenient interface.


    How to Return Back?

    Since essentially the shortcuts are created in the source directories, which the system will follow to another disk to start the programs, you can delete these shortcuts and manually transfer the originals back.


    Alternative Methods

    1. In order not to clutter up the C: drive, when installing the software, you can specify which folder on which drive to put it. Alas, there are programs that normally work only when installed on the C: drive in a strictly predefined directory. For example, programs from Adobe like Photoshop, Illustrator, Adobe Premiere begin to fail when trying to install on another drive. Therefore, the usual installation on a different partition does not always save.

    2. You can resize logical drives by “biting off” a piece from a larger one and transferring it to a smaller one. There are many free programs and well-paid ones for working with disk partitions. The problem is that there is still a chance that during the expansion of the C drive: the light turns off, something freezes and then all the data is lost. Is there a risk that the C: drive will become larger? I think no.

    3. Buying a new hard drive with a larger capacity is the most ultimate option. And if it is an SSD, then everything will be gorgeous. Alas, it costs money and you have to solve the issue of installing Windows.

    Conclusion: creating symbolic (“soft”) links using the FreeMove utility or the mklink command is the most easily implemented way to free up space on the system disk. Of course, provided that there is room for transfer.

    Hosted CMS or Website Builders – Which is Better to Choose?

    So, what would you choose? Hosted CMS or Website Builders? Below you will find a conclusion to your answer

    Content management systems and designers are often opposed when it comes to the self-development of the site. But they are not opponents, but only tools that are suitable for the implementation of various projects. Sometimes the purpose of CMS and designers intersect, and they become direct competitors. But in most cases, each tool has its own niche in which it most effectively solves the user’s tasks.

    Here are some beautifully designed and carefully handcrafted Vue Templates and Themes.

    Must Read: 5 Easy Ways on How to Increase Website Page Speed

    Advantages and Disadvantages of Website Builders

    Website builders are the easiest way to create your first website. No special knowledge is required to start, basic computer literacy is enough: office applications, maybe working with graphic editors. Designers differ in functionality – the power and flexibility of some services are close to CMS. But they have one thing in common – the presence of a visual editor, which makes development simple.

    Advantages of using Website Builders / Designers:

    • Low threshold for entry, no special skills needed.
    • Professional templates that can be customized in the visual editor with the mouse.
    • Ready-made blocks for creating a site interface.
    • Integration with third-party services through the addition of widgets.
    • Hosting, updates, security – no need to worry about it, only pure creativity.
    • Technical support helps with the solution of any questions on work in the designer.

    You should not choose designers who are poorly adapted to solve your problem, hoping that later it will somehow grow together. Do not grow together. During the tests, immediately see if there are necessary modules, applications, settings, and more. If not, continue to the next option. Find one that out of the box can solve your problem.

    Disadvantages of Using Website Builders / Designers: 

    • Customization options are limited. Some services have more, others less, but the boundaries are tight in any case.
    • You can’t move to another hosting if you are no longer satisfied with the work of the designer. We’ll have to create the site again.
    • No full access to source files. For beginner webmasters, this is not critical, but with the development of the project, it can cause a lot of inconveniences.

    Advantages and Disadvantages of CMS

    Content Management Systems (CMS) is a popular development tool among beginners and experienced webmasters. They are free and paid. The former is developed by the forces of user communities and require a lot of effort and time to configure for an individual project.

    The second is delivered in the form of ready-made solutions with different functionality depending on the edition. To fully master CMS, you will need programming skills at least at the level of knowledge of HTML / CSS / JavaScript. This is a necessary minimum that will allow you to customize the appearance of the site.

    CMS Advantages:

    • Flexibility and extensibility, which is achieved through the installation of plugins and access to source files.
    • Constant updates that add new features and fix vulnerabilities.
    • Developed user communities creating additional and educational materials.
    • A large number of templates and plugins.
    • The ability to independently develop extensions.

    Disadvantages of CMS:

    • For normal administration, programming skills are required.
    • Errors in working with source files cause the site to crash.
    • You need to choose the hosting yourself, install updates, take care of the security of the project.

    Cost Comparision: Hosted CMS or Website Builders

    Comparing builders and CMS, many emphasize that the former can only be used for money, while the latter is completely free. This is true, but very distorted. Two clarifications need to be made:

    1. The designers have free tariffs, but they are more likely to familiarize themselves with the system. They use a third-level domain, and there is advertising on the sites created. You can remove these shortcomings by switching to a premium tariff.
    2. Some CMS can indeed be used for free. You don’t have to pay even for templates and plugins. But do not miss other expense items: hosting and domain. Sharing a site, in general, requires money. For free, you can work with it on a local server solely for educational purposes.

    Hosted CMS or Website Builders

    Good hosting and domain cost a little less than the premium tariff of the designer. In the second case, you slightly overpay for usability. In addition, in the case of CMS, you often have to buy paid themes and extensions – free ones are not able to cover all the needs of webmasters.

    Popular Website Builders / Designers:

    • Wix
    • Duda
    • Weebly
    • Hostgator Website Builder
    • WordPress.com
    • Shopify

    Popular CMS

    What to Choose? 

    Before answering the question of what to choose, you need to decide on the main thing – what do you want to create? You can even sit down and outline the essence of the project: structure, functionality, tasks that it should solve. This will help to understand what tools will be required to implement the plan. And the next step is to choose a development method.

    We need business cards for a specialist or company – CMS is useless, the website builder will do the job perfectly. If you want to launch an online store, there is already a choice, so you need to accurately assess its size: for a small site there are enough designer resources, for a large market – CMS, sometimes even paid. Requires an information portal or a large blog – immediately look towards the CMS.

    The main thing is to approach the choice without prejudice and remember that designers and CMS are just tools. You decide how to apply them. A simple analogy: a fork and a spoon. It is unlikely that you use one thing – the tool is selected depending on what it is more suitable for. Treat designers and CMS with the same sober choice, and you’ll see that they complement each other perfectly in the web development kitchen.

    How to Reduce the Load on CPU and Database of your Website

    With the increase in site traffic, the load on the CPU and MySQL Database increases. In this tutorial, I will guide you on how you can reduce the load on CPU and Database by optimizing your site and cut the cost of increasing your server resources.

    There are many articles on the Internet with dozens of points on how to reduce the load. What they just don’t write: both lazyload (Google PageSpeed recommends), and gzip-compression, and writing directives in robots.txt, and setting the cache in .htaccess for static files (although in the yard 2019 and 95% of hosts do it for you ), and many other little things.

    No, using lazyload is super, and processing the pictures on the server-side is also cool, and be sure to collect all the styles in one CSS file, and scripts in footer + async. But in terms of reducing the load, this will not help. Indeed, there are only a few working methods.


    1. Enable Caching

    For Joomla, I use the Jotcache component and for WordPress, we recommend using the W3 Total Cache plugin. Each for himself decides what caching time to set. Since I have a news site, I put 5 minutes. But if the speed of adding and updating information does not play a tangible role (for example, for article sites), you can set 30-90 minutes.

    PS: Standard built-in components will not help here. Caching should reduce the load by 2-3 times.

    W3 Total Cache
    W3 Total Cache
    Developer: BoldGrid
    Price: Free


    2. Reduce the number of database queries

    Each included component, module, plugin or extension is an additional database query. Especially if it is related to any content. Crookedly written modules can do dozens of database queries. For example, the “last records” module can make not 1 query to the database, but as many records as are displayed.

    For example, this one makes about 20 queries:

    What solution? Remove the module, look for another, reduce the number of queries experimentally. You can do the same using the W3 Total Cache plugin or any other caching plugins, just make sure to enable the database caching option in your plugin settings.

    This will surely help you reduce the load on your database by 50-70%.


    3. Block too many active bots

    You need to go to /your_site/access_log and see who is there and what is there. If we find too active bots that are of no use, block them.

    To do this, go to .htaccess and add the following lines:

    RewriteCond% {HTTP_USER_AGENT} PycURL [OR]

    RewriteCond% {HTTP_USER_AGENT} Aport [OR]

    RewriteCond% {HTTP_USER_AGENT} ia_archiver

    PycURL, Aport, ia_archiver are the names of the bots. Each line in the list ends with [OR], and the last is simply the name of the bot.

    By the way, some still suggest ignoring bots through robots.txt, but most bypass these directives.

    If your site consists of 10k + pages, believe me, this will significantly reduce the load. For a large site, even with little traffic, only bots can cause a load that goes beyond the base rate.

    My site is out of season now, traffic is 200 people a day. But access_log has 10,400 entries. Of them:

    • Semrush – 4000
    • GoogleBot – 700
    • Bing – 300
    • DotBot – 500
    • Mail.RU_Bot – 400
    • The remaining 2000 are bots, real people, and more.

    Semrush was previously more modest, but the constant 30% of requests per day of the total number is also a reason to go to the ban. As for YandexNews, which makes a request to the RSS feed, the RSS feed has the latest five news, which makes the load not so noticeable even with 4600 requests per day.

    Semrush, Ahrefs, Megaindex, Linkpad, Moz, etc. – Just parsing your site in order to find out external links and their direction. Whom to block, and whom to leave – of your choice.

    But in any case, using these methods, you can reduce the load and, possibly, return it to the framework of your current tariff.

    How to Get Free SSL Certificate for Your Website

    0

    Introduction

    The article is devoted to the review and comparison of different types of SSL certificates.

    Today we all care about safety: we put an alarm on the car, we lock the doors. Similarly, today almost all sites provide themselves with security. One of the main elements of this security is the SSL certificate, used since the distant 1994. It is he who provides a secure communication channel.

    SSL certificates come in three forms:

    • DV (‘Domain Validation’) – domain verification, quick issuance of 15 minutes,
    • OV (‘Organization Validation’) – organization verification, of several days,
    • EV (‘Extended Validation’) – advanced verification, the famous green lock, up to a week of issuance.

    Today we will consider only certificates with domain verification (DV), and only free, we will choose which certificate is most suitable for starting.

    Let’s Encrypt – a classic of the genre

    Let’s Encrypt is a non-profit organization, created as early as 7 years ago (in 2012), gained its popularity due to exclusively free certificates (for 90 days).

    Pros:

    + certificate for a period of 90 days,
    + IDN support (from 2016),
    + support for subdomains,
    + notification of certificate expiration.

    Minuses:

    – you need to install the client on the server to obtain a certificate or use third-party services
    – because of this, the issuance time increases – on average, from 15 minutes,
    – on third-party services there is only one way to confirm – via HTTP, for example, a free anti-bot system is often used on free hosting services – it’s not possible to get a certificate here,
    – some operating systems and old browsers are not supported, not very compatibility,
    – there is no security guarantee,
    –  no SiteSeal.

    Cloudflare – The Tricky Option

    Cloudflare is an American company that provides services for protection against DDoS attacks and has a free tariff, which is exactly what interests us. If you host a site on it, an SSL certificate is provided free of charge.

    Pros:

    + support for multiple sites and subdomains at once,
    + certificate for one year with renewal,
    + IDN support.

    Minuses:

    – support for far from all operating systems,
    – transferring DNS to their servers is mandatory,
    – not only you will be in the certificate, but it will also be issued to one on 50 sites – lack of security,
    – you will have to torment yourself with the settings, you won’t be able to quickly get the certificate,
    – no security guarantees
    – no SiteSeal.

    ZeroSSL – New Option

    ZeroSSL is a fairly new project, partners of which is one of the largest certification centres – Sectigo CA (formerly Comodo CA), which issues these certificates, and a major seller of paid certificates GoGetSSL.

    Pros:

    + protection of www and the main site,
    + receiving a certificate – no more than 5 minutes,
    + different methods of domain verification (HTTP, CNAME, and mail),
    + certificate for 90 days with unlimited renewals,
    + IDN support,
    + there is SiteSeal,
    + notification of expiration certificate,
    + $ 10,000 guarantee from GoGetSSL,
    + support for 99.6% of devices (very high compatibility).

    Minuses:

    – there is no way to add subdomains, for each you need to order your own certificate.

    A bit about paid certificates

    At the end of the article, I want to remind you that a free certificate will never replace a paid one and is recommended for use only during testing. If your project is already serious, we advise you to buy a paid certificate: it’s both more reliable and less worried.

    Conclusion

    If you choose among free.

    Cloudflare wins the certificate in time, but its configuration will be problematic, and there are doubts about security. Let’s Encrypt wins in the subdomain support category, but loses in the number of supported devices, as does Cloudflare.

    In terms of speed and convenience of issuance, Free SSL Space has a definite victory, security and guarantee are also on its side, which is why we recommend using it, it is better to create a separate certificate for domains than to regret losses later.

    Understanding Domain Status Codes When Registering or Transferring a Domain Name

    Most users who buy and register domains for themselves are pragmatic in their business and are only interested in the end result. The main thing is that the selected address belongs to them. Technical issues are of little concern to anyone – and rightly so, because after registering a domain you will find many more questions related to the development and support of the site, its promotion, and other processes.

    And those who want to know a little more about the internal, technical side of domains can read this article, where we will talk about the status of the domain.


    Where to find domain information

    Information about any domains – both those that belong to you and any others (whose status you want to know) – can be found in specialized services. For example, in order to check the status of a domain, you can use the site whois.net. You just need to enter the domain of interest in the search bar, click on the magnifying glass icon – and all the information will be displayed on the page. If the domain is not registered, then you will see the inscription “… is available” (“… is available for registration”).


    Domain Statuses

    • Registered: this means that the domain has already been successfully registered by someone.
    • Delegated: the domain is delegated, that is, certain DNS servers are already specified for the domain (in the DNS system, this domain address corresponds to a specific IP address). This is what is meant by the phrase “domain delegation” – in fact, this is a domain binding to a specific server (and hosting, respectively).
    • Not delegated: the domain has not yet been delegated (and most often because of this, it does not work yet).
    • Verified: information about the domain administrator is verified and confirmed.
    • Unverified: administrator data is not documented.


    International Domain Statuses

    Now let’s move on to more extensive information on the status of international domains. This is what you can see in the “Domain Status” boxes.

    • Active (or Ok): the standard status of the domain, which indicates that the address has been successfully registered, it can be used, information, domain settings can be changed.
    • Hold: the domain name is suspended for a certain period of time (most often this status is set by the domain registrar due to the lack of domain payment).
    • Registry-Lock: the status is established by the registry (the organization responsible for a specific domain zone). The registrar cannot change or delete a domain with this status.
    • Registry-Hold: similar to the previous status, but with the difference that the possibility of updating the domain is still present.
    • Registrar-Hold: despite the fact that the status is similar to the status above, in this case, the registrar is responsible for the domain name block; This status is set so that no one can change or delete the domain without your consent.
    • RedemptionPeriod: the status indicates that the domain deletion process has already begun. The domain is in this status for 30 days, during this time the deletion process can be stopped, but it is no longer possible to make changes or transfer. After that, the domain goes into pendingDelete status.
    • PendingDelete: the domain deletion process actually started; after about 5 days, the domain name will be free to register again.
    • PendingRestore: such an inscription appears if a domain with the status of RedemptionPeriod needs to be restored (7 days are given for this).
    • PendingCreate: the status indicates that the domain registration procedure is currently underway.
    • Sixtydaylock: a domain name transfer is prohibited for 60 days from the date of registration, the status indicates that the deadline has not yet passed.
    • Inactive: the status indicates that the DNS servers are not configured for the domain (and because of this, it cannot be used).
    • ClientTransferProhibited: a domain with this status cannot be transferred to another registrar.
    • PendingTransfer: the status indicates that the transfer of a domain name to another registrar is allowed.

    The list of domain name statuses does not end there, but all the main statuses are listed above.


    Description of Whois fields

    At the end of the article, a little help regarding the fields themselves that are present in the domain information.

    • Domain Name: your domain name
    • Registry Domain ID: domain name identifier in the registry
    • Registrar WHOIS: whois registrar service
    • Registrar URL: registrar site
    • Updated Date: The date the domain information was last modified.
    • Creation Date: domain registration date
    • Registry Expiry Date: domain registration expiration date
    • Registrar: domain name registrar
    • Registrar IANA ID: identifier of the registrar in IANA (Internet Assigned Numbers Authority, “Administration of the Internet address space”)
    • Registrar Abuse Contact Email: Domain Name Complaints Email
    • Registrar Abuse Contact Phone: Domain Name Complaints Telephone Number
    • Domain Status: status, domain status
    • Name Server: a list of DNS servers supporting the domain
    • DNSSEC: zone signature in accordance with DNSSEC specifications

    Top 10 Web Development Trends in 2019

    0

    Half of this year is already over – it’s time to talk about what is now popular in web development.

    1. Progressive Web Applications (PWA)

    In 2019, websites no longer should have a responsive design, they should be progressive web applications, that is, websites that resemble regular mobile applications. In other words, they must be designed to adapt to the browser, screen size and other technical specifications of the user’s device. Moreover, advanced web applications can even work offline. Companies that have transitioned from traditional websites to PWA have increased conversions and user engagement.


    2. Static sites

    Using frameworks like Jekyll, Gatsby or Hugo, you can quickly create simple static web pages. They load faster and are more protected from a security point of view (when compared with dynamic ones); in addition, using the API and Markdown, you can add dynamic content to static pages.


    3. GraphQL replaces the REST API

    GraphQL is a query language developed by Facebook. It was created as a more efficient alternative to REST. GraphQL has several advantages, for example, it allows you to develop more powerful APIs due to the fact that before execution it allows you to evaluate the correctness of the query within the framework of the type system of this syntax. GraphQL can be used to separate the frontend and backend, as well as improve server performance.


    4. Cross-platform applications

    Now users usually use not one, but several different devices to access the Internet. For example, according to statistics, every third American has three devices at once: a smartphone, a computer, and a tablet. Therefore, it is extremely important to make applications that will work and synchronize on different devices. And here frameworks like Electron and Ionic will be very useful.


    5. Chatbots for customers

    Technologies related to artificial intelligence (AI) are developing by leaps and bounds – now some bots can answer questions and solve customer problems even more effectively than people. The research company Gartner suggests that by the end of this year, the income of areas related to artificial intelligence will grow by 70%. So if you are still not using AI in your project, it’s time to start.


    6. Push notifications replace newsletters

    Now push notifications are used not only in applications on smartphones; they are often found on sites and, in fact, quickly replace traditional mailing lists. Users also prefer short notifications rather than letters in a crowded inbox.


    7. Low-code concept

    This concept provides for the possibility of changing, adapting and developing the system during operation with a minimum of coding and a maximum of visual development. Low-code platforms such as Google App Maker and Microsoft PowerApps have simplified the development process and thus lowered the entry threshold for aspiring web designers.


    8. Using variables in CSS

    CSS variables (also called custom CSS properties) allow you to change the layout, making minimal changes to the site code. They are especially useful for website designs that use the grid. And a set of APIs called Houdini allows you to further expand the capabilities of CSS and implement very fast animations without the need for polyfills.


    9. Voice Search

    Voice search has grown in popularity over the last decade. About half of adults and teens use a voice assistant like Siri or Alexa. Therefore, developers need to implement the ability to voice search on their websites, since now there are already APIs that allow this.


    10. Storytelling

    Successful brands know the power of storytelling. Creating a consistent story for users is crucial in order to make them their loyal customers. 

    Monitor and Manage Your Memcached Server with PHPMemcachedAdmin

    PHPMemcachedAdmin is a web-based interface for monitoring and managing Memcached-server with wide functionality. Allows you to see real-time event statistics, server statistics (network, elements, version) and its configuration.


    How to Install PHPMemcachedAdmin?

    Installing phpMemcachedAdmin consists of simply transferring files to the server. To do this, it is better to use a separate directory in the root of your site or a subdomain.

    1. First, we need to download the PHPMemcachedAdmin into the domain folder, to do so head over to the download page and download the latest version.

    Download PHPMemcachedAdmin

    2. Now upload the downloaded zip file into your domain directory on your server and extract the zip file, you can do this using any File Manager, FTP or you can also use the SSH.

    3. Rename the folder as per your choice, in my case I have renamed it to phpmemcacheadmin.

    That’s it, you can access the PHPMemcachedAdmin panel by visiting www.yourdomain.com/phpmemcachedadmin/ in your browser. 


    Setting a Password for the Folder

    To restrict access to unauthorized persons, set a password for the script folder. If you have Apache, then go to the directory with the installed script and create a file. htaccesswith the following contents:


    AuthType Basic
    AuthName "Private Area"
    AuthUserFile .htpasswd 
    Require user admin


    Instead of the word admin, insert your preferred login. Now create a file .htpasswd with arbitrary text, which will be the password. Change the rights of both files to 400.

    That’s it, the next time you will access the PHPMemcachedAdmin panel it will ask for Id and Password.


    Panel Screenshots:

    Note: Click to Enlarge


    How to Automatically Transfer VestaCP Backups to Google Drive

    0

    Today we will talk about transferring backups of your sites hosted in VestaCP to Google Drive. After all, we all know that storing backups in only one place is a bad idea. Server failure, hackings, administrative errors can lead to irreversible loss of data, and no one wants to lose their brainchild, and for this, the presence of a fresh backup in a safe distant place adds confidence in the future.


    Requirements:

    1. Google Drive Account
    2. VestaCP Installed on Your Server
    3. We are Using Ubuntu 18.04 for this tutorial


    Must Read:


    How to Transfer VestaCP Backups to Google Drive

    So for this purpose, we are going to use google-drive-ocamlfuse. It is a FUSE file system for Google Drive, written in OCaml. It lets you mount your Google Drive on Linux.


    Step 1: Install google-drive-ocamlfuse

    Install google-drive-ocamlfuse on your Linux server with VestaCP Installed. With this program, we will connect Google Drive to our server and will be able to manage files directly from Linux CLI.

    sudo add-apt-repository ppa: alessandro-strada / ppa
    sudo apt-get update
    sudo apt-get install google-drive-ocamlfuse

    Step 2: Once you have successfully installed google-drive-ocamlfuse on your server the next step is to authorize and access your Google Drive Account.

    1. Follow the link to Google Developers Console and log in with your Google Account – https://code.google.com/apis/console/
    2. Create a new project and give it a name.
    3. Now search for the Google Drive API in the API Library and activate it.
    4. Go to the “Credentials” tab, create a new “OAuth Client Identifier“.
    5. An error will appear “To create an OAuth client identifier, specify the product name for the access request window” → click “Configure OAuth access request window” → Enter only the name → Save → Select “Other types” in the list → Create.
    6. Now we have an identifier and a secret. Go to the console in your Linux server and execute the below code replacing IDENTIFIER and SECRET with your keys.
      google-drive-ocamlfuse -headless -label me -id IDENTIFIER -secret SECRET
    7. Next, you will get a link to authorize your Google account, copy and paste the link from your console window into the browser.
      Please, open the following URL in a web browser: https: //accounts.google.com / ...
    8. Complete the authorization, next is to create a folder and connect it with Google Drive.

      mkdir / google_dir
      google-drive-ocamlfuse -label me /google_dir


    9. Now there will be a new folder “google_dir” associated with your Google drive.


    Step 3: Automate Google Drive Transfer

    In this step, we will automate the transfer of backup archive to Google drive by scheduling cron tasks.

    1. First, create a folder inside /google_dir folder named backups, this will be used as temporary storage until the transfer process completes.

    sudo mkdir /google_dir/backup/

    2. Enter the below command (a choice of text editors may appear, I advise you to choose nano or vim which you have installed):

    crontab -e


    3. Add the following line to the end of the cron file:

    44 2 * * * sudo cp -R -n /backup/*.tar /google_dir/backup/


    Now you can configure the archive transfer schedule by modifying the above line with your cron execution time. For example in my scenario at 2:44, by server time, on behalf of the administrator, files matching the * .tar mask will be copied to the “google_dir/backup/” folder, files that are already found in the target folder will not be copied. If you have many users, and you need only one backup, then it would be wise to change the file mask to admin *.tar.

    Now make sure that VestaCP backups are turned on as this will only use those backups created by VestaCP in backups and will transfer them in your Google Drive folder as per your cron schedule.

    Note: You can also paste the above command in cron settings provided by VestaCP.


    Step 3: Deleting Old Backup Archives

    In this process, you can configure on how much backup cycle or for days your backup will retain on Google drive and after that, it will automatically delete older archives.

    1. To delete old backups, we will use a script. Create a new file named delete-backup.sh inside the /etc directory.
    sudo nano /etc/delete-backup.sh


    2. Make the file executable.

    sudo chmod ugo + x /etc/delete-backup.sh


    3. Schedule the automatic execution. Add the below code inside the file that you created.

    10 2 * * * sudo /etc/delete-backup.sh /google_dir/backup/ * tar 7


    The above command will be executed at 2:10 on server time, on behalf of the administrator, the files in the folder “/google_dir/backup/” matching the mask “* tar” will be deleted leaving the 7 of the most recent ones untouched.


    That’s all, the above steps will automate your Backups to Google Drive. If you face any problem following the steps or need any help just leave your queries in the comments below.

    How to Install Lineage OS on Xiaomi Redmi Note 7 Pro Android 9.0 Pie ROM

    0

    Android 9.0 Pie ROM for Xiaomi Redmi Note 7 Pro | Official Lineage OS ROM for Redmi Note 7 Pro, Download and How to Install the Latest Lineage OS ROM on Xiaomi Redmi Note 7 Pro


    Official Lineage OS


    LineageOS is a free, community-built, aftermarket firmware distribution of Android 9 (pie), which is designed to increase performance and reliability over stock Android for your device.

    LineageOS is based on the Android Open Source Project with extra contributions from many people within the Android community. It can be used without any need to have any Google application installed. Linked below is a package that has come from another Android project that restores the Google parts. LineageOS does still include various hardware-specific code, which is also slowly being open-sourced anyway.


    Installation Instructions

    Note: Make sure to take a backup of important files, photos, contacts, etc. as installing a custom ROM resets your phone and we are not responsible for any data loss or damage to your system.

    Step 1: Download the required ROM and GApps files from the download section below.

    Step 2: Make Sure that your device’s bootloader is unlocked and you have successfully installed TWRP Recovery. If not then follow the below link to do so.

    Step 3: Now Boot into TWRP Recovery mode and do a full factory reset and data and cache wipe.

    Step 4: Next Go to Install in Recovery mode and flash the downloaded ROM zip file followed by GApps file.

    Step 5: That’s all After successful installation reboot your device.


    Download


    Credits

    • Lineage OS Team
    • AospExtended Team
    • All Respected Developers and Device Maintainers


    If you any queries or suggestions then don’t forget to leave them in the comments below.