More
    Home Blog Page 53

    Pixel Experience Android 9.0 Pie ROM for Xiaomi Redmi Note 7 Pro

    0

    Android 9.0 Pie ROM for Xiaomi Redmi Note 7 Pro | Official Pixel Experience ROM for Redmi Note 7 Pro


    Official Pixel Experience


    Pixel Experience is an AOSP based ROM, with Google apps included and all Pixel goodies (launcher, wallpapers, icons, fonts, boot animation)

    Our mission is to offer the maximum possible stability and security, along with essential and useful features for the proper functioning of the device.


    Installation Instructions

    Note: Make sure to take a backup of important files, photos, contacts, etc. as installing a custom ROM resets your phone and we are not responsible for any data loss or damage to your system.

    Step 1: Download the required ROM and GApps files from the download section below.

    Step 2: Make Sure that your device’s bootloader is unlocked and you have successfully installed TWRP Recovery. If not then follow the below link to do so.

    Step 3: Now Boot into TWRP Recovery mode and do a full factory reset and data and cache wipe.

    Step 4: Next Go to Install in Recovery mode and flash the downloaded ROM zip file followed by GApps file.

    Step 5: That’s all After successful installation reboot your device.


    Download


    Credits

    • Dyneteve
    • merothh
    • jhenrique09
    • All Respected Developers and Device Maintainers


    If you any queries or suggestions then don’t forget to leave them in the comments below.

    How Digital Marketing Impacts on Business

    These days, almost everyone has or can use smartphones and other mobile devices and according to a report by Pew Research Center, 28% of American adults spend more time online.

    This shows digital marketing has become a thing of the day and in fact, businesses of all kinds are driven by digital technology. And if you are not leveraging the power of digital strategies, then you are not doing any favor to your business given the competitive business nature we are living in today.

    Ask any digital marketing agency in India and they will tell you that digital marketing is the future of business. Digital marketing has simplified the way businesses interact with their target audiences; it has affected people’s purchases, habits, etc.

    Currently, there are more than 3 billion people who are active on social networks almost every day.  A study suggests that people are more likely to engage with business on social media.

    That means it’s high time for business to use digital media for growth.

    That being said, in this article, we will take a look at the impact of digital marketing on businesses.

    But first…

    What Is Digital Marketing?

    Digital marketing is simply the use of electronic devices or the internet for business purposes. Businesses use digital platforms like social media, websites and search engines to identify and connect with their target customers.

    Some digital marketing examples include social media marketing, email marketing, search engine optimization (SEO), content marketing, pay per click, etc.

    Now that you know what digital marketing is let’s see how it impacts on businesses.


    1. Creates Brand Awareness

    More than 2.77 billion people in the world are on social media according to HubSpot marketing statistics.

    • Facebook has more than 2.38 billion monthly active users worldwide
    • Twitter has more than 369 million monthly active users
    • Instagram has more than 500 million daily active users
    • Pinterest has more than 250 million active users and
    • Snapchat has more than 190 million daily active users

    These numbers show that social media is the natural place to connect and engage with a highly targeted market and this can make your brand known to a great audience. Besides, customers are using social media networks to research for brand and products before they can make a purchasing decision.


    1. Digital Marketing for Traffic

    Unlike in the past when businesses had to buy a storefront and hope that customers would visit their physical store to purchase products, these days digital marketing has simplified the way businesses are found online.

    In fact, digital marketing has reduced the cost you could incur in the past when it comes to marketing your business.

    With the tons of people who are active on social media every day, businesses can take advantage of the free traffic these platforms offer to better grow their businesses.  You can take advantage of both paid and free traffic and reach thousands of people globally.


    1. Content Sharing

    With the growth of content marketing, marketers are forced to implement effective content marketing strategies so that they can create content that users will like, comment, and share with other people on their network.

    Once you have implemented a powerful digital marketing campaign, you can create content that connects with your target audience and encourages them to invite their friends as well.

    However, as a marketer, you need to create shareable content that adds value to your target customers- content that is informative, inspiring, entertaining, funny, unique which is bound to attract more people.


    1. Brand Exposure

    Going viral is a term you will hear when it comes to digital marketing.  Once people start interacting with your content, they will comment and share it with their friends and family members. The sharing and resharing of your content makes it spread across networks and this result in millions of shares.

    Remember, people are more likely to get interested once they see others engaging with your content. For instance, once people see others liking your content, they will want to know what your content is all about, they will want to know more about your business and this can have a huge impact on your business.


    1. Customer Engagement

    Today’s customers want to buy from brands that engage with them. Social media platforms provide an opportunity for businesses to interact and engage with customers. Customers can ask questions and get answers there and then unlike in traditional media where customers don’t get the opportunity to engage with brands.

    However, if you want your customers to be engaged, you must make sure you are active on your various social channels, answer questions, and reply to comments on your social media posts in a professional way.


    1. Increased Sales

    These days, you can sell what you have on social media provided you have a powerful digital marketing strategy. Having seen the number of social media, which keeps on increasing every day, you rest assured that social sales will continue to increase. That’s why social media networks are essential for all types of businesses.

    How to Create a Budget for your Blog

    0

    When many people think about how to run a blog, they often neglect to consider the financial costs of running one. People seem to think that a blog is a free endeavor, or that it only requires minimal, inconsequential funds to maintain a blog. But the truth is, starting and maintaining a blog can take a good deal of financial planning to pull off effectively.

    Bottom line, if you’re thinking about starting a blog, or even if you already have a blog and you want to streamline the maintenance, it’s a good idea to create a budget for your blog. There are a lot of factors to consider when you sit down to plan a blog budget. For example, your budget might depend on whether or not your blog generates revenue, and if so, how much. Even if a blog does not generate any revenue, however, it’s a good idea to have a budget to keep track of the costs and keep things on schedule.

    If you’re thinking about creating a budget for your blog, here are a few things to keep in mind:


    Domain Name

    If you plan on having a custom domain name for your blog, the unfortunate reality is that it will come at a cost. It is possible to have a blog with a free domain, but that likely means the blog’s domain will contain the name of the web hosting service used. For a flashier, catchier domain name, you will have to pay a certain amount to register the domain name, and usually, you will also have to pay a recurring charge every month to keep the domain registered under your name.

    The actual amount of the fee often is determined on the domain name you choose. Some domain names that are more popular or more highly searched may be more expensive. By contrast, domains that are less used, including domains that end in .info or .biz or another less common suffix, may be more affordable.


    Web Design

    Whether you choose to do the web design for your blog on your own, or if you choose to outsource it, there will probably be some type of cost for this vital part of blogging. Outsourcing web design obviously costs money, as you will need to pay whatever third-party you hire to do the design. But even doing web design yourself, although it may be more cost-effective, likely will require some investment. That investment could come in the form of design software, such as Photoshop, Illustrator, or InDesign, premium webpage templates, or other tools. No matter how you decide to perform your blog’s web design, be prepared that it likely won’t be free.


    Web Hosting

    Similar to the domain name, a web hosting service can be thought of as a type of “landlord” for websites. WordPress is a common example that is used by many bloggers because of its ability to customize sites. While WordPress does have a free option, to unlock the full range of tools and features available, you’ll need to pay a premium.


    Employees

    Depending on the size of your blog operation, you may or may not have employees other than yourself. Of course, if you do, that’s an expense you’ll want to factor into your budget. And even if you don’t have other employees currently, it’s a good idea to keep the possibility in mind if you plan on growing your blog in the future. Some tasks for which you might need additional employees include:

    •     Accounting
    •     Media buying
    •     Content writing
    •     Web design

    For a blog that’s just starting out, it’s certainly possible for one person to handle most or all of these tasks at first. But as a blog grows larger and larger, especially if it starts generating revenue, there will likely be an increased demand for content and other resources, which may need the help of a larger workforce.


    Advertising

    Depending on the goals for your blog, you may want to invest in some advertising to try and increase your audience. Especially if you are getting paid money to run ads on your blog for other companies, using advertising to increase the number of eyes on your blog can be a good strategy and a sound investment. Of course, advertising costs money, so you’ll want to factor it into your budget if you think your blog will require it.


    Conventions and Conferences

    It’s always a good idea to increase your knowledge however possible, and conventions or conferences about blogging and online marketing can be a great resource. Not only are these events great places to hear from experts about effective and emerging strategies related to blogging, but they can also be a solid networking opportunity. Meeting like-minded individuals who have similar goals or who operate in a similar space can help you take your blogging efforts to the next level. Conventions and conferences can be expensive, however, especially including travel costs if they are a long distance from where you are located. Keep some room in your budget open for these events if you can, because they can be invaluable tools.


    Outreach

    Besides paid advertisements, there are other ways to draw people towards your blog. One way is to utilize social media channels to promote yourself and your blog to friends, family, and followers. Posting on social media doesn’t cost any money necessarily, but in some cases, you can spend a little bit to increase the output. For example, you could pay to “boost” a social media post, or you could pay an influencer to post about your blog on your behalf. If you plan on doing any social media outreach, be sure to include it in your budget. Even if it doesn’t cost you any money, it will still take time, which is also a valuable resource to keep track of.


    Revenue

    Finally, perhaps the best part about a budget is factoring in any revenue your blog might be generating. If your blog makes money off advertisements, sponsorships, or products or merchandise sold on the blog, you should factor this income into your budget. Obviously, the ultimate goal with any business is to make more money than you spend, and keeping track of these figures in your budget is absolutely essential. Keep tabs on your income, so you know how well your blog is doing and how much breathing room you have to spend on expansion or improvement.

     Although blogging is not necessarily as easy as some people might think, the beauty of blogging is that anyone with a computer can get started. There may be some expenses that many people don’t consider, but as long as you plan ahead with a solid budget, you’ll be off to a good start. If you have the right mindset and stick to your budget, you’ll be well on your way to running a successful blog.


    Author Bio

    Luke Loftin is a blog writer and an award-winning indie filmmaker. When he isn’t writing about himself, he specializes in finance and health, blogging about all sorts of topics including credit cards, personal loans, bank accounts, and the digestive system. He currently writes for LeadMarket among other sites, and his articles are scattered all across the information superhighway.

    Record Phone Calls on Huawei / Honor Smartphones Without Root Access

    0

    Not all smartphones have the ability to record calls initially, in part because calls can only be recorded under certain conditions that differ from country to country.

    If for some reason you really need to record a phone call, now you can do it without root privileges on many of the latest Honor and Huawei phones!

    By the way, we must express our gratitude to the very active community of developers of the XDA website, always ready to find a solution to any problem or needs of smartphone users. This time, it was thanks to the appearance of the Huawei P30 Pro that the Zimperium user found a way to record telephone conversations on any Honor and Huawei smartphone with the version of the EMUI 9 interface.


    How to Record Calls in Huawei / Honor Without Root Rights

    The latest flagship from Huawei initially has the feature included in Huawei for smartphones upgraded to the new version of EMUI 9.1. Just install the regular APK file (safe and controlled by XDA moderators) so that an icon dedicated to phone calls of other models with EMUI 9 appears on the screen, which allows you to start and stop call recordings.

    So here are your steps:

    • Download the APK file from this link.
    • Install it on your smartphone.
    • Reboot the device and the desired record icon will be magically available for use whenever you place or receive a call.


    Did you know about such a chip before? Do you think Huawei should include a warning signal when recording a telephone conversation begins to avoid recording without the knowledge of the other side?

    Turn your Android Smartphone into a Spy Camera

    0

    Smartphones can do a lot with various apps today. One of these things is to use the camera as a miniature surveillance camera so you can keep track of your precious things or your loved ones.

    If you really want to spy on someone or just watch your home, you can easily use your Android phone as a spy camera. If you want to spy on your employees in the office or make sure that your child is safe while you are not, turning an Android device into a spy camera will only take a couple of minutes. Below are the methods that you can use to monitor, including using the hidden camera of your smartphone. If you are truly ambitious, you can track calls and text messages after your spy camera is properly configured.


    Method 1: AtHome Video Streamer

    This method should work on most Android devices, and you only need a couple of minutes to launch the application.

    An important nuance: you will need another device to watch streaming video in real-time, while the main device will act as a surveillance camera.


    1. Download and install the application

    Click on the Start Now icon to go to the start page.


    2. Customize the application

    Press the “Menu” button in the upper left corner and select the “Change password” option. You can use any username and password – you will need them to stream video using another device. After you have entered your data, click on the “Save” icon, then click on the “Back” icon to return to the webcam page.

    3. Set the main phone in the right place

    You will see the CID code on the screen – be sure to write it down because you will need it later. After that, click on the “Screen off” inscription in the upper right corner if you do not want others to know that you are tracking them. Then place the phone in the right place, depending on who you want to spy on.

    4. Download the application to the second device

    Download, install and configure the application on your second smartphone.

    Athome Camera: Remote Monitor
    Athome Camera: Remote Monitor
    Developer: ichano
    Price: Free

    5. Add your device

    Click on the “Add” icon in the upper left corner to add your device. Then click ” By CID “.

    6. Set up

    Enter the CID code, username, and passwords that you used to configure the camera on the first device. After that, click on the “Save” icon.


    7. Start spying

    Next, you will be taken to the main screen of the application. Click on the webcam icon and the device you are using should appear. If so, click on the camera icon.

    Now you can stream live from an Android device that you previously turned into a spy camera. You can take screenshots from your spy camera, switch between the front and rear cameras, and turn the flash on or off.


    Method 2: IP-Webcam

    IP Webcam is one of the most reliable and popular applications for spy cameras. Also, the application supports viewing the video stream in any browser or on any media player on your PC. The app also supports video chat via Skype and Chatroulette.

    1. Download and install the application

    Download and install the application on your device, and then launch it.

    IP Webcam
    IP Webcam
    Developer: Pavel Khlebovich
    Price: Free

    2. Change settings

    By opening it, you can edit the settings for how you want to record video. Settings include frames per second, image size, and image quality.

    3. Start recording

    Click on Start Server to start recording from the phone’s camera. After that, you will see the IP address and port number at the bottom of the screen. Be sure to write them down – you will need them later.

    4. Start streaming

    Now put the phone in the place from which you want to track events. Make sure you position the phone correctly.

    If you want to stream on your PC, open a browser and enter the IP address and port number that you saved earlier. You will be taken to the Android Webcam Server page where you can view the video in your browser, where you will have several options for this video.

    5. Download and install the application on your second device

    Download and install tinyCam Monitor on your Android device.

    tinyCam Monitor
    tinyCam Monitor
    Developer: Tiny Solutions LLC
    Price: Free

    6. Choose your camera

    Launch the application and click on “Add Camera”. Then, in the “Required Settings” section, click on “Camera Vendor” and select the “ IP-Webcam for Android ” option.


    7. Configure camera

    Enter the IP address by clicking on the hostname and enter the port number by clicking on the port number.


    8. Start streaming

    All you have to do is go to the main screen and click on the Live View icon. Now you can view the video stream directly on your Android device.


    Method 3: Cloud Cam

    This is another useful application, but, unfortunately, it is not free ($ 1.66). The application has several advanced features, including automatic video recording, automatic image recording, uploading a video file to Picasa, Dropbox, FTP or email and saving a video to an SD card. The application also has an image motion detection function (G-Sensor for automatically activating image capture and video recording modes).


    1. Download and install the application

    Download and install the application on your Android device, then launch it.

    Cloud Cam
    Cloud Cam
    Developer: simplylogic
    Price: $2.08


    2. Set the parameters and start recording

    Click the Settings icon to configure settings such as motion sensitivity and the threshold for comparing pixels when recording video to the phone. After that, just click on the Start Server icon to start recording and streaming.


    3. Save IP address and port number

    You will see an icon with a link to the IP address and port number – be sure to save them somewhere because you will need them later. After that, you need to place the tracking device in the right place.


    4. Start streaming

    Open a browser on your PC or Android Android device, then open the URL (IP address and port number that you saved earlier). This will launch the CloudCam page in your web browser, where you can edit the settings, take screenshots from the device and watch live broadcast directly in the browser or through another media player.


    How to Fully Protect and Secure Your Android Smartphone

    0

    Android phones may have a bad reputation, but they are actually quite safe. Or at least they can be. With a little effort, your Galaxy, Pixel, or OnePlus phone can become a real fortress, practically unbreakable from harmful applications. Regardless of whether you are looking for additional security or a complete phone lock, our article has everything you need so that your data does not fall into the wrong hands.

    Android Security: Default Protection

    Even if you skip the entire setup process and ignore all security requests, your Android phone will still do a lot to keep your information safe.
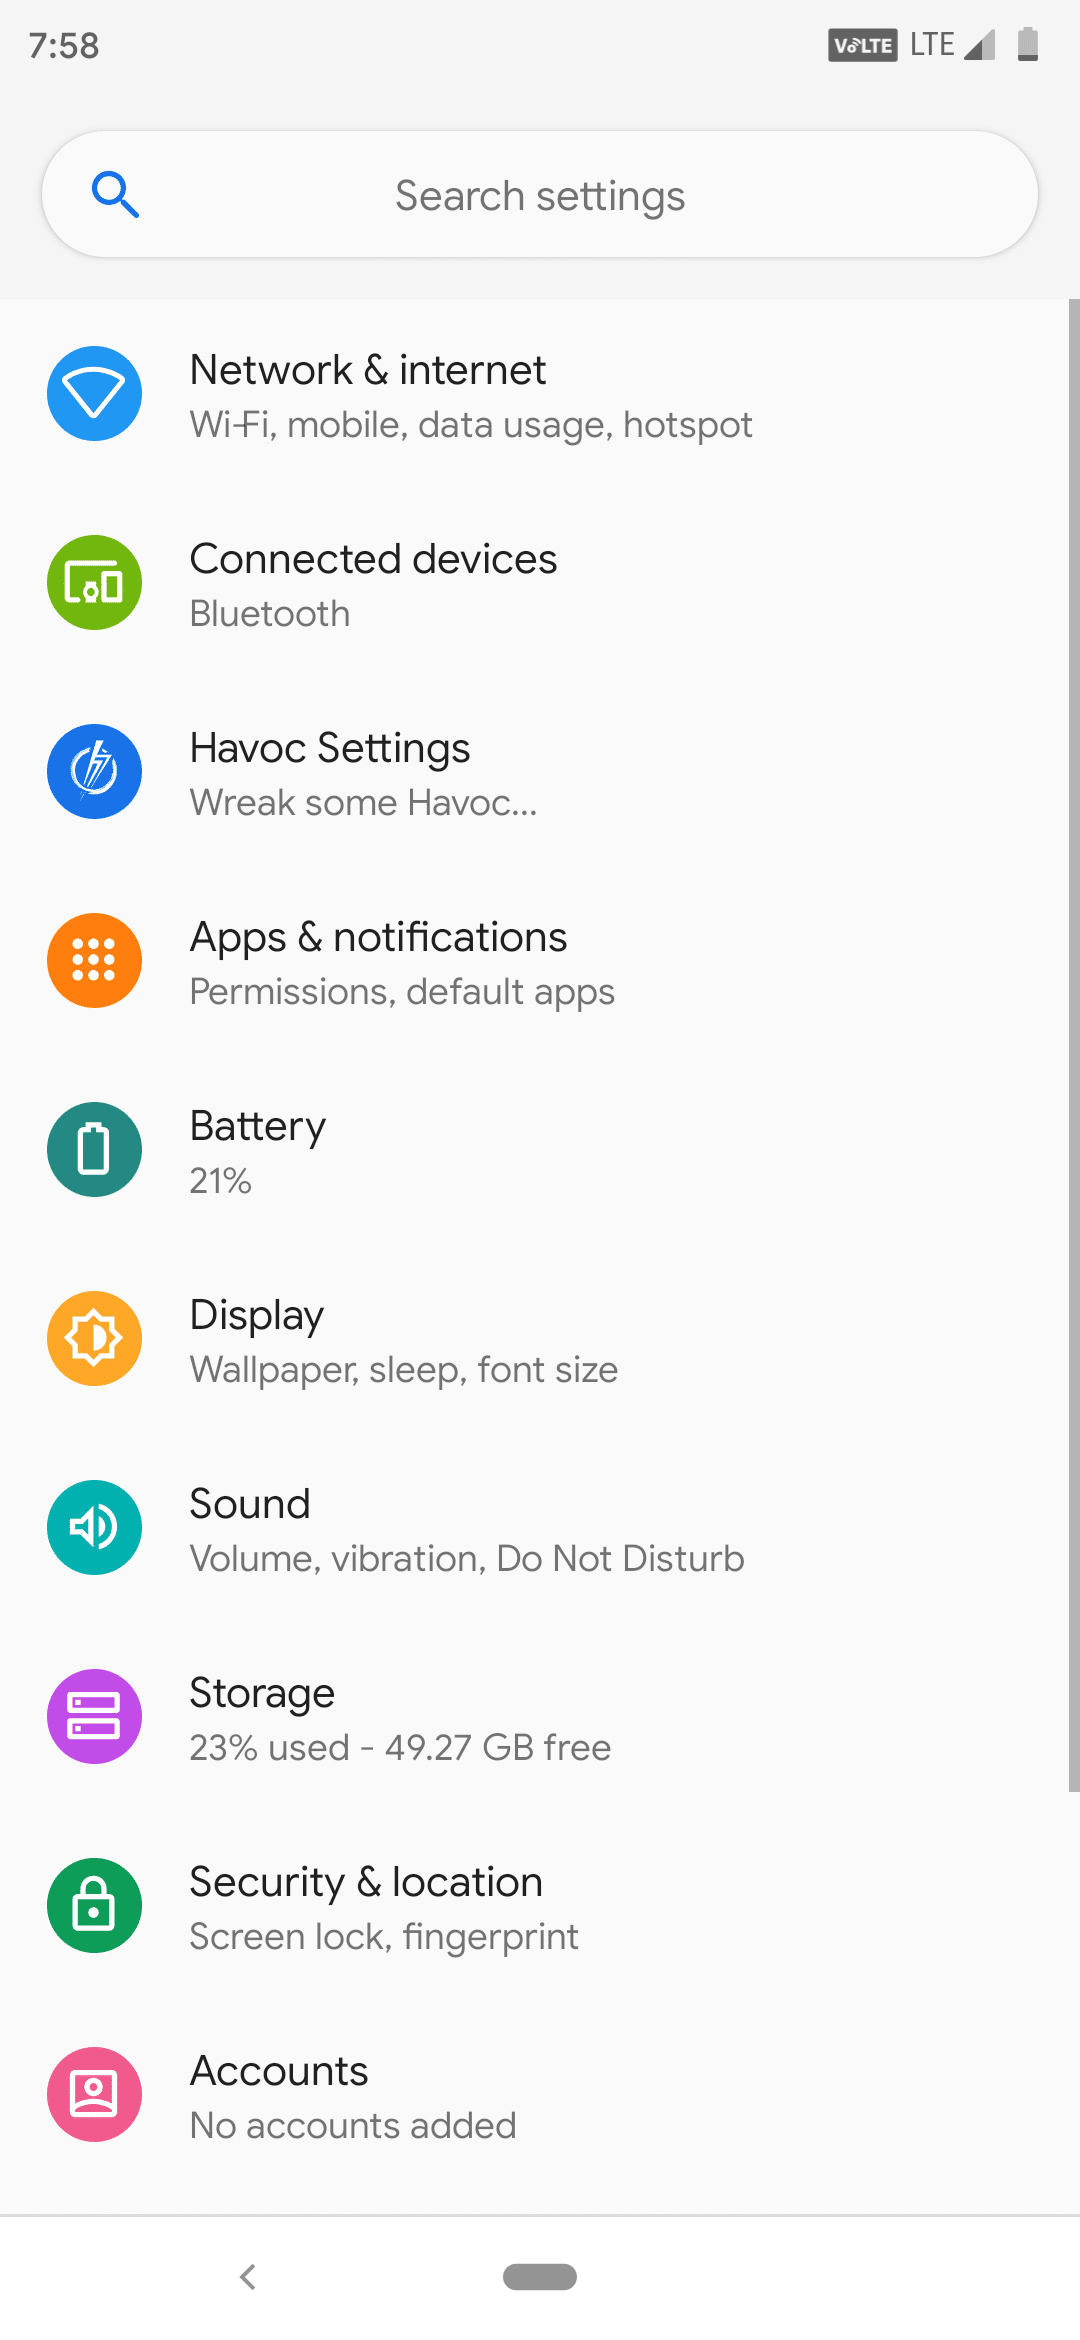
    Play protect

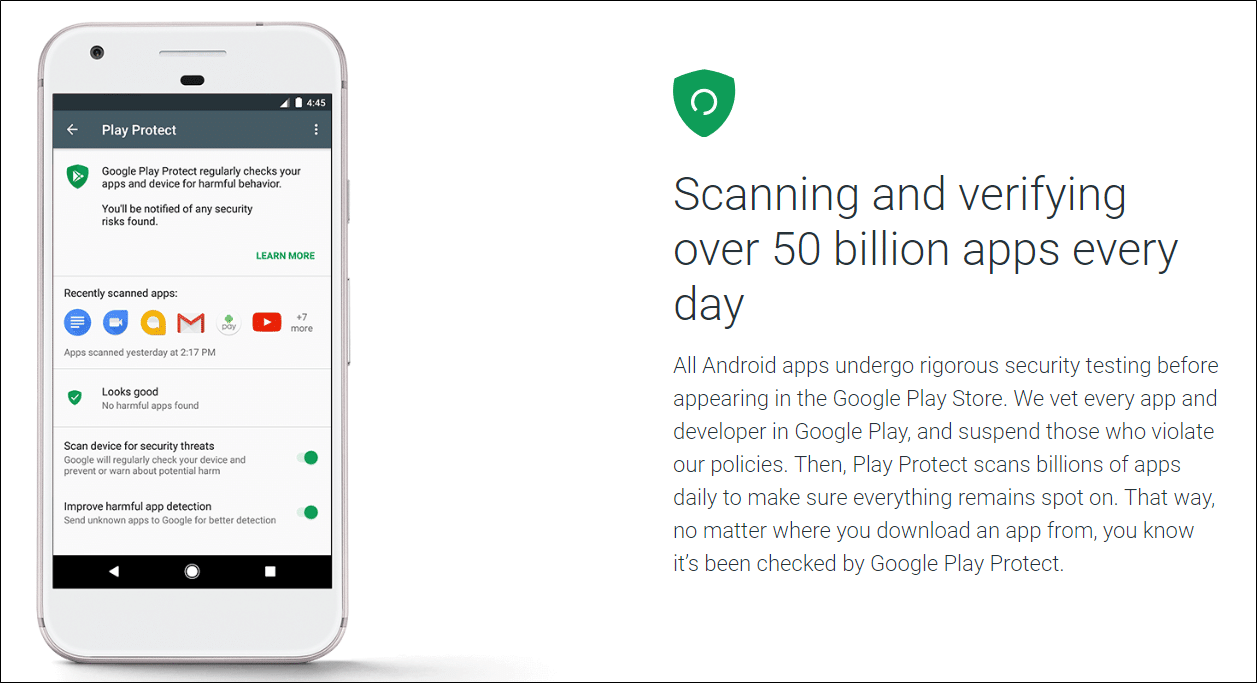
    Google has placed a malware scanner on the Play Store called Play Protect. This software launches a security check of applications before downloading them, but, more importantly, it also checks your phone for applications that might have been “jambs” since they were downloaded and installed. If it detects them, it will notify you with this notification and in extreme cases will delete them from your device on its own. You can check the settings of Google Play Protect and view the scanned applications on the “Updates” tab in the “My applications and games ” section of the Play Store.

    Encryption

    Starting with Android 5 Lollipop, Android by default offers full encryption of the device, provided that you have installed some type of blocking method on the phone (template, PIN or password). Android 7 Nougat used file-based encryption, although the end result is essentially the same: the data on your phone is protected by 256-bit standard AES encryption from the moment the device was locked, so until someone finds out your password, it’s nothing will not see.

    Android Security: Basic Protection

    You do not need to be a paranoid Android user to create a basic level of protection on your smartphone – you only need to change a few settings.

    Assign Password

    While the new Android phones offer numerous biometric methods for unlocking, each phone still requires one of three traditional methods of locking: a pattern, PIN, or password. Although they are not equivalent ineffectiveness. A template (made on a 9-dot square) is easier to remember, but this method is the least secure. A 6-digit pin is much better, but a random password is best. But even if you select a string of letters and numbers, you must set a reminder that will change every six months or so. And make sure that this password is not identical to what protects your primary Google account.

    Turn on 2-step verification

    No matter what you use to protect your phone, your Google account plays a central role in everything that happens. As the name implies, during a two-step verification, you add an additional level of protection, therefore, even if someone steals your password, he still will not be able to log into your account.

    After you are prompted to enter a password for Google, a code will be sent to your phone by default using text or a call, which will need to be entered to provide access to your account.

    Although this does not necessarily protect your phone from theft, it will protect the information contained in it. For example, if someone tries to remotely log into your Google account from another device, you will learn about it from a two-step message on your phone. And then you can take appropriate action and change your password.

    Install the Find My Device app

    Google Find My Device
    Google Find My Device
    Developer: Google LLC
    Price: Free

    Google offers a convenient tool to track your lost or stolen phone right in the Play Store. It is called Find My Device. This application allows you to track, block and delete data from your phone, wherever you are, with one touch. After downloading, you can log in using your Google account and allow it access to the location of your device. From now on, you can go to the Google Find My Device website and instantly determine where your phone is if you lose it. You can also remotely lock your device, display a message or phone number for someone who finds it, or completely erase all content on your device.

    Regular Updates

    Google is releasing monthly security updates for Android, which arrive on most new phones relatively timely. You do not need to check them – as soon as they appear, your smartphone will automatically inform you about it. But do not postpone this procedure for a long time, because it is easy to forget about them. Install or schedule an update to be installed as soon as your phone indicates that it is available. It only takes a few minutes, and it can go a long way in protecting your electronic friend.

    Android Security: Moderate Protection

    Now that we’ve already covered the basic methods, let’s take a look at setting an even more reliable lock on your Android phone.

    Set up fingerprint unlock

    A password can be a reliable way to protect your phone, but it cannot compete with your fingerprint. And if you bought your Android phone in the last two years, it is likely that it has a fingerprint scanner, either under the screen, on the back, or built into the power button. Locate it and go to security settings to register one or more fingerprints. It only takes a few seconds to create a very important level of protection.

    Many phones also offer a face unlock feature, but if you don’t have a Huawei Mate 20, you can ignore it. The thing is that most phones use a 2D front-facing camera to scan faces, rather than a 3D card, for example, with Face ID on iPhone or a Huawei camera that is sensitive to depth, so it’s very easy to fake a face image using a little more than a picture.

    Prevent Unknown Downloads

    One of the greatest benefits of Android is also one of the biggest risks: downloading apps that aren’t on the Play Store. When you install an application outside of this service, you lose Play Protect support and make your phone vulnerable to potential malware. To fix any potential problems, Google has developed a way to disable any accidental or unintended downloads. In the access settings for special applications, you will find the tab “Unknown Sources ” or “Unknown Applications”, which allows you to disable the installation of applications from a source other than the Play Store, for example, from Chrome or another browser.

    Depending on your phone, the mechanism is slightly different. Up until Android Nougat, there was only one slider that allowed you to either block or install applications from unknown sources. In Android Oreo and later, permission is granted separately for each application, so you can allow Chrome or Slack to install applications while blocking others. It is a good habit to check this option from time to time to make sure that there are no malicious applications that are allowed to install software without your knowledge. If you find anything suspicious, click on the name of such an application and deactivate the slider.

    Uninstall apps

    Speaking of wayward applications, one of the best ways to ensure the security of your system is a traditional, time-tested “cleaning” of your phone. Just go to the applications section and uninstall applications that you have not used for a long time. This will free up memory and eliminate the situation so that such applications do not turn into potential risks.

    Check permissions for applications

    It is also recommended that you check access rights to your application from time to time. When you download an application from the Play Store and launch it for the first time, Android asks you if it can access things like a microphone, camera, phone, etc. Often we just refuse access without even realizing that they ask, but you can always come back and correct the situation. Go to the “Permissions” tab in the “Applications” section in the general settings, and you can see what applications are allowed to do and what to do, and disable everything that looks suspicious.

    Android Security: High Protection

    If you are reading our article to find out how to turn your Android phone into a fortress, here’s what you need to do more for this.

    Disable Smart Lock for passwords and auto-login

    Intelligent password locking can be convenient, but if you want to lock your phone, you will have to deal with your passwords yourself. And this, unfortunately, means disabling Smart Lock for passwords, and this is why: the Google method does not use any authentication for each site or account, as password managers do, so after the first login to your account on the device, all your passwords will be available. This can obviously be a problem if someone steals your phone.

    You will find the switch in the security settings for your Google account, and not on the “Security” tab in the settings. After that, click on   “Security”, then scroll down to “Log in to other sites” and click on “Saved Passwords.” You will see two sliders: “Suggest to save passwords” and “Automatic login”.If you do not want to disable all this, you can also choose sites that ignore automatic login. We believe that the requirement for biometric authentication every time a password is entered (which Apple does on the iPhone) is a much better solution, so until this happens, you should disable this feature if you are paranoid.

    Download Password Manager

    If you disable Smart Lock, the only way to keep your passwords safe and orderly is to lock them in the password manager. More reliable and secure than the Smart Lock password synchronization system that Google offers, the password manager encourages unique and complex passwords, allows you to organize and manage multiple logins, as well as store confidential notes, credit card information and everything you want to store in a digital safe. And all this is protected by a password or fingerprint, no matter what you choose.

    Since your password manager is a separate service, you can access your passwords on any device or browser, so even if someone steals your phone, your most valuable personal data will still be protected. And with Android Oreo, you can even include some of them in autocomplete on your phone (of course, with fingerprint protection).

    Our favorite password manager is LastPass, but there are many other great options. You will need to pay an annual fee, but it’s worth it.

    Use VPN

    No matter how much protection you add to your phone, it is always vulnerable every time you visit the Internet. And all because the information you send can be stolen and tracked without much effort, especially if you use a public Wi-Fi access point. If you use the Android VPN service, your information is encrypted before it goes on the air, so your data is completely protected from everyone except the VPN provider and any website that you visit. Even if someone manages to steal your device, it will be protected.

    There are many VPN applications on the Play Store, so be sure to check the rating and user reviews before making a choice. We recommend starting with TunnelBear, which is free and inherently simple. If you are looking for something more advanced, you can download the OpenVPN option for Android and experiment with Mullvad, the best choice for PCs that are on our list of the best VPN services.

    Use the identifier application

    Google Authenticator
    Google Authenticator
    Developer: Google LLC
    Price: Free

    We’ve already discussed how important the two-step verification process is for your Google account, but you should also use it for any service that offers it: Twitter, Facebook, Dropbox, etc. But if you want to take it one step further, you can use an authenticator application to generate unique codes directly on your phone, and not send them via SMS text messages, which can be riskier. Google has created its own
    Google Authenticator authentication application for your Google account and many other sites that are free on the Play Store, so we recommend checking it out.

    Get a physical security key

    If you need maximum protection for your accounts, nothing beats the NFC security key. Approximately the size of a flash drive (you can attach this device to a keychain) and is completely protected from phishing, the security key does without codes and stores all your authentication on a physical device. Therefore, it is impossible to access any of your accounts without a key, even if someone succeeds in stealing all your passwords. The $ 50 Titan Security Key package (which includes USB and Bluetooth security keys) is a great option from Google, but there are less expensive options from Yubico.

    Use lock mode

    If all else fails, Google adds a new lock option in Android 9, which allows you to fully protect the phone with one touch. Hold the power button for a second and you will see the lock option at the bottom of the list. (If you do not, you can enable it in the settings of the lock screen.) Click on it and your phone will instantly lock, turn off the fingerprint scanner (so that someone could not force your finger to unlock it), delete all notifications from the screen lock and unlock Smart Lock. And so it will be until the next time you lock your phone again.

    How to Securely Hide Files & Apps on your Android Device

    If you often experience something like panic when you give your phone to someone, and your device has some special emails/documents/images or other files, you need a way to hide these files from prying eyes.

    Perhaps you have installed applications that you really can’t be proud of – no one should know about the Farming Sim game that you are playing. In any case, we have compiled a list of different ways to ensure the security of your personal files and applications.

    If you really want to have the most complete control over what is stored on your phone, you may need to root it. If you do not want to do this, we have also included some options that do not include root rights. In addition, Android has several built-in functions that you can use to maintain privacy.


    How to hide applications in stock Android

    The easiest way to hide your applications, files, and personal data when transferring a regular Android smartphone to anyone else is to use a guest account. You can configure the guest user on your device from the settings menu. Follow the scheme “System> Advanced> User Group” to access the menu. After all the necessary settings are made, you can quickly switch between the main and guest accounts from the drop-down menu. Guests gain experience as if the phone had just been removed from the box and loaded for the first time. There are no credentials, and only preinstalled applications are displayed in the application panel. You can also choose whether you want guests to be able to make calls or not.

    Having a second account on your phone is also ideal if you often give your smartphone to the same person. A good example of this is a parent who passes his phone to his child to watch videos or games. You can create a separate account that shows only those applications that your child should see, and quickly and easily switch between them.


    How to hide your files and applications: the basics

    Although some manufacturers added “storage” functions to provide a safe space on phones (for example, “Secure Folder” from Samsung or “Personal Space” from Honor), stock Android did not do very well with the need to selectively display default files and folders.

    Users with any version of Android, for a basic change in privacy, can rename folders containing content that needs to be hidden. Therefore, if you want to hide your images, open the file explorer (there is the main one available in the Android version of Marshmallow and newer), select the folder with the images you want to hide, and change its name. Now the system will not display your images in your gallery or files in folders.

    Admittedly, this is not the most reliable option in terms of secrecy – Android no longer displays information on the phone’s display, it’s true, but if you lose your phone, the files will still be fully accessible to other people.

    Similarly, you can hide those annoying pre-installed applications that come with your phone without using third-party applications. To do this, you need to go to “Settings> Applications” and then select the application that you want to hide. If you cannot remove such an application, you can simply disable it. If you need to learn how to stop applications in the background, you can find out the necessary information first.


    Outside help

    If you don’t need the simplest means of hiding and “protecting” from prying eyes, you will probably want to seek outside help to get better control over your data, files, and applications. Fortunately, there are many applications that can help you achieve your goal.

    Hide your apps

    If you just want to hide and not protect your applications, one of the easiest ways to do this is to install a custom launcher (provided that your manufacturer has not provided a built-in option to hide applications). There are really many options for third-party launchers, but one of the most popular on the Play Store is the ubiquitous Nova Launcher.

    Although there is a free version of Nova Launcher, you’ll need a paid Prime upgrade to unlock the ability to hide apps. If you purchased it, you need to go to the scheme> “ Nova Settings> Application and Widget Panels ”, and then scroll down to “ Panel Groups> Hide Applications ”.

    Nova Launcher Prime
    Nova Launcher Prime
    Developer: Nova Launcher
    Price: $0.49


    Apex Launcher is another popular option that has the ability to hide applications, except that a paid update is not required to access this feature. Follow the steps: “Settings> Panel settings> Hidden applications” to control the applications that appear in the application panel.


    Application lock

    So, perhaps you hid your applications using the above options, but deep down you know that you need security, not confusion. To prevent users from opening your applications at all (hidden or not), you have several third-party options. You probably want to try a few to find the one that you like the most.

    AppLock is one of the most popular free apps on the Play Store to add locks to your apps. This application is suitable for videos and images, but we have more suggestions to block such items later.

    In addition to being able to block applications and other elements, AppLock also has a useful feature that helps prevent application uninstallation. After activating this advanced protection, you will need to use the password that you set to remove the application. You can also disable advanced protection when you do not need to use it.

    AppLock
    AppLock
    Developer: DoMobile Lab
    Price: Free+

    It is worth remembering that there is another version called AppLock Fingerprint, although both applications now support fingerprint unlocking. This application also has additional options, such as a selfie photo of anyone trying to access your phone without authorization, and the ability to remotely lock the phone. Both offers paid in-app updates.

    AppLock - Fingerprint
    AppLock - Fingerprint
    Developer: SpSoft
    Price: Free

    After installation, you just need to scroll through the list of installed applications and select which ones you want to protect. Then, each time you open one of these applications, you will be asked to enter a password or fingerprint to unlock them.

    A small caveat: if the advertisement is too annoying, you can pay for the premium version, where there are no advertising messages.


    Be incognito with Hide It Pro

    So far, all the applications on our list have done exactly what you expect from them, but there are other hidden options that have made a little more effort to hide the fact that you do not allow files and applications to be displayed.

    For example, Hide It Pro uses an icon called the “sound manager,” and when you first open the application, you see some sound settings. Press and hold the logo, after which you will get access to the protected section of your phone, where you can find all hidden files, applications and other content.

    Hide Photos, Video and App Loc
    Hide Photos, Video and App Loc

    There are other features built into Hide It Pro, such as encrypting files on a case by case basis, but for some aspects (for example, for secure messaging or browsing the web) you need to install add-ons separately.

    Helpful advice

    Which application you use to hide or protect your files will depend on what you want to achieve. If you just want the files to not be displayed at all, you can do so without installing anything, but this will not provide much protection if you have data that someone wants (and is able to) access.

    With so many apps to choose from on the Play Store, you might have a favorite that isn’t on our list. Let us know which application you prefer in the comments below!

    6 Methods to Sync iTunes Music Library With an Android Device

    0

    Before smartphones became as functional as they are today, many of us listened to music on iPods and created voluminous music collections. These days no one wants to carry two devices with them, but if there is no iTunes application for Android, how can you use your iTunes library on your Android phone?

    In this article, we will briefly talk about the best ways, including using the official Apple Music app to access your iTunes library.


    Method 1: Transfer iTunes to Android using Google Play Music

    Google Play Music provides cloud storage for 50,000 songs, accessible both from your computer and from your phone. Pleasant moment – it is compatible with iTunes. To synchronize the two systems, you need to download Google Music Manager (or Google Play Music for Chrome) to your computer and the Google Play Music app on your phone.

    Open the program and log in to your Google account. Select the location of the music you want to download (in this case iTunes), and Google Music Manager will start downloading the music files contained in it.

    The PC version is automatically synchronized with the Google Play Music application on your phone – open it, select the “My Library” section, and then you will see the icons of your songs begin to appear. Downloading large music collections can take some time, but since you don’t need to physically connect your phone to your computer, you can continue your workday while Music Manager does its work.


    Method 2: Syncing with doubleTwist

    With the free Windows program and doubleTwist Android application, you can easily sync your iTunes library with Android. First, download the program for your PC from the doubleTwist home page and install it. Then grab your Android smartphone and download the doubleTwist app from the Google Play Store.

    The doubleTwist application for Android is free, although there is a paid version of Pro (the price is about 10 US dollars, depending on the region of your residence). The more advanced version offers a number of special features that are not needed for synchronization between iTunes and Android.

    Now run doubleTwist on your computer. You can choose whether you want your Android smartphone to sync with iTunes via USB or AirSync. We recommend the USB method, as this option is not only included in the free version of doubleTwist but also much faster than Wi-Fi.

    But before you can click on the icon ” Synchronize Now “, you must first right-click the doubleTwist icon on the Windows taskbar and select “Settings> ” Use iTunes library “to let doubleTwist to access your iTunes library. If you also have a device with a MicroSD slot, you should select an external memory card as the storage location in the settings. Depending on the card, you can transfer the entire collection of music to your Android phone.

    Now, when you click on Sync Now, the entire iTunes music collection, including all playlists, will be copied to your smartphone. If your collection is larger than the memory of your smartphone, then this option will not be the best. For example, it makes sense to create in iTunes a playlist called “Android” that contains only the music that you really want to copy. Once you have created the list, simply switch to the “Music” tab in doubleTwist and select the previously created Android playlist in the “Playlists” list.

    After syncing is complete, you can play and access iTunes music using DoubleTwist Player for Android. However, your music is also available in other music players if you don’t like doubleTwist.


    Method 3: Transfer iTunes to Android using iSyncr

    There are various special applications for transferring iTunes music to an Android phone on Google Play. We tested several and found that iSyncr was the easiest and most efficient.

    To get started, download the iSyncr application from the Play Store to your phone and the desktop version of the application on your PC. Connect your device to your computer using a USB cable, then open the iSyncr desktop app.

    A window should automatically appear asking what files you want to sync with your device. Check the box next to iTunes and click Sync. After that, iSyncr will transfer your files from iTunes to your phone.

    When the process is completed, click on the “ Finish ” icon. After that, you can play files using the selected music player, although iSyncr creators recommend their own Rocket Player application. It is also possible to transfer iTunes files over Wi-Fi using iSyncr if your phone and computer are connected to the Internet via the same network.


    Method 4: Transfer iTunes to Android via USB

    If you don’t want to rely on a third-party application to use iTunes on your Android phone, you can manually transfer the files to your device. This method is simple and efficient, but, as indicated above, it is limited by the available memory on your device or its MicroSD card.

    So here are your actions. Connect your phone to your computer using a USB cable. Open Windows Explorer and find the iTunes folder on your computer. Drag it to the music folder of your device to copy files to your phone. Music will be displayed in the music player application of your choice after the transfer is complete.


    Method 5: Use Apple Music for Android

    Apple usually does not create Android applications. But to deter iTunes customers who decided to switch to Android, Apple created the Apple Music app for Android. It has its drawbacks, but this is the official way to listen to music from iTunes on Android.

    Since this is Apple’s chip, you will need the Apple ID to use it. You should already have one since you already have iTunes music. Make sure you restore your account if you cannot find the information, and consider contacting support if you still cannot access it.

    The Apple Music app has the same features as iTunes, with recommendations for you from the 30 millionth song catalog. You can save all the playlists that you created when you used iOS, and the transfer scheme is pretty simple. This is essentially a streaming service (like Spotify) that requires a subscription, but the first three months are free.


    Method 6: How to add music from your collection to the Android app:

    Open iTunes on your computer, where you probably have purchased music from iTunes or copies of old CDs. Log in to the iTunes Store with your Apple ID on your computer and make sure you’re signed in with the same ID in your Android app. Next, on your PC, turn on the iCloud music library and wait for it to be updated. Once this is done, all your iTunes music will be available in the Apple Music app for Android.

    Apple Music
    Apple Music
    Developer: Apple
    Price: Free

    In your opinion, what is the best way to use iTunes on your Android phone? Tell us about it in the comments.

    Resurrection Remix ROM for Xiaomi Redmi Note 7 Pro Android 9.0 Pie

    0

    Android 9.0 Pie ROM for Xiaomi Redmi Note 7 Pro | Official Resurrection Remix ROM for Redmi Note 7 Pro


    Official Resurrection Remix

    Resurrection Remix Custon ROM


    Resurrection Remix the ROM has been based on LineageOS, SlimRoms, Omni and original Remix ROM builds, this creates an awesome combination of performance, customization, power and the newest features, brought directly to your Device.

    Many things that in previous versions were tweaked with mods are now included by default in the ROM so, please enjoy!


    Installation Instructions

    Note: Make sure to take a backup of important files, photos, contacts etc. as installing a custom ROM resets your phone and we are not responsible for any data loss or damage to your system.

    Step 1: Download the required ROM and GApps files from the download section below.

    Step 2: Make Sure that your device’s bootloader is unlocked and you have successfully installed TWRP Recovery. If not then follow the below link to do so.

    Step 3: Now Boot into TWRP Recovery mode and do a full factory reset and data and cache wipe.

    Step 4: Next Go to Install in Recovery mode and flash the downloaded ROM zip file followed by GApps file.

    Step 5: That’s all After successful installation reboot your device.


    Download


    Credits

    • Lineage OS Team
    • Resurrection Remix Team
    • All Respected Developers and Device Maintainers


    If you any queries or suggestions then don’t forget to leave them in the comments below.

    Havoc OS Pie ROM for Xiaomi Redmi Note 7 Pro

    0

    Download and Install Android 9.0 Pie Official Havoc OS ROM in Xiaomi Redmi Note 7 Pro. Rom filled with so many features that you probably won’t find in any ROM. Just flash and enjoy.


    Official Havoc OS


    Havoc OS

    Havoc-OS is an all-new ROM based on LineageOS. So many features that you probably won’t find in any ROM. Just flash and enjoy


    Screenshots


    Installation Instructions

    Note: Make sure to take a backup of important files, photos, contacts, etc. as installing a custom ROM resets your phone and we are not responsible for any data loss or damage to your system.

    Step 1: Download the required ROM and GApps files from the download section below.

    Step 2: Make Sure that your device’s bootloader is unlocked and you have successfully installed TWRP Recovery. If not then follow the below link to do so.

    Step 3: Now Boot into TWRP Recovery mode and do a full factory reset and data and cache wipe.

    Step 4: Next Go to Install in Recovery mode and flash the downloaded ROM zip file followed by GApps file.

    Step 5: That’s all After successful installation reboot your device. Now complete the Android setup following on-screen instructions and you will be presented with the home screen of Havoc OS Rom.


    Download


    Credits

    • Lineage OS Team
    • Havoc OS Team
    • All Respected Developers and Device Maintainers


    If you any queries or suggestions then don’t forget to leave them in the comments below.