More
    Home Blog Page 205

    Best App to Control Manual Camera Focus and DeFocus in Android Devices

    0

    If you ever have use Nokia Lumia devices then you must have noticed one amazing thig in Nokia Camera that you can Manually set focus for pictures, you can Focus or defocus background, that’s the one thing that Android Devices or missing.

    Today i’m going to tell you about one of best App to Control Camera Focus, This app is Background Defocus and is developed by Sony Mobile Communications.

    Background Defocus :-

    Background DeFocus is Developed By Sony Mobile Communications, and is one of the best app for Focus Adjusting, alternatively Google has also launched its Camera App and i even much better Google Camera only supports Android 4.4 KitKat, so if you are on Jelly Bean or on ICS then Background Defocus is best app for you.

    Sony Background DeFocus has the feature to take two photos of an character or object. After taking a shot, the user need to select the character or objects which they need to focus and adding blur effect to the second image. The second image/shot will be your background for the focused object before. Sony Background Defocus also offers user to edit the focused image by adjusting the blur level and more. Think so the only camera quality secret behind all Sony Android devices will be this one.

    Background defocus – take photos in a professional style
    Let the object in focus stand out. The Background defocus app simulates a shallow depth of field by creating a blurred out background.
    It captures two photos with different focus settings, which you can bring together to create a photo with one object in sharp focus, against a beautifully blurred background.

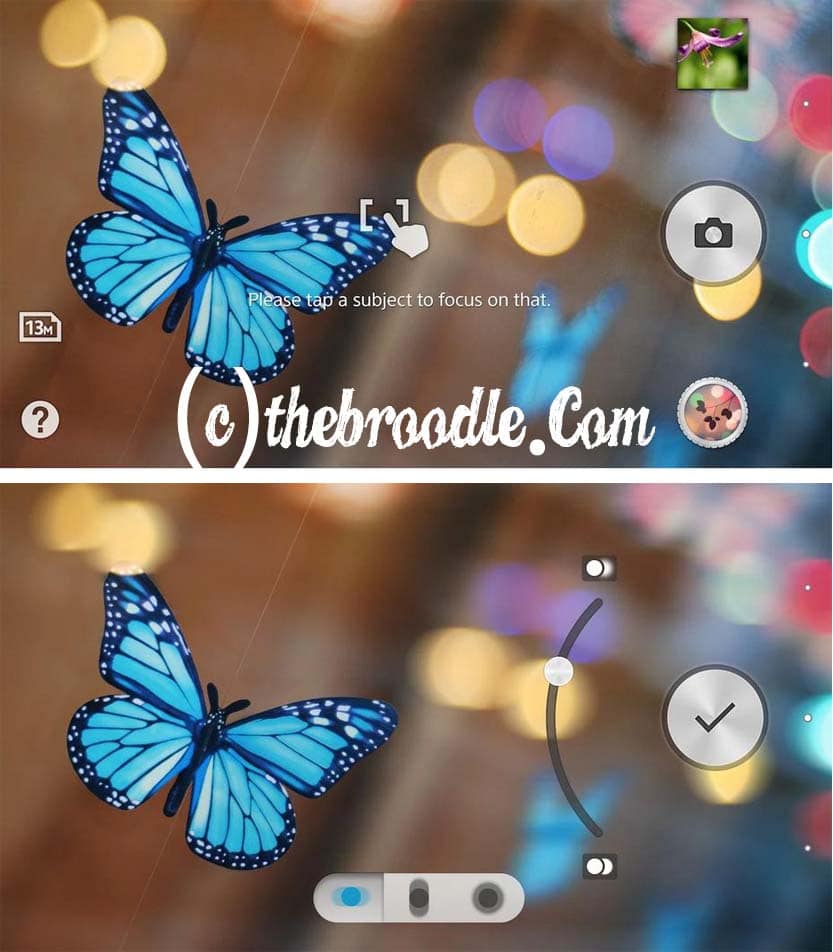
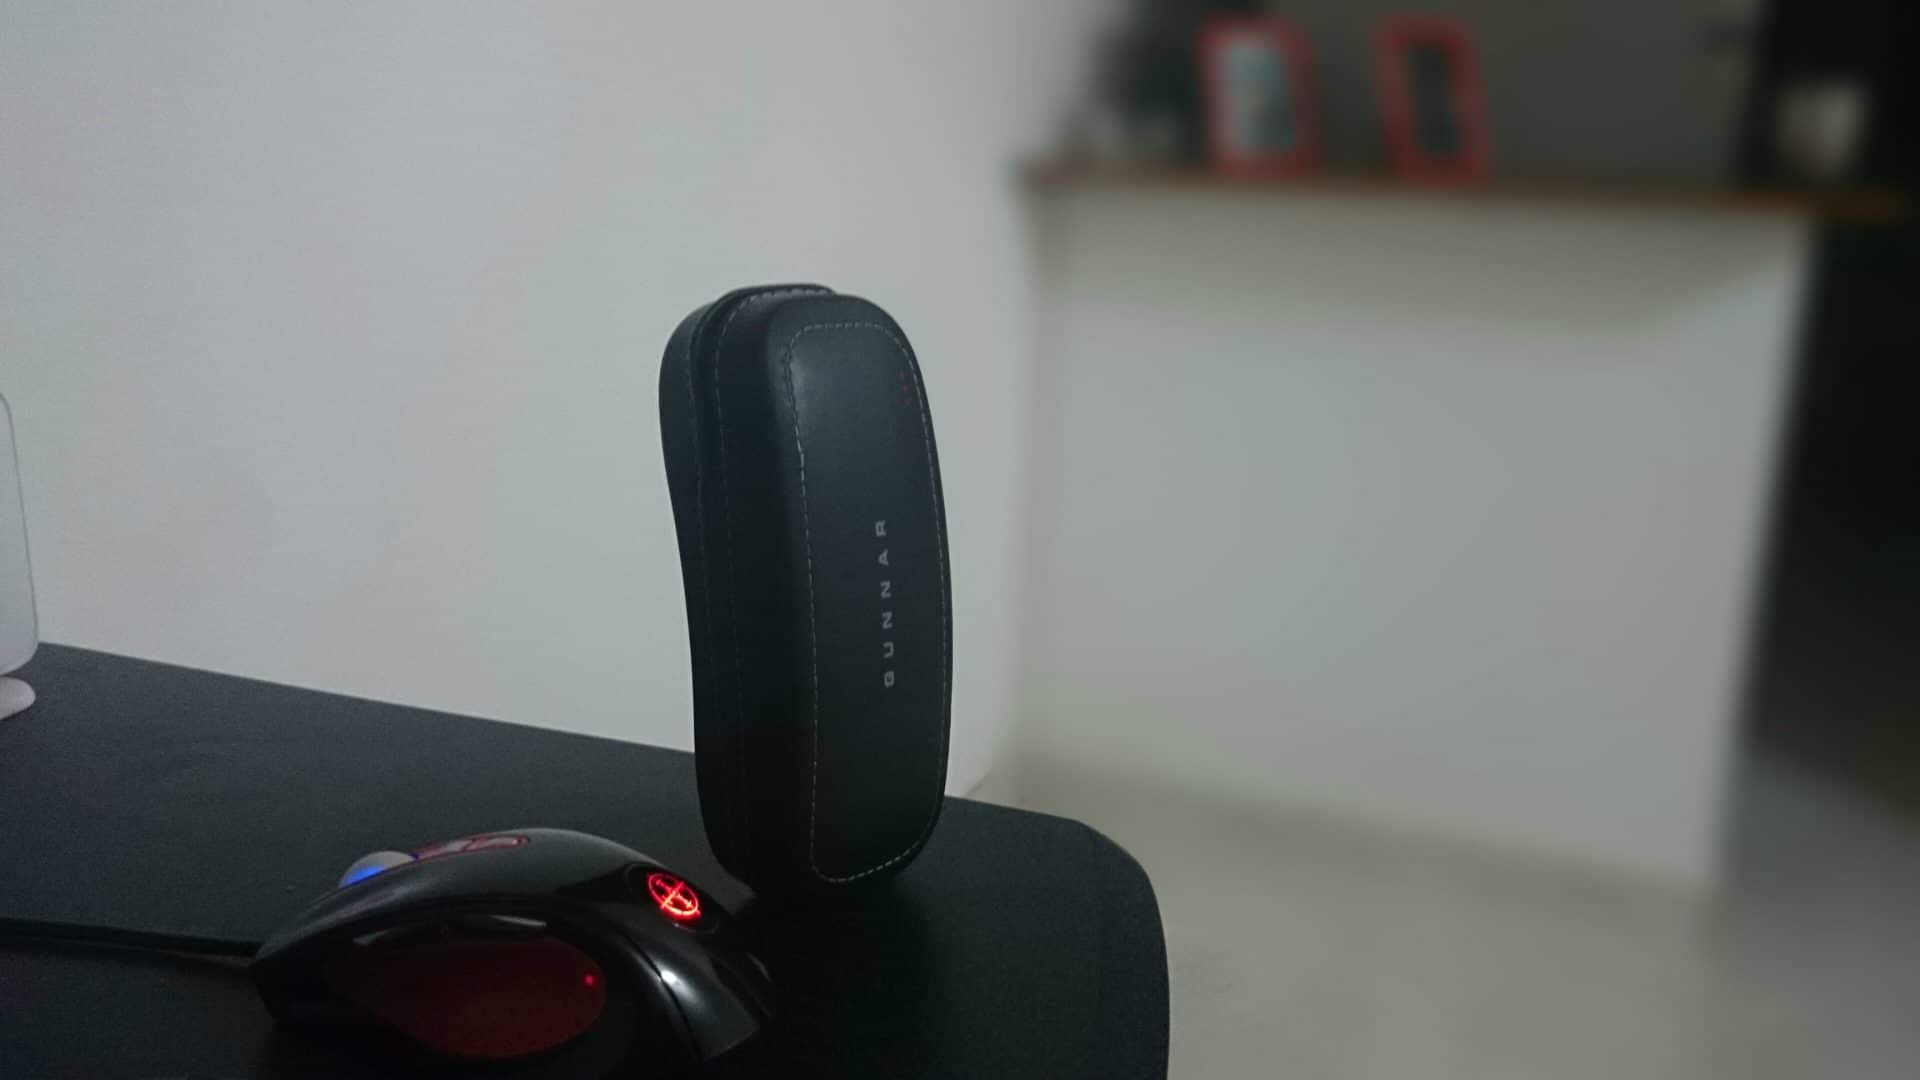
    Below are the few ScreenShots and Camera Captures done by this app :-

    Manual Focus with Sony Backgroud Defocus
    Manual Focus with Sony Backgroud Defocus
    Captured By Sony Background DeFocus
    Captured By Sony Background DeFocus
    Playing With Focus in Sony background DeFocus
    Playing With Focus in Sony background DeFocus

    How to use Background defocus :-

    Step 1 :- Start the Camera and select Background defocus as camera mode

    Step 2 :- Tap the object you want to focus on in the viewfinder

    Step 3 :- Tap the camera key to take a photo

    Step 4 :- Change the blur level and blur effect with the controls on the screen

    Step 5 :-Tap the save buttonTips for best photos:

    To get the best results, please focus on an object 15-45cm (0.5-1.5 feet) away and make sure the background object is 5 meter away from focus target and hold camera steady.

    Downloading links :-

    Download Sony Background DeFocus from Google Play Store :-

    Download Background DeFocus from Play Store

    Alternatively, if your device is not supported in Play Store then you can try downloading apk file.

    Download Background DeFocus apk :-

    Download Background DeFocus from MediaFire

    OR

    Download Background DeFocus from Google Drive


    Create Fake WhatsApp Conversations on Android With WhatSaid

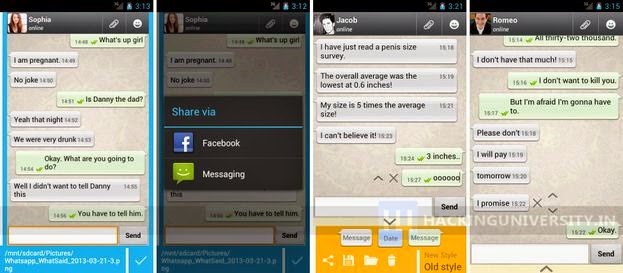
    Have you ever think of making prank on your friends by creating fake conversation on WhatsApp, well then i have a best app for you, its WhatSaid, it lets you create Fake Conversations on WhatsApp by any contact.

    So, install WhatSaid on your Android device and Start creating fake Conversations and Make Pranks on your friends.

    What WhatSaid do?

    The basic function of this app is that it creates fake Conversation on your WhatsApp with any contact you want. It only works with WhatsApp. So by creating fake conversation messages on WhatsApp you can make prank your friends.

    Fake Conversations on WhatSaid
    Fake Conversations on WhatSaid

    How to Download and Install?

    Step 1 :- First Download WhatSaid apk file from the below link.

    Download WhatSaid APK from XDA

    Step 2 :- Now Install it on your Android Device.

    Step 3 :- Once install, open it from the app drawer, and follow the on screen instructions, and create Fake Conversation.

    Step 4 :- Now show those conversations to your friends and make pranks on them.

    If you like reading this post, subscribe to our mailing list and please do comment.

    Invite all Facebook Friends to like a Page in a Single Click (Trick)

    Created a new page on Facebook but don’t get enough likers? Here is the solution for this. use this simple JavaScript Code to invite all your Facebook friends to like your page in just a single click.

    How to invite them all ?

    Step 1 :- Open Facebook.com and login to your account.

    Step 2 :- Next visit the page that you created.

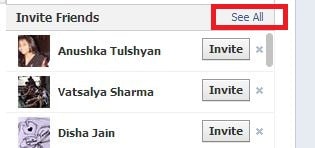
    Step 3 :- Next Click on See all button from the right side of the page

    Invite All Facebook Friends to like your page
    Invite All Facebook Friends to like your page

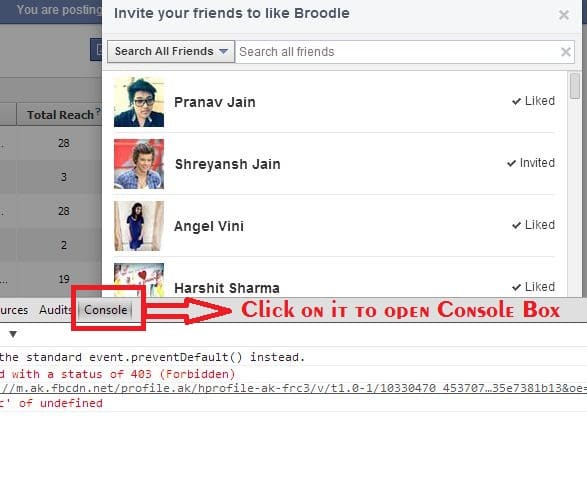
    Step 4 :- After Clicking on it a popup box will appear with the list of your friends, now click Ctrl+Shift+J if you are on Google Chrome or Ctrl+Shift+K for Mozilla Firefox to open Console box and then click on Console tab from it.

    Console Box in Google Chrome
    Console Box in Google Chrome

    Step 5 :- Now paste the below code in console box and hit enter and wait for few seconds.

    javascript:var inputs = document.getElementsByClassName(‘uiButton _1sm’);
    for(var i=0; i<inputs.length;i++) {
    inputs[i].click();
    }

    Step 6 :- That’s it, the JavaScript performed its task and invited all your friends to like your page.

    If you face any problem then please comment.

    Get Awesome HQ Laptop Skins for Rs. 99 Only {Special Offer 83% Off}

    0

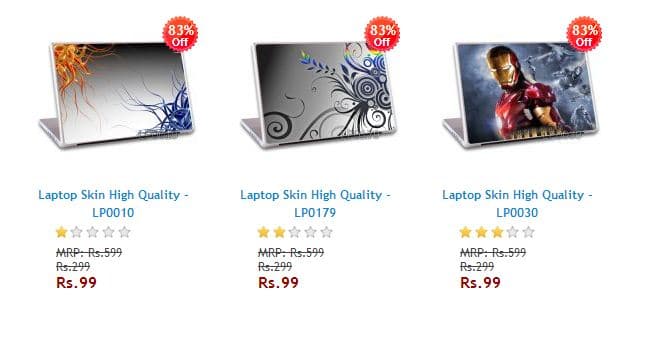
    ShopClues.Com is offering High Quality laptop Skins for Rs.99 only for limited time, These deals are currently 83% off.

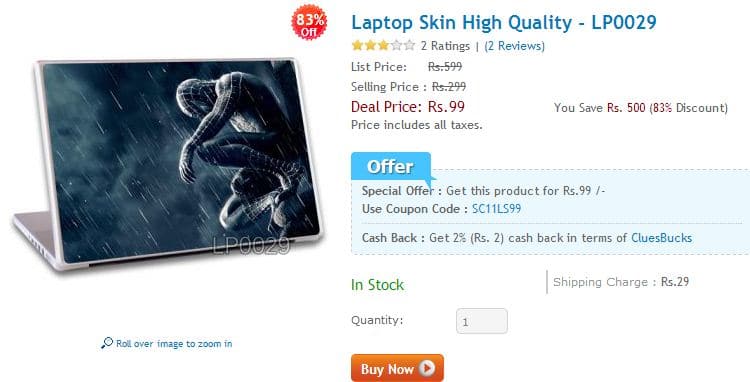
    These laptop skins include various newly released movie themes including The Amazing Spiderman 2 and lots more.

    These stylish, functional yet high quality laptop covers can be attached in minutes and help preventing your laptop cover from scratch and stain.
    The Vinly material used for these skins is high quality which leave no trace of glue at the time of removing the skin which other cheap skins do and damage your laptop. Skin lamination is of advance technology, between glossy and mate finish.
    It allows anyone to quickly and easily create uniqueness to your laptop in no time High quality Vinyl Material with Lamination provides scratch proof, stain proof and waterproof protection. Distinctive design reserved by high resolution printing technology.

    So visit the below link and Grab these deals.

    Grab HQ Laptop Skins for Rs. 99 only

    Spider man 2 Laptop Cover
    Spider man 2 Laptop Cover


    How to download Videos from Facebook easily with Google Chrome

    Sometimes you see videos on facebook that you might find interesting and wanted to keep them in your PC for future playback, but as we know that facebook don’t have any download button for videos, its not possible to keep them.

    So, today i will show you a way through you will be able to download any facebook video with a single click.

    FVD – Chrome Extension :-

    FVD Video Downloader – a browser plugin that allows you to download video and audio files from almost any page for further viewing on your computer.

    It supports a huge selection of sites including Facebook, Vkontakte, Blip, Metacafe, Break as well as thousands of others. It is very easy to operate the plugin – if there’s a downloadable video available on the page that you are viewing, the arrow button in your browser changes its color to blue. You can download the video by clicking on this button. After that you can play it on your computer or convert it into another format for further viewing on other devices. Download music or Video in HD format, MP3 format, MP4 or FLV Flash games downloads are in SWF format.

    Download Videos from Facebook using Google Chrome Extension :-

    For this you need to have Google Chrome installed in your PC, if you don’t then you can download it from here.

    Now after installing chrome open it and install FVD Chrome Extension from the below link.

    Download FVD Chrome Extension

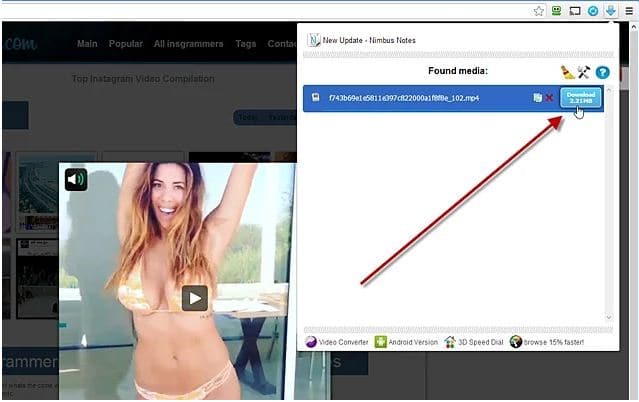
    Next after installation open any video on facebook and click on blue arrow icon from the taskbar, after that you will see mp4 video link just click on it to start downloading your video.


    Facebook Video Downloader Chrome Extension
    Facebook Video Downloader Chrome Extension

    That’s it, now you can keep your favorite videos in your PC Safely and watch them later.

    Best WordPress Plugin for inserting CSS Buttons in WP Posts

    Most people are not familiar with HTML/CSS. This is why WordPress plugins are very useful for adding tables or buttons. There are many plugins which will allow you to add Buttons in between your WordPress Posts and pages with the help of Shortcodes or HTML tags, but today in this post i will gonna show you a different and Best WordPress Plugin for Adding Responsive Button in your WordPress posts without using any shortcodes or HTML tags.

    The name of this plugin is Forgot About Shortcode Buttons and is one of the best way of adding  CSS buttons in the post editor screen and to your themes.

    Forget About Shortcode Buttons plugin :-

    As this plugin is newly launched it requires WordPress 3.9 or higher.

    For this, firstly you need to install Forgot About Shortcode Buttons Plugin, install it by searching it in Plugins directory from your WordPress dashboard or you can manually install it by downloading it from the below link.

    Download Forgot About Shortcode Buttons Plugin

    (the button inserted above is done by using this plugin only)

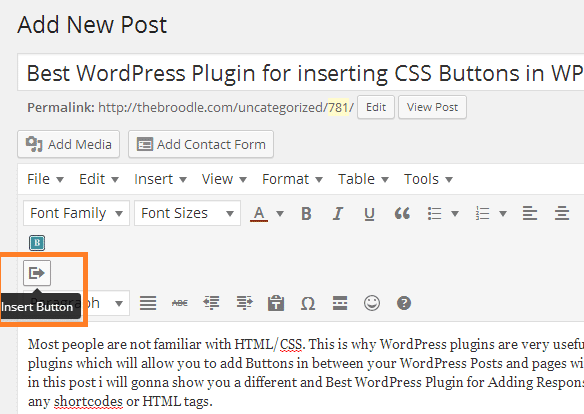
    Once you have installed and activated the plugin, simply create a new post or edit an existing one, and you will see a new button in the Visual Editor labeled Insert Button.

    Forgot About Shortcode Buttons Plugin Insert Button
    Forgot About Shortcode Buttons Plugin Insert Button

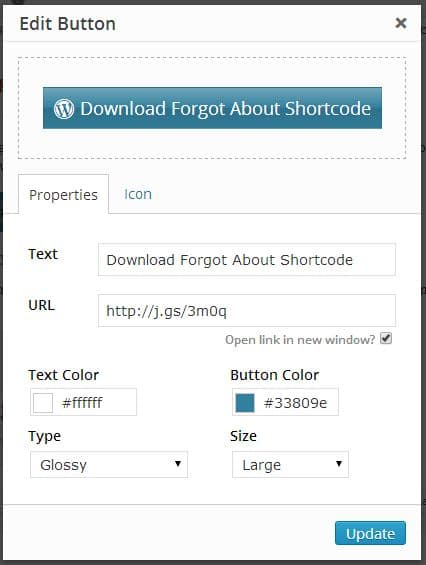
    To insert a new button in your post or page, you just need to click on the Insert Button. This will bring up a popup window where you can design, insert link, use custom icon, etc. your new button.

    Button using Forgot about Shortcode Button Plugin
    Button using Forgot about Shortcode Button Plugin

    If you click on the icon tab then you will be able to choose custom icon for your button.

    After your designed your button, just click on the insert button to insert in your post.

    That’s it, you will be able to see your button in your Post.

    If you face any problem then please comment.

    Google’s Official WordPress Plugin for Adsense Ad Placement (Tutorial)

    As we all know that Google Adsense is the best way for earning some revenue from Blogging, Whenever a new blogger gets and Adsense account the biggest problem he face is of placing the Ad code on right place on their WordPress blogs, their are many plugins available for this purpose but they are not that good.

    But now to resolve this problem Google has launched its Official “Google Publisher Plugin”, currently this plugin is in Beta, but for me it worked flawlessly.

    The Ad Units that are displaying on this site are also placed by this plugin.

    Today,  I will gonna share how you can configure and use this plugin with your WordPress blog for better ad placement.

    Google Publisher Plugin :-

    The Google Publisher Plugin enables you to easily use Google’s products – including AdSense and Webmaster Tools – with your WordPress site.

    Adding AdSense ads usually requires you to generate snippets in AdSense and paste these into your site, or to manually edit PHP files. This plugin lets you place AdSense ads using a simple point-and-click UI.

    This beta version of the Google Publisher Plugin allows you to:

    • Easily add AdSense ads to your site to make money from advertising.
    • Verify your site with Webmaster Tools with just one click.

    Download and Set up Google Publisher Plugin in WordPress Blog :-

    Firstly you need to have an active Adsense Account, if you don’t have then you can apply for it.

    Now Login to your WordPress Dashboard and Install this plugin, or if you prefer manual installation then you can download this plugin from the below link.

    Download Google Publisher WP Plugin

    Next Activate this plugin and head to Settings >> Google Publisher Plugin from your WordPress Dashboard.

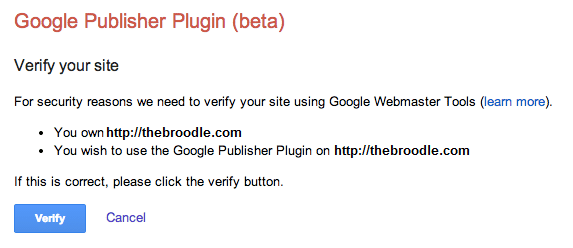
    Next Link this Plugin with your Google Adsense Account, and verify the permissions asked.

    Google Publisher Plugin Asking for Verification
    Google Publisher Plugin Asking for Verification

    Now remove Any older Google Adsense code placed in your site (it is not necessary, but will be good if you do so)

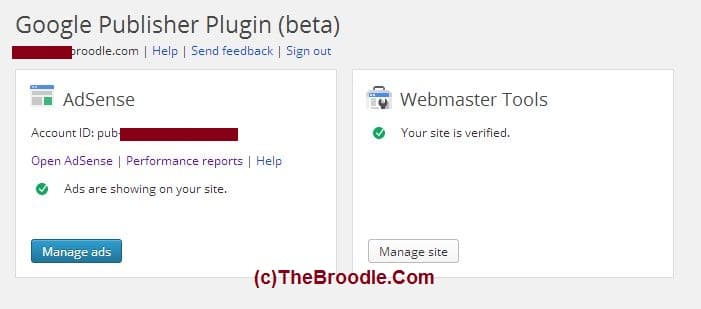
    Next Click on Manage Ads button from plugin page.

    Google Publisher Plugin Dashboard
    Google Publisher Plugin Dashboard

    Now the plugin will analyze your site and theme for ad tag, it will few minutes. In my case it detected already running AdSense ads and suggested to remove it.

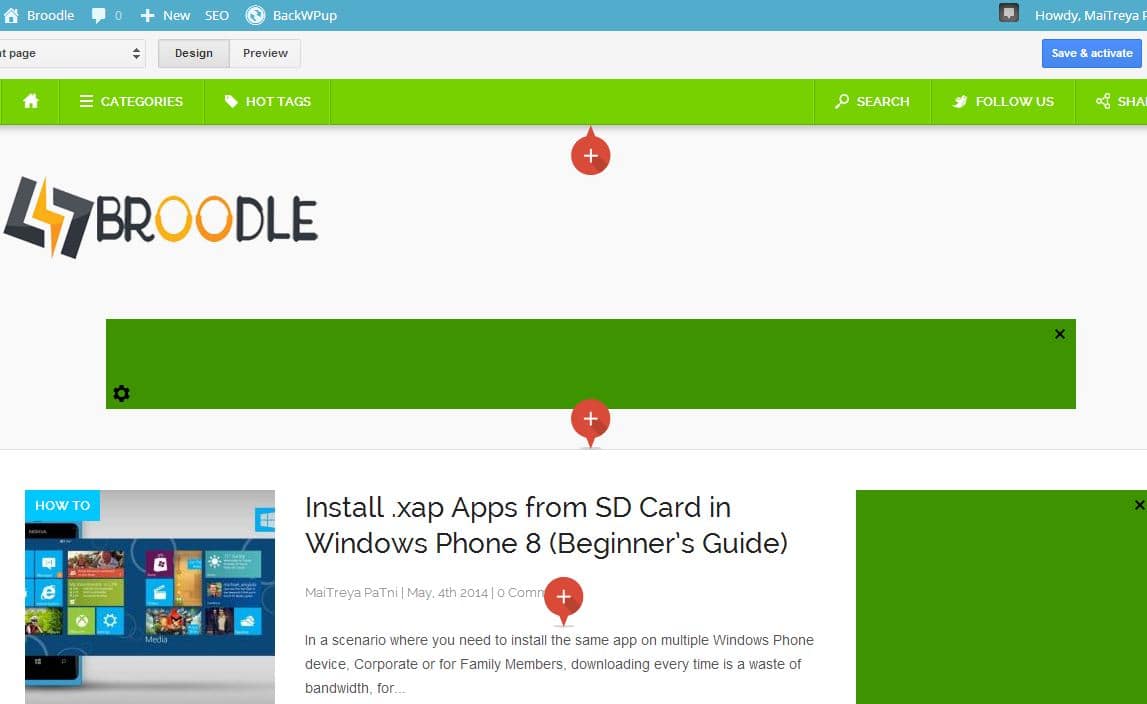
    Now it will display tags on your site where Ads can be placed, you can click on these tags to add Ad units, only three ad units can be placed on single page, to manage ad units on different pages or post types you can select that page from the upper left corner of the screen.

    Note: If you want to control the ad type (Display or text or both), simply click on gear box from the bottom left corner of that unit to configure that.

    Ad Placement using Google Publisher Plugin
    Ad Placement using Google Publisher Plugin

    Now after placing Ad Units an all Home, Post and Page Templates click on Save and Activate Button, that’s it, after few minutes you will be able to see live ads on your site.

    Conclusion :-

    According to my experience with this plugin, i must say that this is the Best Plugin for Adsense Ad Placement and one the must have plugin for Adsense user.

    Instead of naming it as Google AdSense WordPress plugin, Google named it as Google Publisher plugin which indicates that this plugin will bring more feature from other Google products like Google Webmaster tool and might be Google Analytics.

    Install .xap Apps from SD Card in Windows Phone 8 (Beginner’s Guide)

    In a scenario where you need to install the same app on multiple Windows Phone device, Corporate or for Family Members, downloading every time is a waste of bandwidth, for this you can use a single downloaded file and install it in various Windows Phone Devices by placing it in their SD Cards.

    Today i’m going to show you an easiest guide fro installing Apps (.xap) in and Windows Phone 8 device.

    Download Windows Phone Apps Manually :-

    Step 1 :- Firstly Go to WindowsPhone.com > Apps + Game > Search, and then search or Select the app that you want to download.

    Step 2 :- Next Scroll down a bit, and look for a link which says “Download and install manually”, click on it.

    Step 3 :- This will start downloading the xap file.

    Step 4 :- Now copy downloaded XAP file to your SD Card.

    Installing from SD Card :-

    Step 5 :- Now after copying it in SD Card insert your SD Card in your phone.

    Step 6 :- Next Click on the Windows Phone Store Tile.

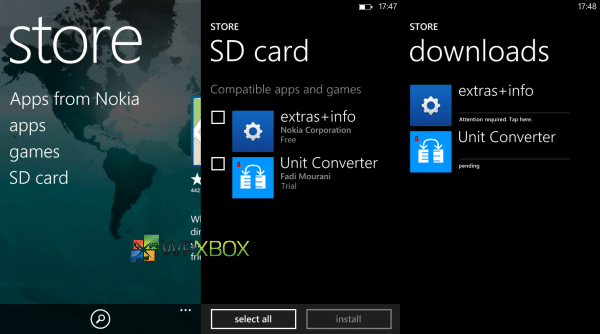
    Step 7 :- Select SD Card from the option.

    (If you don’t see SD Card option in your Windows Store then reboot your phone)

    Step 8 :- This will list down all the .XAP files or the apps available in your SD Card.

    Step 9 :- Tap on it  to install and it will appear in its respective place.

    Installing Apps in Windows Phone from SD Card
    Installing Apps in Windows Phone from SD Card

    If you face any problem while installing from SD Card then please comment.

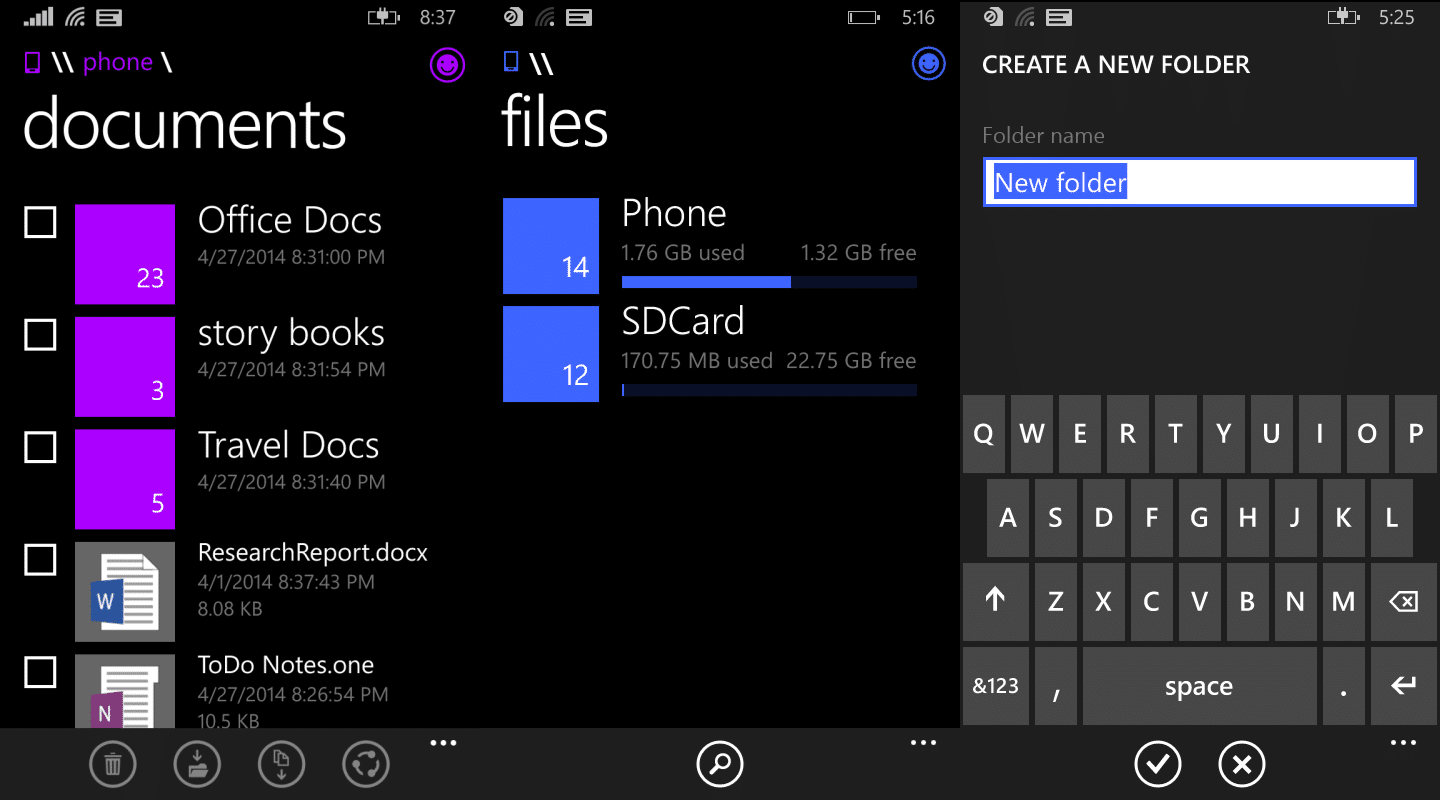
    Official File Manager for Windows Phone 8.1 is Coming in May

    One of the main reason which leads to decrease interest in windows phone is of lack of Fully Functioning file manager. Many users when shifts from Android to Windows phone feels a bit uncomfortable while managing their files because of no file manager, and When Windows Phone 8.1 developer preview was announced, in that also File Manager was missing, however there are various file managing apps in windows store but they re not fully functioning.

    Windows Phone would be getting a File Manager, a highly-requested feature the community has been asking about for years, and Belfiore confirmed that yes, an app would be in the Windows Phone Store by the end of the month.

    But now to resolve this problem Microsoft has confirmed that Windows Phone 8.1 will get the Official Fully Functioning file manager in late May. This was confirmed by Joe Belfiore, the VP, Lead Windows Phone Team at an AMA session on Reddit.

    He confirmed that File Manager was one of the most requested feature and it is coming soon to WP8.1. He even shared some of the screenshots of the app.

    The file manager will provide users the ability to navigate the device’s built-in storage as well as SD cards. The app will also let you create new folders, move files from one folder to another, and search within folders.

    Belfiore said this on Reddit :-

    WOO HOO! SOMEONE ASKED THIS QUESTION!! I’ve been waiting! in fact, I’ve avoided tweeting on this very topic just for all you redditors. Seriously.

    in fact– you GET A CORTANA T-SHIRT FOR ASKING!! 🙂 (PM me your size and we’ll get it to you.)

    *** YES *** We are doing a File Manager for WP8.1! I know a LOT of you are looking for this (thanks for the tweets, I’ve read them all). In fact, I’ve been running a build of it on two of my phones for the last week or so and it’s getting to pretty good shape.

    Here’s what it looks like: http://imgur.com/a/hvqGD#nRuOFXp

    We are expecting to get it into the store HOPEFULLY by the end of May.

    Here are the screenshots of the app :-

    Official File Manager for Windows Phone 8.1
    Official File Manager for Windows Phone 8.1
    Official File Manager for Windows Phone 8.1
    Official File Manager for Windows Phone 8.1

    As of now there is mention on details and features on how the file manager works, but from the screenshot it definitely looks great.


    Micromax is caught testing Android 4.4.2 KitKat on Canvas 4 A210

    As we all have heard that in December End 2013 MMX NewsCaster twitted that Micromax is planning to launch KitKat for its Selected Canvas Models in about Q2 of 2014.

    Micromax is continuously loosing trust of the old users due to this update issue because even the other Indian Smartphone makers like Xolo and Karbonn has started providing KitKat updates.

    As the May has just started there is only one month left for the quarter 2 to end, so we can assume that Micromax can announce KitKat till the end of this month.

    Now the recent leak confirms that The Indian Manufacturer Micromax was found Testing Android 4.4.2 KikKat in its Canvas 4 A210 Smartphone.

    On 7th of Aprol 2014 Micromax has uploaded official KitKat 4.4.2 for  the Micromax Canvas 4 on  the Moulnisky.com  which is under this path :

    Index of . / downloads / Micromax / 00_A Serie / A210 / SW Versions / V17_050414(Beta Testing password protected) /

    and the file name is :

    A210_KK_S9111B_MP_F2F3F5F8_B1_IN_MMX_17_FLASHER_USER.rar.html.

    Here is the screenshot of that file :-

    KitKat Update for Micromax Canvas 4 A210
    KitKat Update for Micromax Canvas 4 A210

    It is seemed to be update package for MMX Canvas 4 which can be flashed easily by SP Tools, however the file was password protected but through this we can assume that KitKat in Canvas is not to far.