Install MTK65XX Preloader USB Vcom Drivers SP Flash Tools in Windows.
Generally, many users face the problem of VCom drivers not getting installed for their MediaTek device, we require VCom drivers usually when we flash firmware in our device with SP Flash Tools or any other similar tool.
Today I’m sharing this guide which will help you in installing MTK VCOM Drivers on your PC Manually.
This Guide works with Windows XP, Vista and Windows 7 Based Operating systems, You can follow the link to another article for Windows 8 and 8,1 and Windows 10 users below.
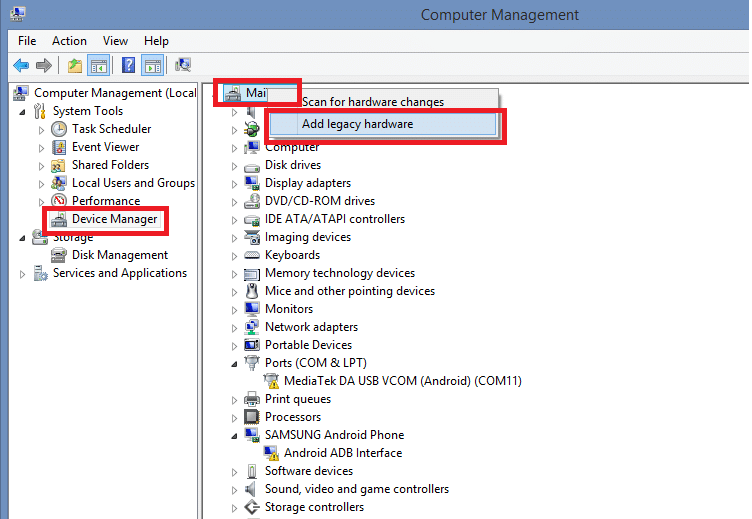
Step 2: Now open Device Manager on your PC by right-clicking on My Computer and then clicking on Manage.
Step 3: Next go to Device Manager in that and click on your PC name and then click on Add legacy hardware, see the below screenshot.
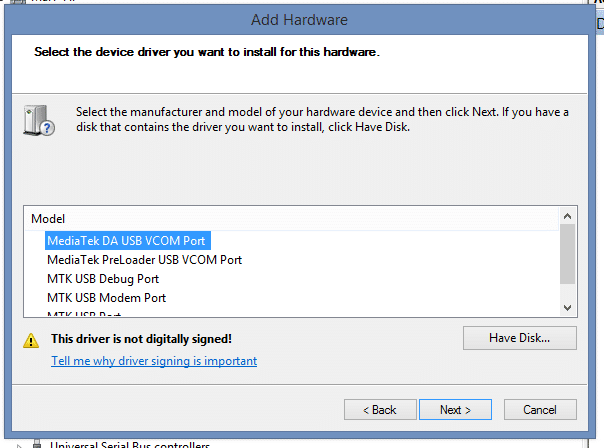
Step 4: Now in Add Hardware Wizard click on Next >> Install the Hardware that i manually select from a list (Advanced) >> Show All Devices >> Next >>Have a Disk >> Browse, Now select any inf file from where you extracted the downloaded drivers.
Step 5: Now click on Next on the wizard to install the drivers and when promoted for security issue just click on install anyway to finish the driver installation.
Step 6: That’s it after clicking on Finish Restart your PC and use your tool with VCOM Drivers.
If you face any problems then please comment below.
How to Root and Install TWRP Recovery in Micromax A121 Canvas Elanza 2
Micromax Canvas Elanza 2 A121 is probably the only Qulacomm device by Micromax at this price range in its canvas series.
Now before proceeding further to our rooting and CWM section lets have a quick view on its specs.
Micromax Canvas Elanza 2 A121 is a 3G Android dual sim smartphone with a 5-inch TFT HD Touchscreen display. The phone is powered with 1.2 GHz Qualcomm MSM8212 Quad-Core Processor and it runs on Android 4.3 Jelly bean OS. With 8 Mega Pixel rear view camera, the phone offers high quality image capturing. If you are looking for a smartphone under 10000 INR with good features, then Micromax Canvas A121 would be the ideal choice.
How to Root Micromax A121 Canvas Elanza 2 :-
WARNING: If your Micromax Canvas Elanza 2 A121 smartphone gets bricked or gets damaged while following the tutorial given below, we shouldn’t be held responsible. Proceed at your own risk.
Step 1 :-Enable USB Debugging in your device by going to Settings>Developer Options>Enable USB Debugging
(If you are not seeing Developer Options in settings then Go to Settings>About Phone>Tap 7 times on build number until a toast is displayed “You are now a developer” to Show Developer Options in Settings)
Step 2 :- Now download and install Micromax A121 USB Drivers on your PC from the below link.
Step 4 :- Now after installing VROOT open it and Connect Your phone with USB Debugging enabled, VROOT will automatically detect your device.
Step 5 :- Now just click on “Root” buton in VROOT, it will begin rooting process. Your device will start several times, one the process is complete your device will be rebooted and VROOT will show you the success message.
Rooting with VROOT
That’s it, now you can Check Successful root by installing Root Checker app from Play Store.
If you face any problem then please comment below.
Install CWM Recovery in Micromax A121 Canvas Elanza 2 :-
Please Make sure that you have a rooted device to install Recovery.
Now before proceeding further let us have a quick view on Waht TrueCaller is?
TrueCaller is basically a mobile application which finds contact details globally given name or telephone number, and has an integrated caller ID service to achieve call-blocking functionality and social media integration to keep the phonebook up-to-date with pictures and birthdays. The name TrueCaller comes from the app being able to show the True name of the Caller. The client is available for Android, BlackBerry OS, iOS, Series 40, Symbian s60, BlackBerry, and Windows Phone.
TrueCaller Premium Account Features :-
Premium version of truecaller helps you in doing more with their service, well below are some of the awesome premium features.
See who saw your Profile – Being a validated Truecaller Premium user enables you to see who is seeing your individual profile. You can see the number of minutes ago somebody saw your profile!
No more Advertisement – Take pleasure in checking out People You May Know, determining numbers, and getting one of the most from your Truecaller experience totally advertisement complimentary.
Month-to-month Contact Demands – At the start of each month while you are a Truecaller Premium user, you will certainly get 30 contact demands. These contact demands can be utilized to get in touch with somebody with Truecaller? s call search. An SMS message will certainly be sent out to them for their consent for you to see their contact information.
How to Get TrueCaller Premium Account for 2 Months for Absolutely Free :-
Normally the TrueCaller premium account for android users cost like Rs.55/month but TrueCaller is officially offering One Yearof Premium account to any android or iOS user just to promote their premium feature and also to let you know what Premium account can do.
Step 1 :- Open Trucaller App in your Android Device or if you don’t have it installed then install it from play store from below link.
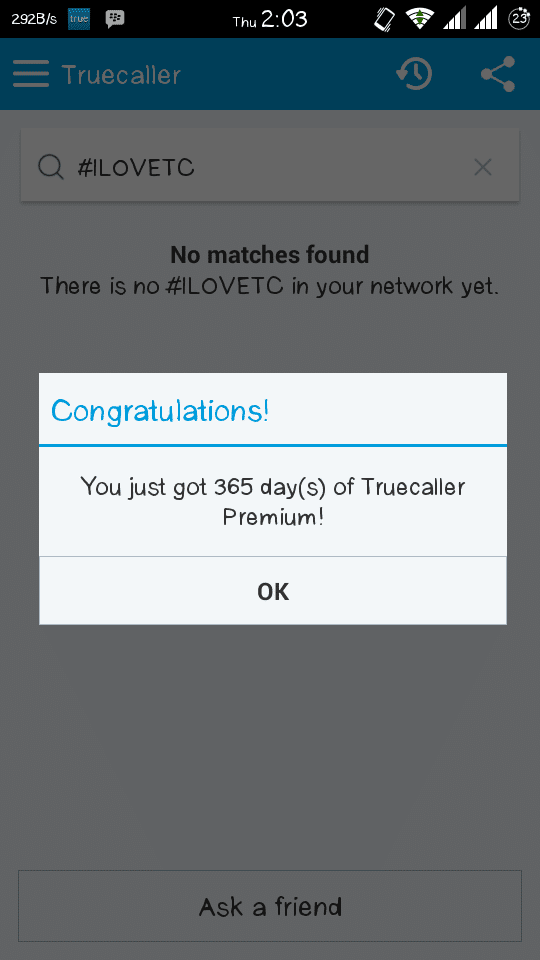
Step 2 :- Now under the search type #ILOVETC and click on it, now your PROMO CODE will be accepted your account will be upgraded to the premium version for 1 Year.
TrueCaller Premium Account for One Year
That’s it, now you can enjoy premium version of truecaller for free without any interruptions, enjoy using app without any advertisements, search for the one who searched for you and you can even contacts directly, so have fun and do share this post with your friends.
Before going through the giveaway process first lets have a quick view on it features.
Special Features of Bitdefender Internet Security 2015 :-
Bitdefender Internet Security 2015 comes with many new features that are unique and somewhat amazing. Apart from providing the best in class security from viruses and attacks, it keeps your system running at good pace, by optimizing it in many ways. It can also work in complete auto-pilot mode, and take decisions whenever it founds any problem that needs to be addressed, just to provide you a distraction free environment. So below are some few major features of Bitdefender Internet Security 2015 edition.
Disk Defragmentation: The default Disk Defragmenter application included in Windows is not quite efficient, and that is why we search for other alternatives that do a better job. But Bitdefender Internet Security, has a built-in tool to defragment drives, and it also informs you if the defragmentation is required in the first place.
Autopilot Mode: Bitdefender Internet Security (BIS) 2015 comes with an autopilot mode, which when active, will force BIS to take actions which otherwise would require your input. This makes the application work quietly in the background, so that you can work distraction free.
Optimizing Your Computer: Most of us with a little technical knowledge, tend to buy programs to clean up the registry. This is because the Windows registry with errors can slow your PC big time. Bitdefender Internet Security includes a registry cleaner that cleans the registry and makes it free of errors. It also has a disk cleanup tool that deletes the junk files from your hard drive. This helps in obtaining the better processing speed from your PC, no matter how old your windows installation gets. And all of this is done with a single click of your mouse.
Privacy Cleaner: We all browse stuff on the internet that we want no one else to know. But clearing everything from every browser can become a little difficult. Bitdefender Internet Security comes with a Privacy Cleanup tool that cleans all the files that can pose a privacy risk.
Scan Files Easily: Bitdefender Internet Security 2015 comes with a security widget, on to which you can drop the files you want to scan immediately. The widget stays on your desktop and also reports about any problem that the program encounters.
Remote Security: Bitdefender lets you scan and protect your devices remotely by accessing your Bitdefender account online. This can be done for all your devices that have Bitdefender Internet Security installed.
Vulnerability Scanner: With a click of a button, Bitdefender Internet Security informs you about all the outdated programs installed on your machine. The program also informs you about any Windows Updates and security patches that are available for you to download.
This makes sure that all the applications on your system have the best and the latest security fixes, and no one is vulnerable to any attack, which makes your PC secure too.
Safe Search: BIS tells you about the safety of the links that are displayed on Google and Bing search result pages. This makes sure that the links you open are safe, because you know about the links even before you open them.
Safego: Safego is a unique feature in Bitdefender Internet Security, that connects with your Facebook account and scans the links in your news feeds. It then prevents you from opening any malicious links that gets accidentally/deliberately shared by your Facebook friends or by the pages you follow.
Smart Profiles: Bitdefender Internet Security automatically detects when you play, work or watch movies and adjusts the background apps accordingly, to give you the computing power you need.
Get Bitdefender Internet Security 2015 with Genuine License for Free :-
You will get Bitdefender Internet Security 2015 with License for 180 days with this GiveAway.
Step 2 :- Now fill the Valid Email Address and Security Code in the box provided and then click on “GET FREE LICENSE” button to get you license code along with download link your email address.
Step 3 :- Now Check you Email Address, you will get License code and Download link in your inbox.
Step 4 :- Now download the program and enter the license code when it asks while running setup.
That’s it, you will get 180 days of free Genuine subscription.
If you face any problem then feel free to comment below.
Get all the latest GiveAways directly on your Email, Subscribe to our Mail List :-
Upgrade Micromax A120 with Official Android 4.42 Kitkat Firmware.
Canvas 2 Colours A120 is another decent smartphone launched by Micromax at a decent price, Micromax also guarantees Android 4.4.2 Kitkat update over FOTA but they didn’t launched it over OTA till now, however MyPhone (a brand of Philippines who sells Micromax Smartphones as rebranded) has provided kitkat update on their same smartphone and is working all fine for Micromax Canvas 2 Colours A120.
This Update is also being provided by Micromax only if you visit one of their service center.
In this tutorial i will post about how to install this KitKat update in your Micromax A120 without going to any service center.
How to upgrade Micromax A120 to Android 4.4.2 Kitkat (Official) :
Before proceeding further please make a backup of your device with CWM Recovery or MTKDroid Tools.
Step 1 :- Firstly Download Required PC Drivers for A120 from the below link.
Step 3 :- After downloading the Zip of KitKat Firmware & Drivers From The Above Links, Extract Them Into A Separate Folder into your PC. [Please Turn off Your Anti-Virus During The Process For Some Time.]
Step 4 :- Now Install The Extracted Tinno Driver From The Folder. (If A Type of Security Pop-Up Comes Then Simply Click install This Driver Software Anyway.)
Step 5 :- Now Switch-Off You Canvas 2 Colors, Remove Battery & Re-Insert It to Ensure that its Properly Switched Off.
Step 6 :- Next Open SP-Flash Tools From The Same Extracted Folder.
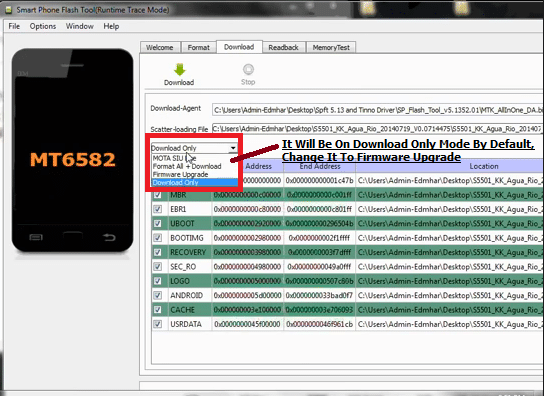
Step 7 :- Now click Click Scatter Loading & Select The ‘MTTK6582_Scatter.txt‘ From The Directory Where KitKat Firware and also change the Download Only into Firmware Upgrade (See the below image)
Upgrading Micromax A120 with SP Flash Tools
Step 8 :- Hit the Download button and SP Flash Tools will start searching for your device.
Step 9 :- Now connect your device with a USB Cable in the switch off mode.
Step 10 :- Your device will be detected by SP Flash Tools and Upgrade Process will start.
Step 11 :- The process will complete in 3-4 minutes and then a success popup will appear, now disconnect your phone reinsert its battery and power it on.
That’s it, FIrst boot will take about 4-5 minutes wait for it and enjoy official kitkat.
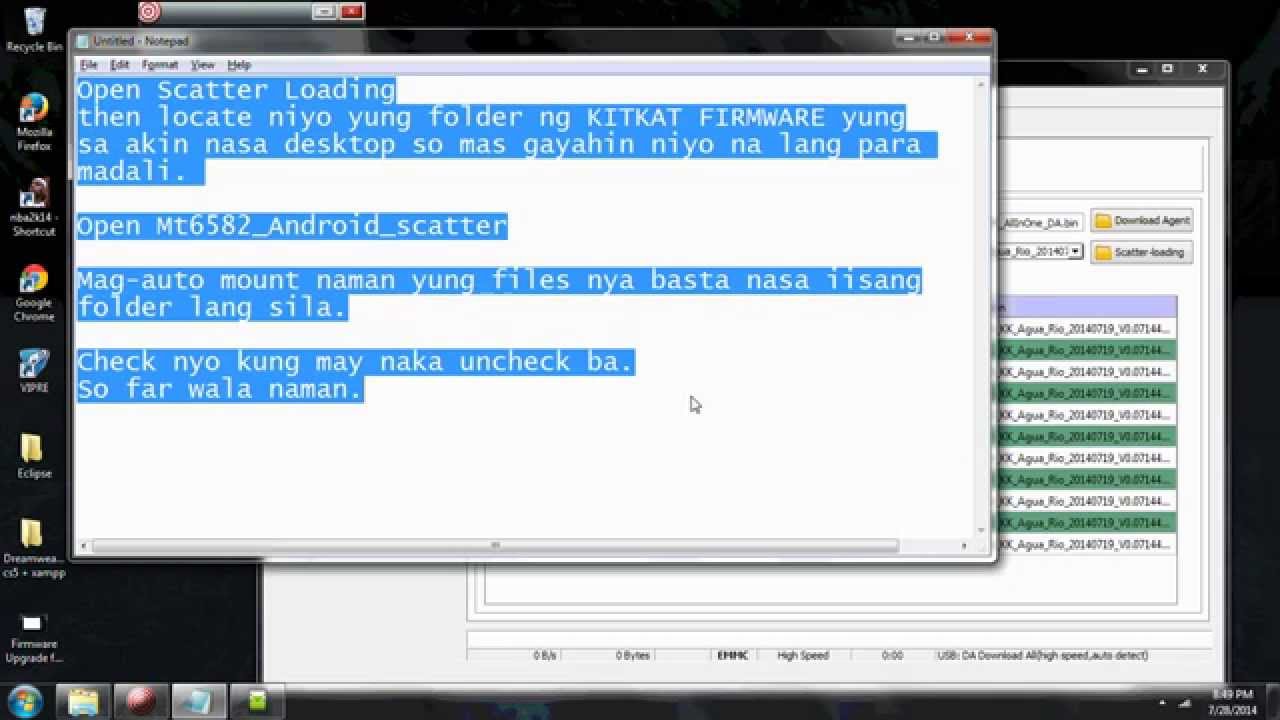
Video Tutorial :-
See the below video for detailed tutorial, its for MyPhone Agua Rio but its the same as A120(Its the same A120 rebranded as MyPhone Agua Rio) :-
Screenshots of A120 after Kitkat upgrade :-
If you face any problem during installation then please feel free to comment below.
Viber has launched an online Internship Program for college students providing Free certificates to them from Viber and a chance to win a World Tour. Go through the below article to know more about this program and how to participate in it.
About the Program :-
The program is basically for promoting the viber and its features across the web by inviting your friends on Facebook and Twitter.
It is doing what you love and sharing it with the world as part of Viber’s College Brand Ambassador Program.
As a #GoodVibes college ambassador you would lead the #GoodVibes campaign in your own way. Share any content – status, pics, music, links, selfies, sports activity, and just hash tag #GoodVibes, across social media platforms of your choice. Your role would be to encourage more people around you to share #GoodVibes. There will be a few more simple tasks to take up on our #GoodVibes messenger Viber. We aim to take this campaign viral and your role would be to make it happen with the rest of us.
You just have to register your self with your facebook ID and perform some basic tasks like liking thier page, following viber on twitter, install app, sharing conversation screenshots and answering some basic questions about viber.
Each task that you will complete on viber will give you points, higher the points higher the ranking and more the chances of winning the world tour.
Win a Free World Tour – GoodVibes
At the end of this program you will be provided with a Certificate which you will receive on your Email.
How to participate?
Visit www.thegoodvibes.in and register yourself with your facebook account.
Now in the next step fill up your details including your city, gender and College name.
After that you will get levels on your screen, you just have to successfully complete these levels by performing their tasks, each task that you complete will give you points and these points will help you grow your ranking, higher the ranking more the chances off winning the World Tour plus lucky winner will also get a chance to win various goodies like iPad Mini, Pendrives, Headphones, T-Shirts and many more.
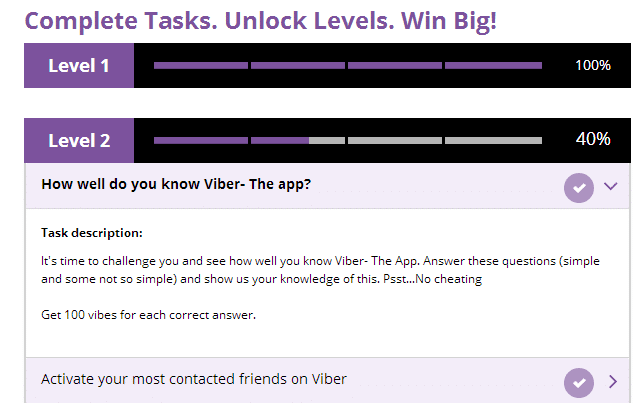
The levels basically consists of few easy tasks like the Level 1 includes linkin Viber’s page on Facebook and following it on Twitter.
Level 2 in GoodVibes by Viber
The next level will ask you for a screenshot of your conversation with anyone on viber.
Complete all the levels and earn points and you will also get points for inviting you facebook friends.
So, what are you wating for now, go and get you certificate from Viber.
How to Fix “Limited” or No Connectivity issue in WiFi with Windows 8 and 8.1
Many a times while connecting to a WiFi Network in Windows 8 and 8.1 we face a problem saying “Limited Connectivity” and in that case we are not able to access Internet. This happens with me many a times but now i found a solution to fix this problem.
Limited Connectivity in Wifi Network
How to Fix “Limited” or No Connectivity issue in WiFi with Windows 8 and 8.1 :-
In Windows Limited connection means the PC has successfully connected to the router, but the PC wasn’t assigned a valid IP address, so you can’t actually get to the Internet.
Below is the working solution to fix this problem.
Step 1 :- Go to Start screen type command prompt in search and select command prompt and run it as an Administrator.
Step 2 :- Now in Command prompt windows type “ipconfig /all” (without the quotation marks), and then hit the‘ENTER’ key.
That’s it, Now just wait and watch how you limited connectivity converts into a working connection.
This trick worked for me and might also work for you.
If you any problem regarding this then please comment below for instant solution.
")


")


")


")