Microsoft has just released the Windows Phone 8.1 Developers Preview for all Windows Phone 8 Devices. This Update is not yet available for general public but however who are willing to install this update can do so by following this tutorial.
Installing Windows Phone 8.1 Developers Preview :-
Things that you require :-
A Device running Windows Phone 8
A Computer with Internet Connection
Microsoft Account
Cautions :- Do this at your own risk, i may not be responsible for any damage to your devices, however you can always install a Fresh Copy of Windows Phone 8 by following this tutorial on XDA Developers Forum.
Now for Installing WP 8.1 follow the mentioned guide :-
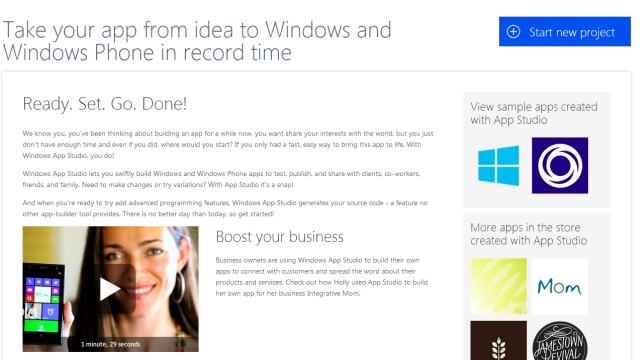
Step 1 :- Firstly go to appstudio.windowsphone.com and Sign up as a Developer by clicking on the big blue button on right side which says “Start New Project“.
Sign Up as a Developer for WP 8.1
Step 2 :- Now Sign in with your Microsoft Account.
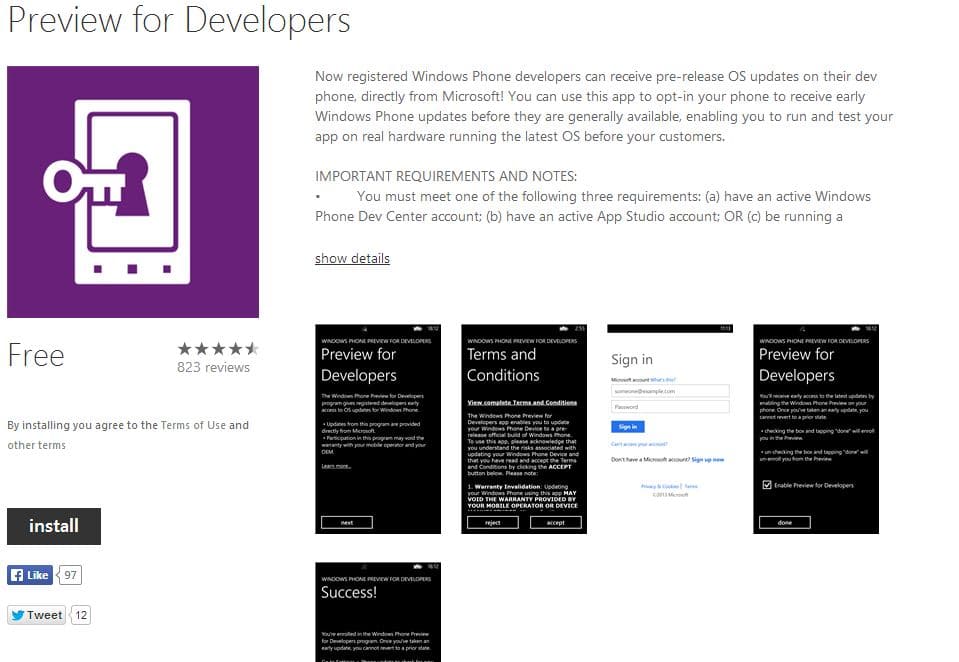
Step 3 :- Now go to Windows Phone Store and Download “Preview for Developers” App on your device.
Download and Install Preview for Developers App from Windows Store
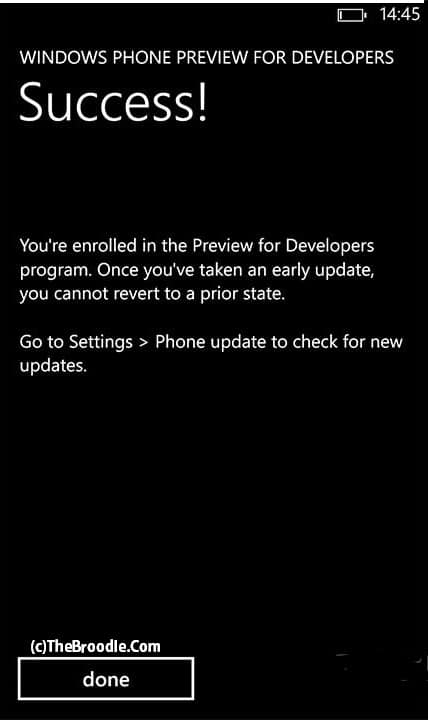
Step 4 :- Now on your device open the app and Sign in with the same Microsoft ID and Agree the Terms and Conditions.
Step 5 :- Next, go to ‘Phone update’ in the Settings menu and click ‘Check for updates’ in your WP 8 Device. Before installing 8.1, your phone will most likely download the 8.0.10322.71 update. This is to just to prepare the phone for WP 8.1. After a reboot, head again to ‘Phone update’, check for updates once more. Now, the Windows Phone 8.1 update will download and install automatically.
Installing Windows Phone 8.1
That’s it, Once your phone Boots up you will be in the new Windows Phone 8.1, I tried this on my Nokia Lumia 920, and it worked just fine.
As we all know that TeamViewer is one of the most popular Software Application program for Remote Desktop Controlling and is available on almost all platforms including Android and Windows, but this week Google has launched its own application for Remote Desktop Controlling named “Chrome Remote Desktop” which enables you to control your Windows Desktop from another PC or from your Android Smartphone.
Google Chrome Remote Desktop
How Chrome Remote Desktop Works ?
For Chrome Remote Desktop to work you need to have Chrome Browser running on your system, it may be on Windows, Linux or Mac.
How to Use Chrome Remote Desktop :-
With Windows
Step 1 :- First of all download and install Google Chrome Browser on your system and Sign in to it with your Google Account.
Step 2 :- Now download and install Chrome Remote Desktop Application and be sure to give it Rights requested.
Step 3 :-Start the software and choose “Remote Assistance” for limited tech support or “My Computers” for full-desktop access
Step 4 :– Follow the one screen guidance and then Control another PC from your PC.
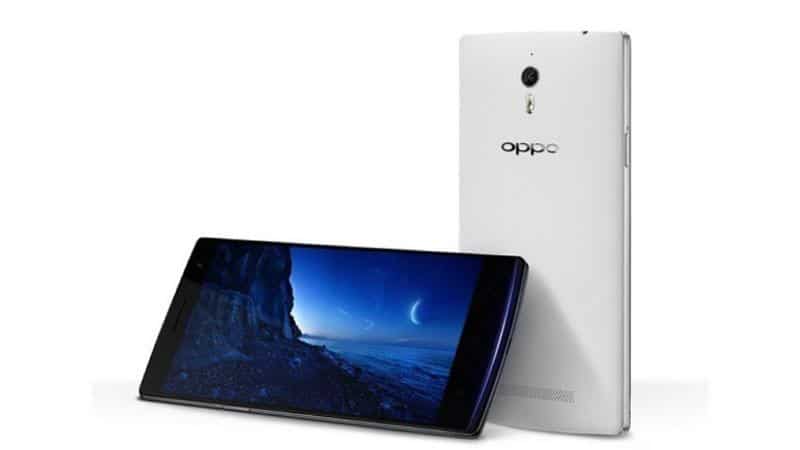
The Chinese smartphone maker Oppo is about to launch its flagship smartphone Find 7 in India in mid 2014.
Currently Oppo has already selling its 4 smartphones in India.
Oppo Find 7 White
Here is a quick list of specs of Oppo Find 7 :-
5.5 inch Quad HD Display with 1440 x 2560 pixels of resolution.
3 GB of Ram and 32 GB of Internal Storage
4G LTE and USB OTG Support
13 MP Auto focus Primary Camera with dual led flash (4128 x 3096 pixels of resolution)
5 MP Secondary Camera
Android 4.3 Jelly Bean (Expected Kitkat)
Qualcomm Snapdragon 801 Chipset
Quad Core 2.5 Ghz Processor
Aderno 330 GPU
3000 mAh Battery
According to Mr. Tom Lu, CEO of Oppo Mobiles India, “India is emerging as the fastest growing smartphone market in the world. As such, we’re very optimistic about the growth of the Oppo brand.” Lu said the company is planning to improve after sales service and at the same time focus on market expansion to attract more buyers.
As mentioned by the Google last weekend, they are opening a few spots in glass explorer program. They also mentioned that the spots in the programs are for US Residents only.
“Every day we get requests from those of you who haven’t found a way into the program yet, and we want your feedback too,” Google said in a post on Google+ last Thursday. “…We’re excited to meet our new Explorers, and we can’t wait to hear your thoughts about Glass.”
Today on Tuesday i received an email from Google Glass saying that the Glass is now available for purchase.
Here is the screenshot of email that i received :
Email from Google Glass Team
The few restrictions that apply for purchase are :-
Explorer must be US Resident
Must be 18 years or older
Should provide a US Shipping Address
[alert style=”yellow”] For US Residents Google Glass is available to Purchase for $1500 + Taxes [/alert]
To get your own Google Glass follow the below link.
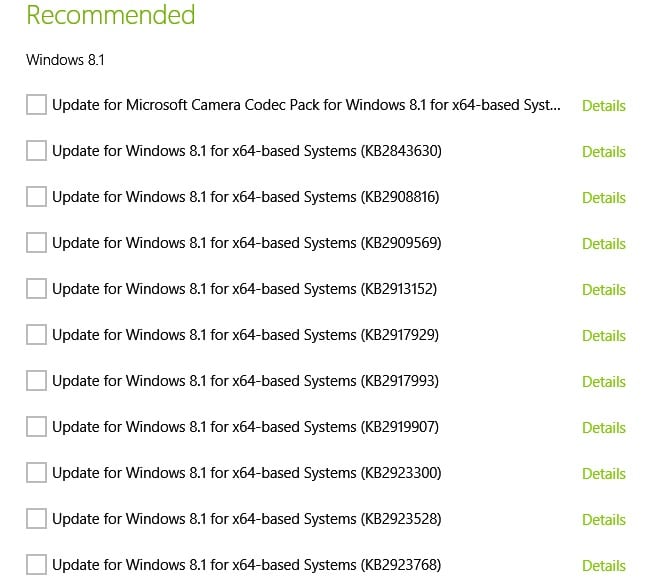
Microsoft has recently released a first update for its OS Windows 8.1 and is available for free to everyone.
On 6th April Microsoft announced that the Windows 8.1 update will get released on April 8th, and we already have the download links available for x86, x64 and ARM devices.
Today i am sharing an easiest guide to update your Windows 8.1 to latest Update 1 for absolutely free.
How much drive space you will be needing to install the update :-
In most cases, you’ll need the following amount of available drive space on your PC to download and install the Windows 8.1 Update, depending on your version of Windows:
Windows 8.1 (64-bit version) : 2 GB
Windows 8.1 (32-bit version) : 0.8 GB
Windows RT 8.1 : 1.1 GB
These amounts are estimates, so you might need slightly more or less available drive space for the update. To learn how to check the current space on your PC and free up space
Direct Download Windows 8.1 Update 1 Manually
For this firstly you need to download appropriate Setup Update for your Windows 8.1 OS Environment, to download go to the below link.
Step 1 :- Please make sure that you have rooted device and installed CWM Recovery.
Step 2 :- Backup your current ROM using CWM Recovery.
Step 3 :– Download the ROM zip file from below links.
Step 4 :– Put the zip file in the root of your sdcard.
Step 5 :- Now go to Recovery Mode and do a complete wipe of cache, data, dalvik cache and system and then Select Install Zip From SDCard and Flash MIUI Zip File.
Wait for few minutes, till it installs and Reboots.
Step 2 :- Now Enable USB Debugging in your Canvas Knight by Going to Settings >> Developer Options >> USB Debugging >> Tick to enable it.
(Developer Options are hidden in Android version 4.2.2 and above, to make them visible go to settings >>About Phone and tap 5 times continuously on Built Number to enable developer option.
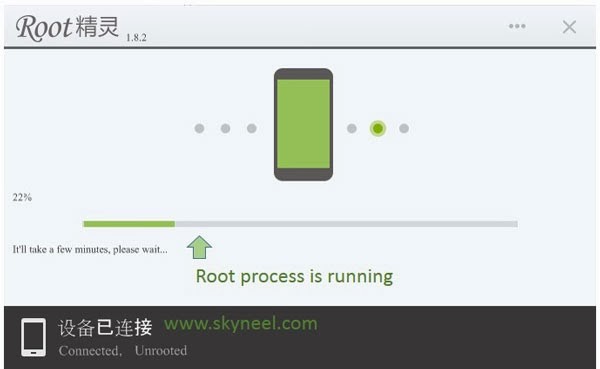
Step 3 :- Now Download and Run RootGenius Application on your desktop.
Step 4 :- Once RootGenius is launched, Connect your Micromax Canvas Knight to your Computer with USB Cable.
Step 5 :- Once your device is connected, RootGenius will automatically detect your device.
RootGenius Detects your Phone
Step 6:- Now click on Root Now button to begin the process.
Step 7 :- Wait for few minutes till RootGenius roots your phone.
Rooting Micromax Canvas Knight
Step 8 :- After the rooting process completes, unplug your smartphone, you will see a KingUser application your app drawer, it will act as a SuperUser for your device. You can also install SuperUser application from Play Store, if you want.
KingUser Application in Canvas Knight
That’s it, you have successfully rooted your Canvas Knight.
Installing ClockWorkMod Recovery :-
Follow the below link for detailed CWM V.5.5.0.4 Installation instruction in Micromax A350 Canvas Knight.
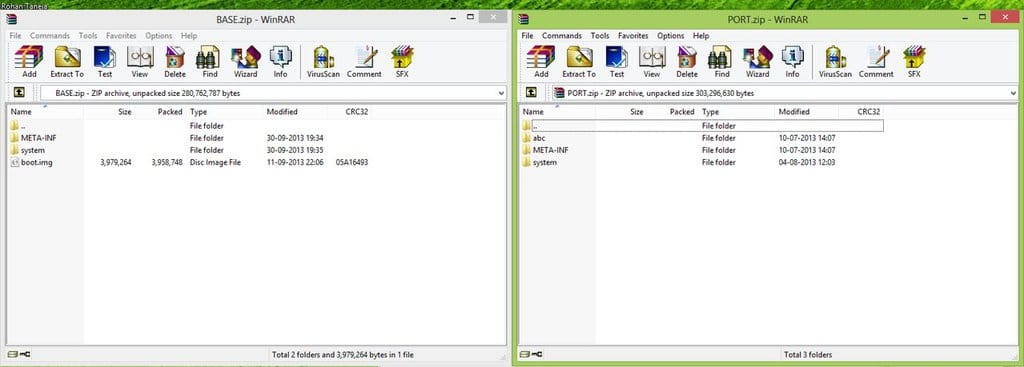
11. Go to /META-INF/in both the roms and drag and drop below files from Base Rom to Port Rom.
CERT.RSA
CERT.SF
MANIFEST.MF
12. Internal Memory Fix:
If You Face Bug Something like 0.00B internal storage then you can use this file to fix it.
In system/etc replace vold.fstab & vold.fstab.nand from base Rom to port Rom.
That’s it, Now you can Add or Remove System App from System/app folder, but make sure that the name of Apps must be without spaces.
Now .zip the Port Folder and Flash it in your Phone with Recovery, before flashing Please Make sure that you have Backed Up up device because in case of bricking i may not be responsible for that.
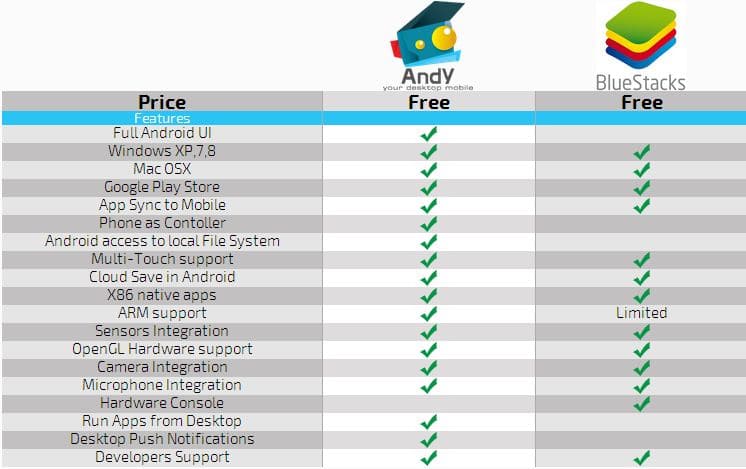
Now a days WhatsApp is one of the most Popular instant Massaging Application in the world and i available for free on Mobile Plateforms. But as we know that by using bluestacks app player we can use whatsapp on PC too by creating a Android Runtime Environment. We can also use bluestacks to run whatsapp but many of us face some problems in using it like it supports only 64 bit Computers, also it doesn’t supports Play Store, it requires minimum of 2 GB of Ram etc.
So to run WhatsApp Without bluestack we gonna need a software named Andy, which is similar to bluestacks but much better.