More
    Home Blog Page 203

    Root and Install CWM Recovery in Micromax A120 Canvas 2 Colours

    Before we begin lets have a quick eye on the specs of this Smartphone.

    Micromax Canvas 2 Colours A120 Specifications :-

    • 5-inch (1280 x 720 pixels) HD IPS display
    • 1.3 GHz quad-core MediaTek MT6582 processor
    • Android 4.2 (Jelly Bean)
    • Dual SIM
    • 8MP rear camera with LED Flash
    • 2MP front-facing camera
    • 3.5mm audio jack, FM Radio
    • 1GB RAM, 4GB internal memory (1.61GB user memory), 32GB expandable memory with MicroSD
    • 3G (HSDPA: 21Mbps, HSUPA: 5.76Mbps), WiFi 802.11 b/g/n, Bluetooth 4.0, GPS
    • 2000 mAh battery

    Rooting Guide (Without PC) :-

    Before going further please make sure that you have at least 80% battery and take a backup of your phone.

    Step 1 :- Firstly Download Framaroot.apk from the below link.

    Download Framaroot V1.9 apk from Dev Host

    Step 2 :- Now install framaroot in your device.

    Step 3 :- Next Open Framaroot app from your app drawer.

    Step 4 :- Now Select “Install SU” from the drop down list.

    Step 5 :- After that you will see three options “Boromir/Faramir/Barahir“, click on all of them one by one until you get a message of successful root.
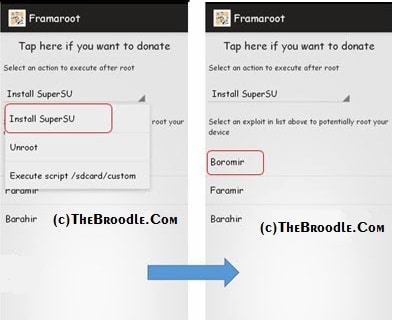
    Rooting Micromax A120 Canvas 2 Colours with framaroot
    Rooting Micromax A120 Canvas 2 Colours with framaroot

    Step 6 :- After successful root you will see “SuperSU” app in you app drawer, that’s the app for managing root permissions on your phone.

    That’s it you will now have a rooted phone, you can now proceed further for installing Custom Recovery.

    Installing CWM Recovery :-

    Before proceeding further please make sure that you have a rooted device.

    Step 1 :- Firstly download CWM Recovery Img from the below link.

    Download Recovery.img from Mediafire

    Step 2 :- Now play that downloaded recovery image in root of your SD Card.

    Step 3 :- Now download and install MobileUncle MTK  Tools from Google Play Store.

    Step 4 :- Next, run MobileUncle MTK Tools from your app drawer and grant root permissions to it.

    Step 5 :- On MobileUncle MTK Tools click on Recovery Update Option.

    Step 6 :- Now Click on recovery.img and click OK on the prompt dialogue box.

    Step 7 :- Wait Few Seconds, after that it will ask for Reboot, Reboot Your Device and Check your Installed CWM Recovery.

    That’s it, You have Installed CWM Recovery in your Phone, now you can install Custom Roms.

    If you face any problem then comment below.


    If you like this article then please subscribe to our mailing list for more  canvas 2 colours tutorials and Custom Roms.


    How to Send any Photo or Video from Gallery in Snapchat

    Snapchat is a one of the most popular Photo Messaging application available for smartphones.

    UPDATE : This method is no longer working, see the updated tutorial for this : Share any Photo from Gallery on Snapchat

    Using Snapchat users can take photos, record videos, add text and drawings, and send them to a controlled list of recipients. These sent photographs and videos are known as “Snaps“. Users set a time limit for how long recipients can view their Snaps after which they will be hidden from the recipient’s device and deleted from Snapchat’s servers. According to Snapchat in May 2014, the app’s users were sending 700 million photos and videos per day, while Snapchat Stories content was being viewed 500 million times per day.

    it is entertaining to use Snapchat, still like any other app there are restriction. Till now you can only send those Photos and Videos that are taken from SnapChat Camera, making it difficult to send other Photos and also viewing in Gallery.

    But, there is an app named “SnapHack”, through this app you can send any photo or video from gallery and even you can also save Photos that you receive from users.

    Till the last month it was available in Play Store but due to some privacy violation it was removed from Play Store but you can download and install it manually from the below link.

    How to Send any Photo or Video in Snapchat Through Android?

    Step 1 :- For this firstly you need to download SnapHack.apk from the below link.

    Download SnapHack from Google Drive

    or

    Download SnapHack from 1Mobile

    Step 2 :- After that install SnapHack.apk in you android Device.

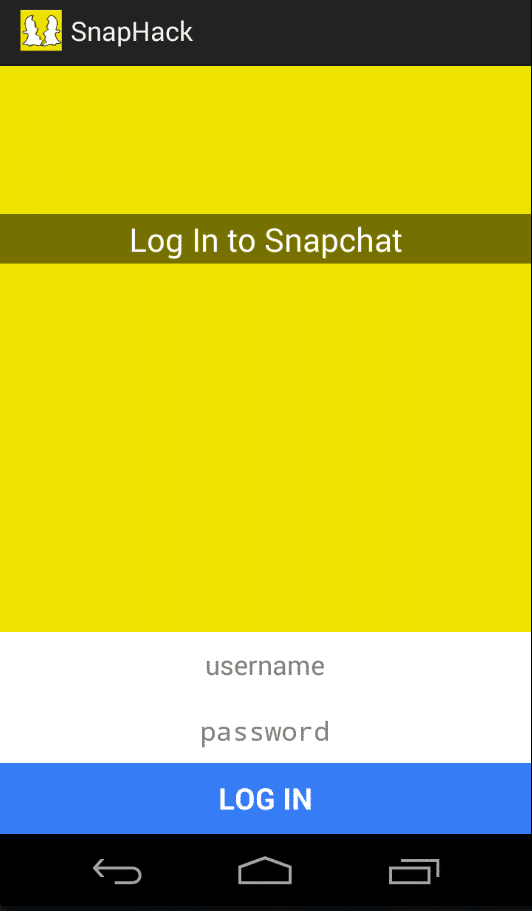
    Step 3 :- Next, Login with your SnapChat Account.

    Login to SnapChat with SnapHack
    Login to SnapChat with SnapHack

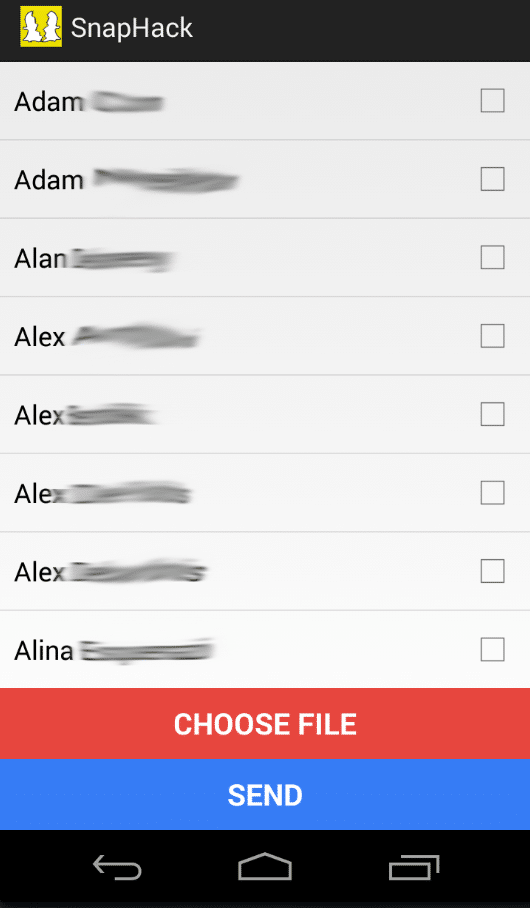
    Step 3 :- After Loging in, click on Choose File button to choose your Photo or Video from Gallery and then select your contact to send.

    SnapHack - Send any Photo or Video from Gallery
    SnapHack – Send any Photo or Video from Gallery

    That’s it, now you can send. any photo or video from Gallery and you can even save Snaps that you receive.


    UPDATE : This method is no longer working, see the updated tutorial for this : Share any Photo from Gallery on Snapchat


    If you like this article then please subscribe to our mailing list.


    Top 100 Most Popular and Trending Hash Tags to use on Instagram

    Instagram is one of the most popular and most used online photo sharing, video sharing and social networking service that enables users to take pictures from their smartphones and apply digital filters to them and share them on variety of social networks like, Facebook, Twitter, Tumblr, Flickr etc.

    Instagram was acquired by Facebook in April 2012 for approx US $1 Billion.

    The main features that instagram provides is that linking your photos and videos with different hashtags to that different users can view them when they came searching for specified hashtags.

    Today we are sharing this ultimate list of Most Used Hash Tags on Instagram.

    You can link your photos and videos with these tags to make your post more popular.

    Top 100 Most Trending and Most Popular Hash Tags on Insta :-

    Sr No.(#) Hash TagsNo. Of Posts
    1.#love543,896,811 posts
    2.#instagood251,212,708 posts
    3.#me237,149,219 posts
    4.#follow207,211,385 posts
    5.#tbt203,086,684 posts
    6.#cute202,286,469 posts
    7.#like193,577,034 posts
    8.#photooftheday189,042,011 posts
    9.#followme182,839,739 posts
    10.#tagsforlikes170,798,268 posts
    11.#happy164,631,854 posts
    12.#beautiful162,321,970 posts
    13.#girl162,169,787 posts
    14.#picoftheday139,720,348 posts
    15.#instadaily125,619,076 posts
    16.#fun123,413,216 posts
    17.#smile119,450,672 posts
    18.#igers118,032,350 posts
    19.#friends117,159,744 posts
    20.#selfie116,854,766 posts
    21.#like4like116,449,986 posts
    22.#summer112,135,765 posts
    23.#fashion105,513,991 posts
    24.#instalike104,899,982 posts
    25.#food104,288,288 posts
    26.#swag103,685,910 posts
    27.#amazing99,234,534 posts
    28.#tflers98,915,569 posts
    29.#bestoftheday95,532,959 posts
    30.#instamood88,484,779 posts
    31.#follow4follow87,569,466 posts
    32.#style83,363,230 posts
    33.#lol81,586,426 posts
    34.#l4l74,400,575 posts
    35.#likeforlike74,392,913 posts
    36.#pretty73,636,886 posts
    37.#nofilter72,470,763 posts
    38.#webstagram72,407,202 posts
    39.#family72,034,093 posts
    40.#my71,408,523 posts
    41.#iphoneonly71,315,842 posts
    42.#wcw70,818,942 posts
    43.#life70,121,136 posts
    44.#tweegram69,032,441 posts
    45.#hair67,022,210 posts
    46.#all_shots65,782,034 posts
    47.#instago64,531,968 posts
    48.#sun63,278,494 posts
    49.#bored62,201,916 posts
    50.#instacool61,790,383 posts
    50.#followforfollow60,803,973 posts
    51.#f4f60,599,727 posts
    52.#instafollow59,919,067 posts
    53.#eyes59,192,650 posts
    54.#cool58,666,170 posts
    55.#funny57,251,192 posts
    56.#nice55,373,502 posts
    57.#look54,702,506 posts
    58.#girls53,491,337 posts
    59.#party50,989,892 posts
    60.#20likes49,927,982 posts
    61.#followback49,622,365 posts
    62.#night48,914,111 posts
    63.#colorful48,848,880 posts
    64.#sky48,532,708 posts
    65.#art47,872,171 posts
    66.#instacollage47,761,675 posts
    67.#shoutout47,509,325 posts
    68.#pink47,309,808 posts
    69.#hot46,927,672 posts
    70.#christmas46,707,076 posts
    71.#music46,653,234 posts
    72.#repost46,455,747 posts
    73.#baby46,007,133 posts
    74.#beach45,474,288 posts
    75.#mcm45,140,844 posts
    76.#iphonesia44,613,513 posts
    77.#beauty44,418,778 posts
    78.#nature44,199,216 posts
    79.#throwback43,503,805 posts
    80.#blue42,004,230 posts
    81.#day41,618,240 posts
    82.#black41,138,682 posts
    83.#photo40,761,769 posts
    84.#makeup40,066,701 posts
    85.#throwbackthursday39,374,656 posts
    86.#boyfriend39,252,308 posts
    87.#harrystyles39,114,245 posts
    88.#fitness38,961,643 posts
    89.#dog38,784,568 posts
    90.#instalove38,401,869 posts
    91.#good38,122,597 posts
    92.#awesome38,118,950 posts
    93.#loveit37,812,458 posts
    94.#best37,635,192 posts
    95.#new37,074,145 posts
    96.#i36,735,743 posts
    97.#onedirection36,718,462 posts
    98.#sweet35,986,653 posts
    99.#home35,561,725 posts


    That’s it, Now Start Tagging your Photos and Videos with these popular tags and get more likes and comments on them.

    Source :- Websta :- The Best Instagram Web Viewer

    Top 5 Best Free Alternatives of WordPress for Bloggers

    WordPress in now a day one of the most popular and most trusted Bogging Platform available, apart from blogging WordPress is even capable of designing Several institutional and business websites with high quality Scripts.

    Currently WordPress is being used by more then 60 Million Websites. The main features of WordPress includes Switching between thousands of beautiful themes, different plugins, easy to use dashboard and many awesome features.

    Today we are posting about some of the best blogging platforms rather the WordPress.

    Below is the list of Popular Free Blogging Platforms :-

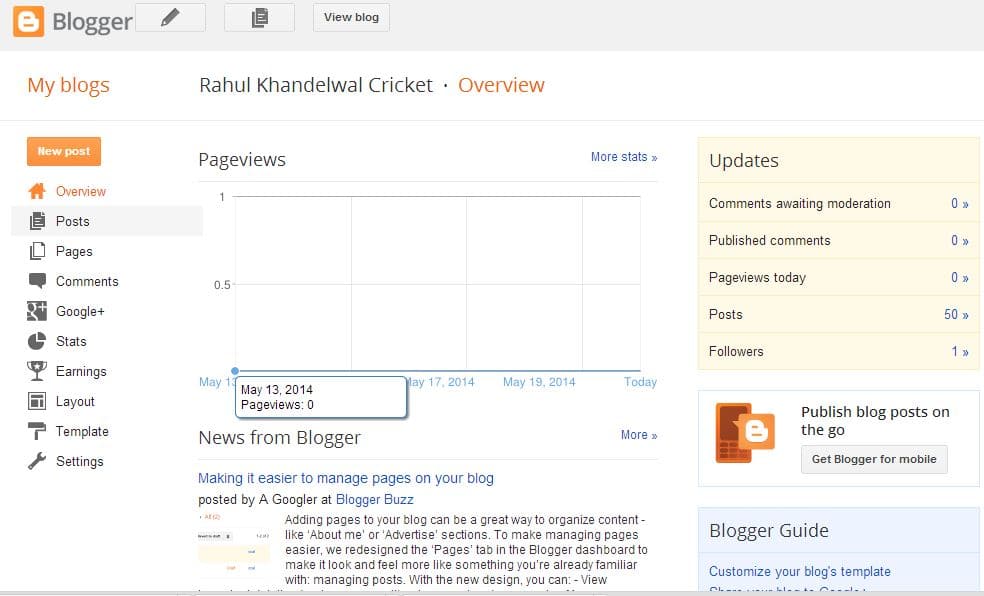
    1. Blogger 

    Blogger is one of the oldest and most popular Blogging Platform, its owned by Google itself and is also one of the most trusted platform on the web. Blogger also provides a sub domain service in case you don’t have your domain.

    So if you are not willing to use WordPress or you are new in the Blogging Industry then Blogger in best alternative for you.

    Blogger - Blogging Platform by Google
    Blogger – Blogging Platform by Google

    2. Tumblr

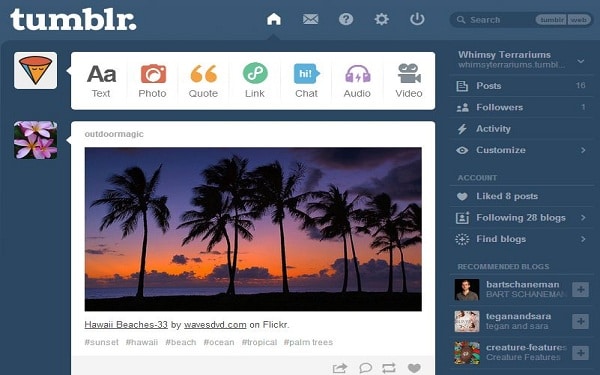
    Tumblr is basically designed for blogging and social sharing. Stripping away all the scary backend of a blog platform, Tumblr makes it dead simple to share a blog post, quotes, video, photo, link or audio file. Tumbler was Purchased by Yahoo and is now owned by Yahoo! itself.

    Tumblr - Free Blogging Platform
    Tumblr – Free Blogging Platform

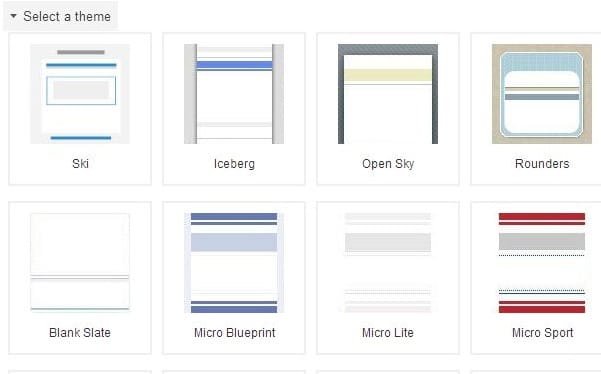
    3. Google Sites

    Its for those who wants to stay with Google. Google sites offers a simple and amazing solution for website creation, it is actively more focused on Website Creation by blogging with Google Sites is also not a bad choice.

    Google Sites for Blogging
    Google Sites for Blogging

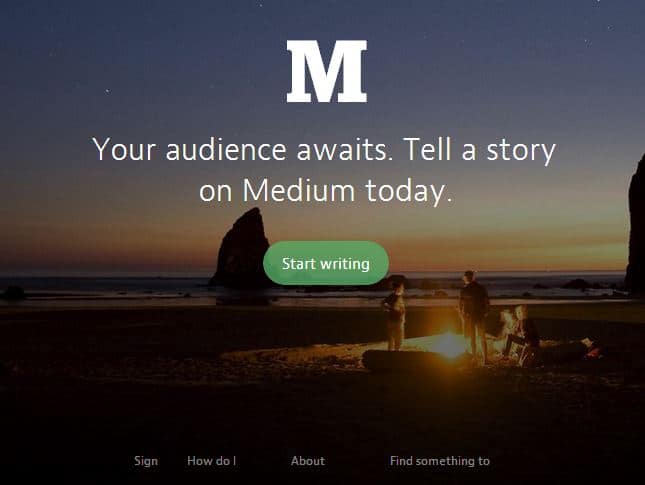
    4. Medium

    Medium is another platform for publishers and is completely owned by Twitter Founders, and is completely integrated with twitter, so if you have thousands of followers on twitter then you must try medium.

    Medium- Blogging Platform integrated with Twitter
    Medium- Blogging Platform integrated with Twitter

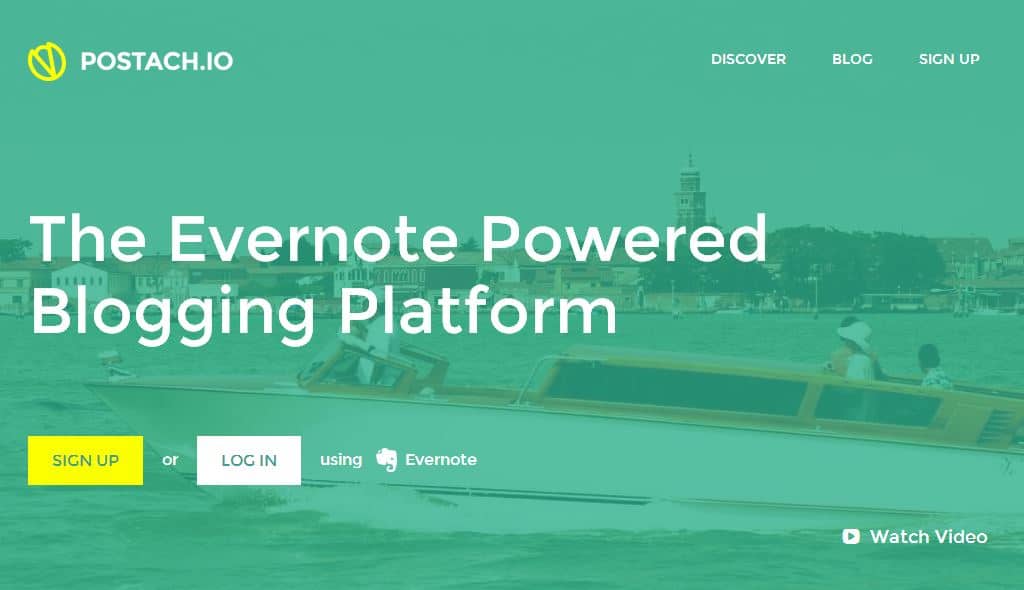
    5. Postach.io

    Postach.io is another blogging platform with more then 25,000 bloggers and is completely owned by the Popular Note Taking app Evernote.

    The main feature of this network is that i lets you create your posts directly from you smartphone with the evernote app.

    Postach.io also supports setting custom domain, disqus, google analytics and much more and include hundreds of beautiful themes.

    Postach.io - Blogging Platform by Evernote
    Postach.io – Blogging Platform by Evernote


    ZTE Nubia W5 : Features Windows Phone 8.1 with 4500mAh Battery and Snapdragon 801

    Few Weeks ago Microsoft launched its Most Awaited Windows Phone 8.1 Build 2014 and also announced that it will be freely available for Manufacturers.

    As a result many smartphone manufacturer companies entered in the Windows Phone Market. Micromax and LG’s WP 8.1 Smartphones already got leaked but now its ZTE.

    ZTE is planning to launch its Nubia 5 and it would be a very high – end device with Built in Snapdragon 801, 3GB of Ram, 64 GB Native Storage and a huge Battery.

    The Snapdragon 801 Comes with a Faster CPU and GPU Clock Speed.

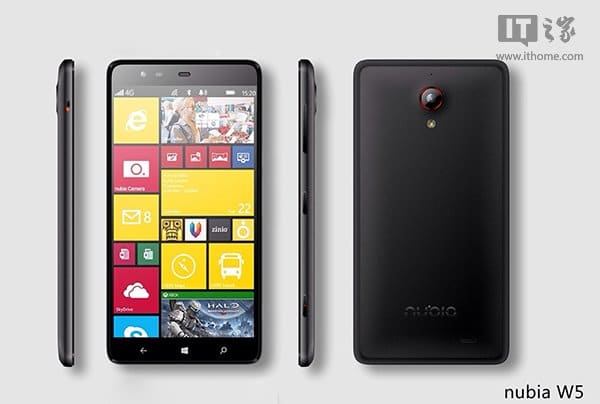
    The leak didn’t mentioned the screen size but from images we can conclude that it will be bigger, might be a phablet.

    ZTE Nubia 5 - Windows Phone 8.1 Device
    ZTE Nubia 5 – Windows Phone 8.1 Device

    Below are the detailed specs of this device :-

    • 4500 mAH Battery
    • Qualcomm Snapdragon 801 Processor
    • 3 GB Ram
    • Windows Phone 8.1 OS
    • 13 MP Camera with Optical Image Stabilization
    • 4G LTE Connectivity


    Top 5 Best Beautiful Android Themes for Go Launcher EX

    The main advantage of Having an Android SmartPhone among other Windows or iOS Devices is that we can customize its look and make it beautiful and unique very easily. We can use hundreds of different launcher and thousands of themes to make it more unique.

    There are hundreds of launchers available in Play Store for Customization but today we are discussing about the Best and Beautiful looking Themes for Go Launcher EX.

    Go Launcher EX is one of the Most Downloaded and Most Popular Android Home Screen Replacement App or we can call it Launcher available in the Play Store, Its absolutely free but some of its themes are paid.

    We are gonna discuss about some of the best Free Go Launcher EX Themes.

    Download Go Launcher EX :-

    Before Proceeding Further to themes you need to download and install Go Launcher EX in your Android Device, download it from Play Store by clicking below button.

    Download Go Launcher EX From Play Store


    Top 5 Best Free Themes :-

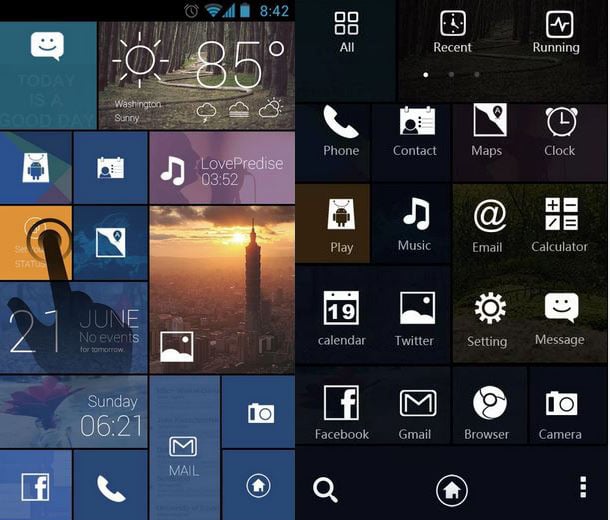
    1. Color Box Live Go Launcher EX Theme :-


    Color Box Live Theme for Go Launcher EX
    Color Box Live Theme for Go Launcher EX

    Download Color Box Theme from Play Store

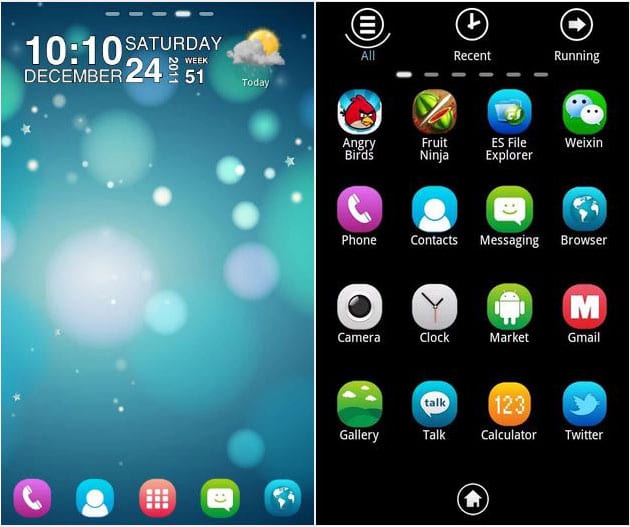
    2. ABLACK Go Launcher EX Theme

    Ablack Theme for Go Launcher EX
    Ablack Theme for Go Launcher EX

    Download ABLACK Theme from Play Store

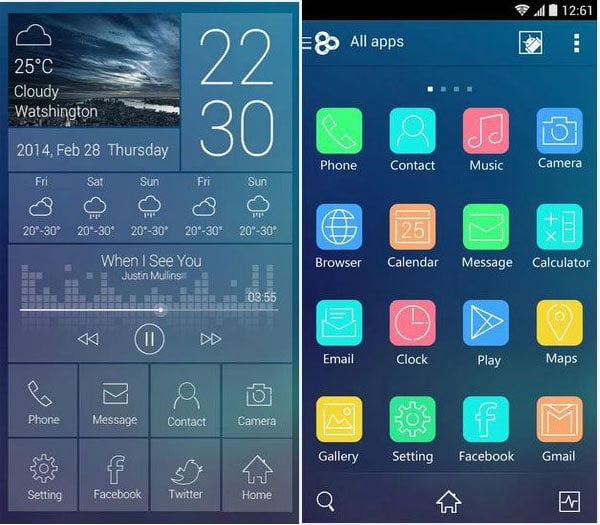
    3. Venus Go Launcher Live Theme

    Venus Go Launcher Ex Theme
    Venus Go Launcher Ex Theme

    Download Venus Theme from Play Store

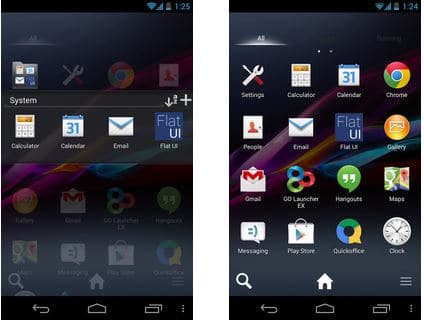
    4. Xperia Go Launcher EX Theme

    Sony Xperia Go Launcher EX Theme
    Sony Xperia Go Launcher EX Theme

    Download Xperia Theme from Play Store

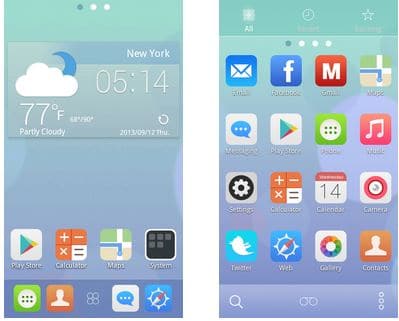
    5. ColorFul Day Go Launcher EX Theme

    Colorful day Go Launcher EX Theme
    Colorful day Go Launcher EX Theme

    Download ColorFulDay Theme from Play Store


    That’s it, now enjoy installing these themes and please do comment with your feed backs and suggestions.


    Top 5 Best Free Windows 8 and 8.1 Themes / Skin Packs

    Themes, Skin Packs or Transformations Packs all are ways of transforming your Windows OS look into awesome, beautiful, attractive, cool and sexy look.

    We are here to showcase Best Top 5 3rd Party Themes for Windows 8 and Windows 8.1 Users.

    Theme Installation Procedure on Windows 8 and 8.1 :-

    Before we proceed downloading new themes we need to Patch some Files in Windows 8 and 8.1 for 3rd Party Themes.

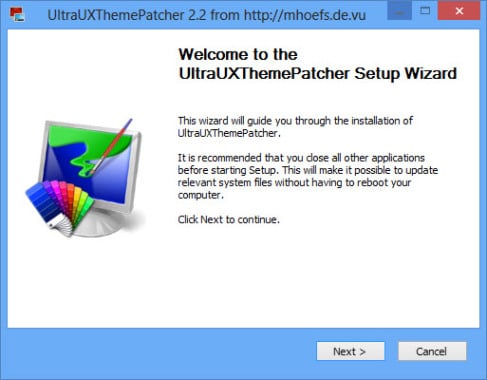
    For this you need to download UltraUXTheme Patcher from the below link. its the best tool available for Patching Windows Files.

    UltraUXThemePatcher for Windows 8 and 8.1
    UltraUXThemePatcher for Windows 8 and 8.1

    This program will run as your theme engine service so you can use any 3rd party visual style on all Windows operating system.

    Download Auto UXThemePather

    After Patching, proceed forward.

    Top 5 Best Windows 8 and 8.1 Themes :-

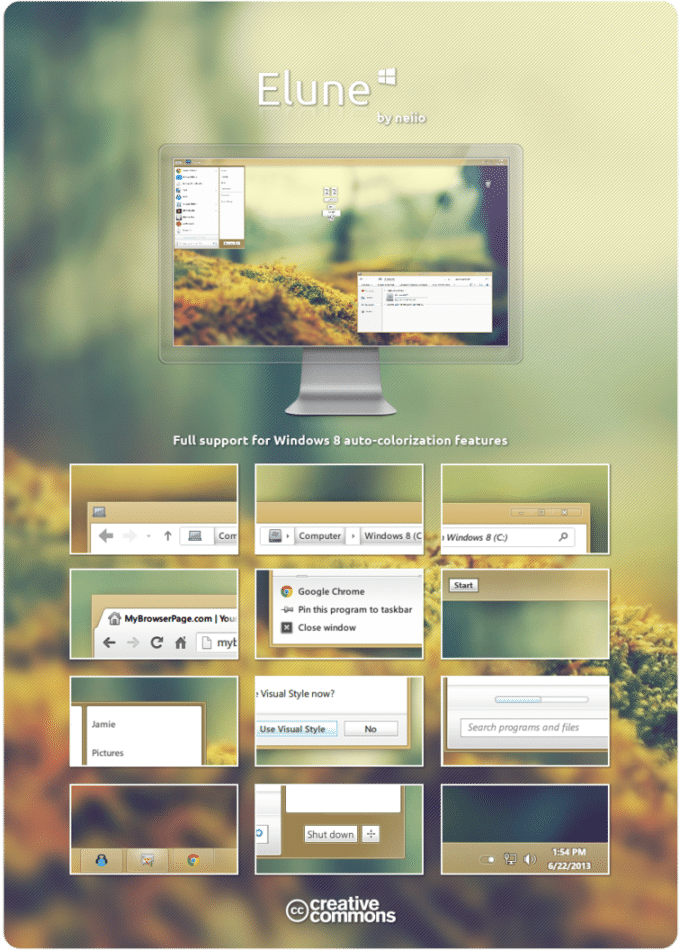
    1. Elune by neiio

    Elune Theme by neiio for Windows 8 and 8.1
    Elune Theme by neiio for Windows 8 and 8.1

    Download Elune Theme by neiio

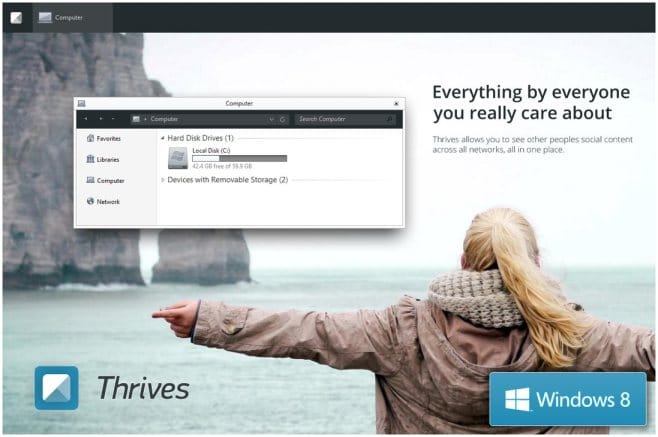
    2. Win 8 Thrives

    Thrives Theme for Windows 8 and 8.1
    Thrives Theme for Windows 8 and 8.1

    Download Win 8 Thrives Theme

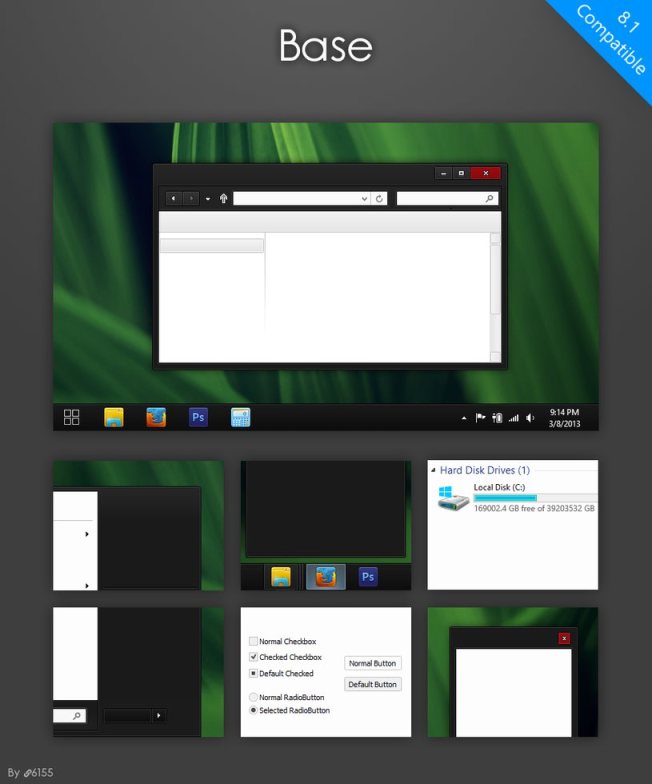
    3. Base Theme for Windows 8 and 8.1

    Base Theme for Windows 8 and 8.1
    Base Theme for Windows 8 and 8.1

    Download Base Theme

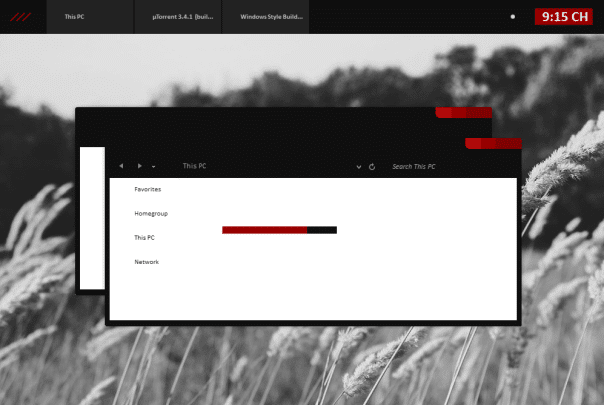
    4. Black Red Minimal Theme

    Black Red Minimal Theme for Windows 8 and 8.1
    Black Red Minimal Theme for Windows 8 and 8.1

    Download Black Red Minimal Theme

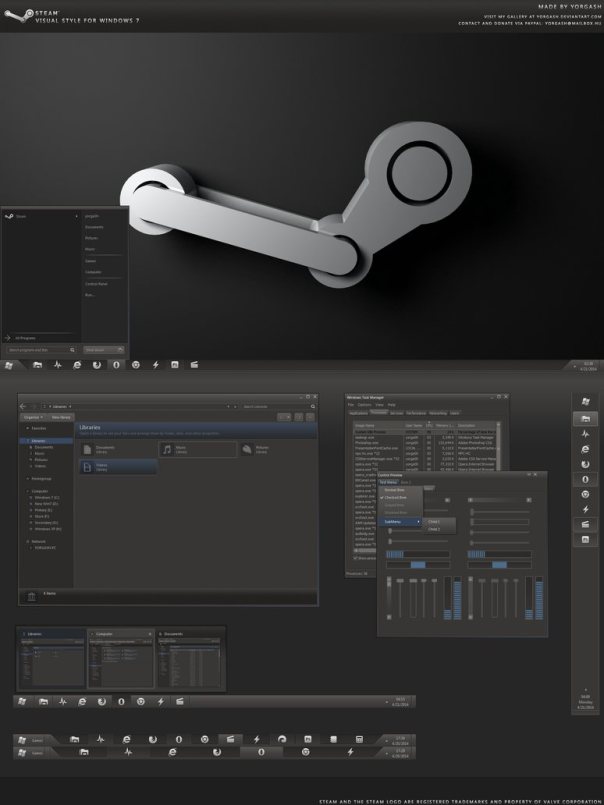
    5.  Steam OS Theme for Windows 8 and 8.1

    Steam OS Theme For Windows 8 and 8.1
    Steam OS Theme For Windows 8 and 8.1

    Download Steam OS Theme


    That,s it, After downloading your desired theme, extract the downloaded zip file and read the readme file present inside that zip for installation instructions.

    Please comment with your Feed backs and queries.

    Password Protect Folders in Windows Without any Software

    There are hundreds or maybe thousands of third-party software available on the internet for protecting Files and Folders in Windows with Password, but the main problem with them is that first we need to download them and after that, we need to install them and they even corrupts or deletes our files when we uninstalled them.

    So, today I am sharing this amazing trick with notepad through which you can Password Protect any Folder in Windows PC and you can even use this as a portable locker.

    How to Password Protect any Folder in Windows?

    This method works on every version of windows including Windows 8.1 and XP and will also gonna work on Windows 9.

    Step 1:- Firstly Create a new folder that will include your Password Protected Folder, in my case i Created a new folder on the desktop and named it “My Files”.

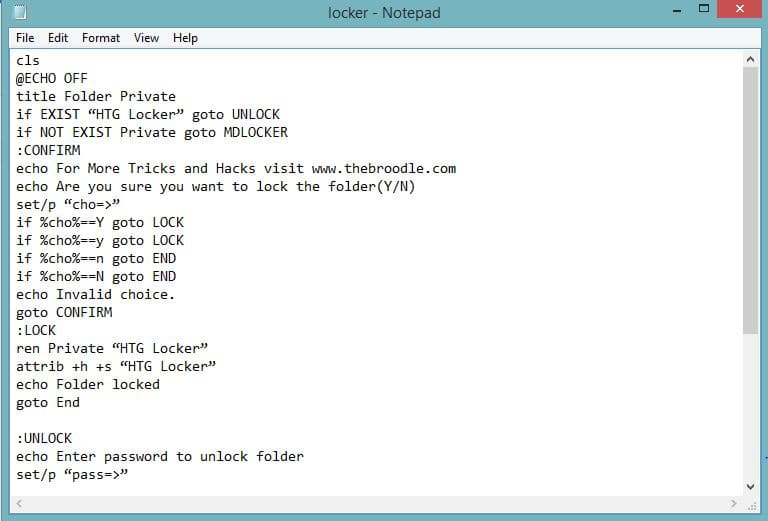
    Step 2:- Now open Notepad and paste the below code in it.

    cls
    @ECHO OFF
    title Folder Private
    if EXIST “HTG Locker” goto UNLOCK
    if NOT EXIST Private goto MDLOCKER
    :CONFIRM
    echo For More Tricks and Hacks visit www.TheBroodle.Com
    echo Are you sure you want to lock the folder(Y/N)
    set/p “cho=>”
    if %cho%==Y goto LOCK
    if %cho%==y goto LOCK
    if %cho%==n goto END
    if %cho%==N goto END
    echo Invalid choice.
    goto CONFIRM
    :LOCK
    ren Private “HTG Locker”
    attrib +h +s “HTG Locker”
    echo Folder locked
    goto End

    :UNLOCK
    echo Enter password to unlock folder
    set/p “pass=>”
    if NOT %pass%== PASSWORD_GOES-HERE goto FAIL
    attrib -h -s “HTG Locker”
    ren “HTG Locker” Private
    echo Folder Unlocked successfully
    goto End
    :FAIL
    echo Invalid password
    goto end
    :MDLOCKER
    md Private
    echo Private created successfully
    goto End
    :End

    Password Protect Folders in Windows With Notepad Script
    Password Protect Folders in Windows With Notepad Script


    Step 3 :-
    Next Change the “PASSWORD_GOES_HERE” from the above code with your desired password.

    Step 4 :- Now Save the notepad file as “locker.bat” in the folder you created (You will need to select “All Files” in Notepad’s saving window in order to save the file as .bat file instead of .txt)

    Step 5 :- Now double click on the “locker.bat“, it will create a folder named “Private” in your Folder.

    Step 6 :- Now Paste those files and folders that you want to be protected in “Private” folder.

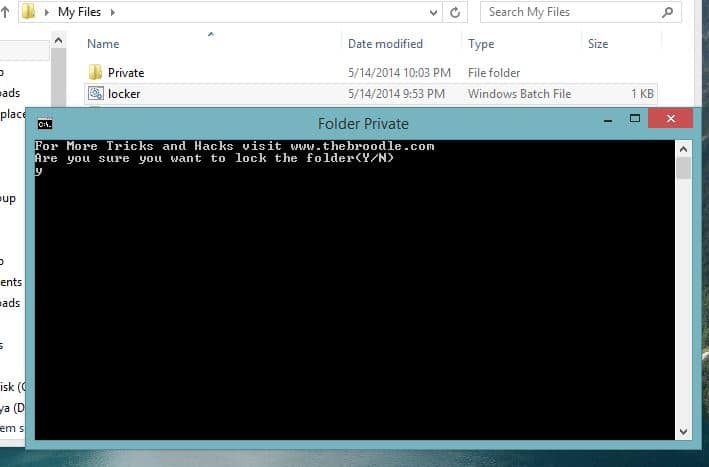
    Step 7 :- After pasting all files and folders double click on “locker.bat” now this time it will ask for the permission that you want to lock the folder, type “y” and hit enter.

    Lock Folders in Windows With Password withot any software
    Lock Folders in Windows With Password withot any software

    Step 8 :- That’s it, now you will see that the Private folder disappears, now if you want to unlock it just double click on locker.bat and type your password and hit enter.

    That’s it, you can use this method to lock any amount of files and folders.

    Do share your feed backs and queries in comments.

    Use Google Chrome Without Mouse With Keyboard Shortcuts

    3

    Many times we stuck on the situations when our Mouse stops working or gets broken, in that situation, it’s very hard to use any software in windows with keyboard, especially browsers like Google Chrome.

    So, today I am sharing this post which contains a list of all Google Chrome Shortcuts through Which you can easily use Chrome without Mouse.

    Below is a list of keyboard shortcuts that can be used in Google Chrome for Windows. These shortcuts can be utilized for a variety of purposes, ranging from opening Chrome’s internal Task Manager to sending the active Web page to your printer.

    Must Read: How to Use Google Chrome Without Mouse in 2020

    Controlling Tabs:-

    • CTRL + T: Open a new Tab
    • CTRL + W: Close current tab or pop-up window
    • CTRL + F4: Close current tab or pop-up window
    • CTRL + <Link>: Open a link in a new tab
    • CTRL + SHIFT + T: Reopen the last tab that you closed
    • CTRL + 1:  Go to the Number 1 Tab in Position
    • CTRL + 2: Go to the Number 2 Tab in Position
    • CTRL + 3: Go to the Number 3 Tab in Position
    • CTRL + 4: Go to the Number 4 Tab in Position
    • CTRL + 5: Go to the Number 5 Tab in Position
    • CTRL + 6: Go to the Number 6 Tab in Position
    • CTRL + 7: Go to the Number 7 Tab in Position
    • CTRL + 8: Go to the Number 8 Tab in Position
    • CTRL + 9: Go to the Last Tab in Position
    • CTRL + TAB: Switch to the next tab
    • CTRL + SHIFT + TAB: Switch to the previous tab
    • CTRL + PAGE DOWN: Switch to the next tab
    • CTRL + PAGE UP: Switch to the previous tab

    Controlling Window or Page:-

    • ALT + F4: Close current window
    • ALT + HOME: Open your home page
    • F5: Reload the current page
    • ESC: Stop the current page from loading
    • CTRL + F5: Reload the current page, overriding the cache
    • SHIFT + F5: Reload the current page, overriding the cache
    • CTRL + U: View source code of the current page
    • ALT + <Link>: Download link
    • CTRL + F: Open the ‘Find in page’ dialog box
    • CTRL + G: Find the next match from ‘Find in page’ box
    • F3: Find the next match from ‘Find in page’ box
    • CTRL + SHIFT + G: Find the previous match from ‘Find in page’ box
    • SHIFT + F3: Find the previous match from ‘Find in page’ box
    • CTRL + U: View source code of the current page
    • CTRL + D: Bookmark the current page
    • CTRL + PLUS: Make text larger
    • CTRL + MINUS: Make text smaller
    • CTRL + 0: Return to default text size
    • BACKSPACE or ALT + LEFT ARROW: Advance to the previous page in your browsing history (for the current tab)
    • SHIFT + BACKSPACE or ALT + RIGHT ARROW: Advance to the next page in your browsing history (for the current tab)
    • CTRL + S: Save the current page to your hard drive
    • CTRL + C: Copy selected text or images to the Clipboard
    • CTRL + V or SHIFT + INSERT: Paste the current contents of the Clipboard, preserving original formatting
    • CTRL + SHIFT + V: Paste the current contents of the Clipboard without original formatting

    URL and Address Bar Shortcuts:-

    • CTRL + ENTER: Automatically add www. (at the beginning) and .com (at the end) of the text currently residing in the Address (or URL) bar
    • CTRL + BACKSPACE: Remove whatever key term precedes the active cursor in the Address (or URL) bar
    • CTRL + L or ALT + D: Highlight the full URL in the Address bar
    • CTRL + K or CTRL + E: Enters a question mark in the Address bar. Typing a keyword or keywords following this question mark will submit the search term to your default engine.

    Other Important Shortcuts:-

    • CTRL + SHIFT + M: Launches Avatar Menu / Profile Management
    • CTRL + O: Open a file in the browser
    • CTRL + H: View Browsing History
    • CTRL + B: Toggle bookmarks display
    • CTRL + J: View Downloads
    • SHIFT + ESC: View Chrome’s internal Task Manager
    • CTRL + P: Print the current page
    • CTRL + D: Bookmark the current page
    • ALT + E or ALT + F: Open Chrome’s “wrench”, or tools, menu
    • CTRL + SHIFT + B: Activate or disable the Bookmarks Bar.
    • F6 or SHIFT + F6: Advance through active components on the current page, or through items in Chrome’s Address bar, Bookmarks bar, or Downloads bar.
    • CTRL + SHIFT + J: Open Chrome’s JavaScript Console.
    • CTRL + SHIFT + I: Open Chrome’s Developer Tools interface.
    • F1: Open Chrome’s Help Center in a new tab or window.
    • CTRL + SHIFT + DELETE: Open the Clear Browsing Data window.

    That’s it, Now Use these Shortcuts and Start Using Google Chrome like a Pro.

    Installing ADB and Fastboot in Windows Without Android SDK

    Any user who uses Android Devices as Power User must have come across ADB and Fastboot commands.

    Today i am posting this tutorial through which you can install ADB and Fastboot in your Windows PC without Downloading the Whole Android SDK.

    How to Install ADB and Fastboot:

    Step 1 :- Firstly Download the latest ADB Installer from the below link.

    Download ADB Setup from XDA Forums

    Step 2 :- Now after downloading Right Click on adb-setup-1.1.exe and chose “Run as Administrator“.

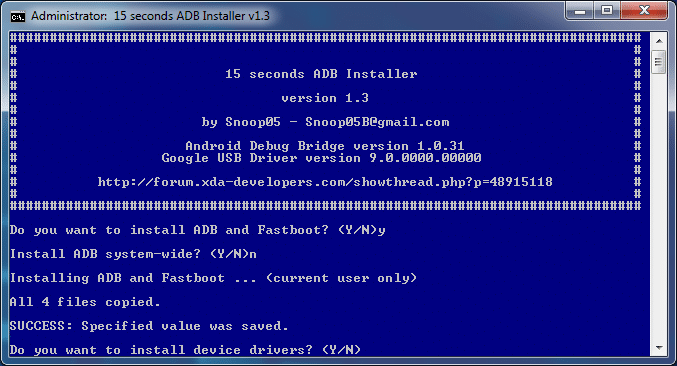
    Step 3 :- It will open a command prompt windows with blue background and will ask for “Install ADB and Fastboot?”, hit Y and Enter.

    Step 4 :- Next it will ask to install drivers for your device, choose “Y” if you haven’t install device drivers or “N” if you already have installed Device drivers.

    ADB and Fastboot Installer
    ADB and Fastboot Installer

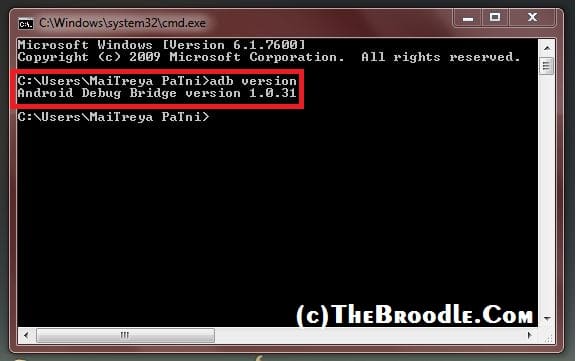
    Step 5 :- Wait for few seconds till it finishes, to verify you have successfully installed ADB and Fastboot, open command Prompt (Win+R and type cmd in run dialog) and type “adb version” (without quotes) if it returns something like “Android Debug Version x.x.xx”  then your adb and fastboot are successfully installed.

    Android Debug Bridge Version
    Android Debug Bridge Version

    If you face any problem during this whole process then please comment.