I installed Home Assistant on a Sunday afternoon thinking it would take 2 hours. It took 6. Not because it is hard. Because once you get the basics working, you start seeing possibilities everywhere. Your lights. Your AC. Your doorbell. Your water pump. Your inverter. Suddenly a Raspberry Pi on your desk becomes the brain of your entire house.
If you have never heard of Home Assistant, here is the short version: it is free software that connects every smart device in your house and lets you control them from one app — even devices from different brands that normally refuse to talk to each other. It runs on your own hardware, not some company’s cloud server. Nobody can suddenly decide to charge you a monthly fee or brick your devices with a firmware update. That alone is worth the setup effort.
By the end of this guide, you will have Home Assistant installed, your first few smart devices connected, a dashboard you can use from your phone, and a couple of automations that make your home feel like it is from 2030 instead of 2026. I have written this for the absolute beginner. If you can plug in a Raspberry Pi and follow instructions on a screen, you can do this.
And yes, I have included India-specific prices, brands, and tips throughout. Because half the smart home tutorials on the internet assume you live in a country where Amazon delivers everything in 2 days and everything costs what it costs in dollars. That is not how it works here.
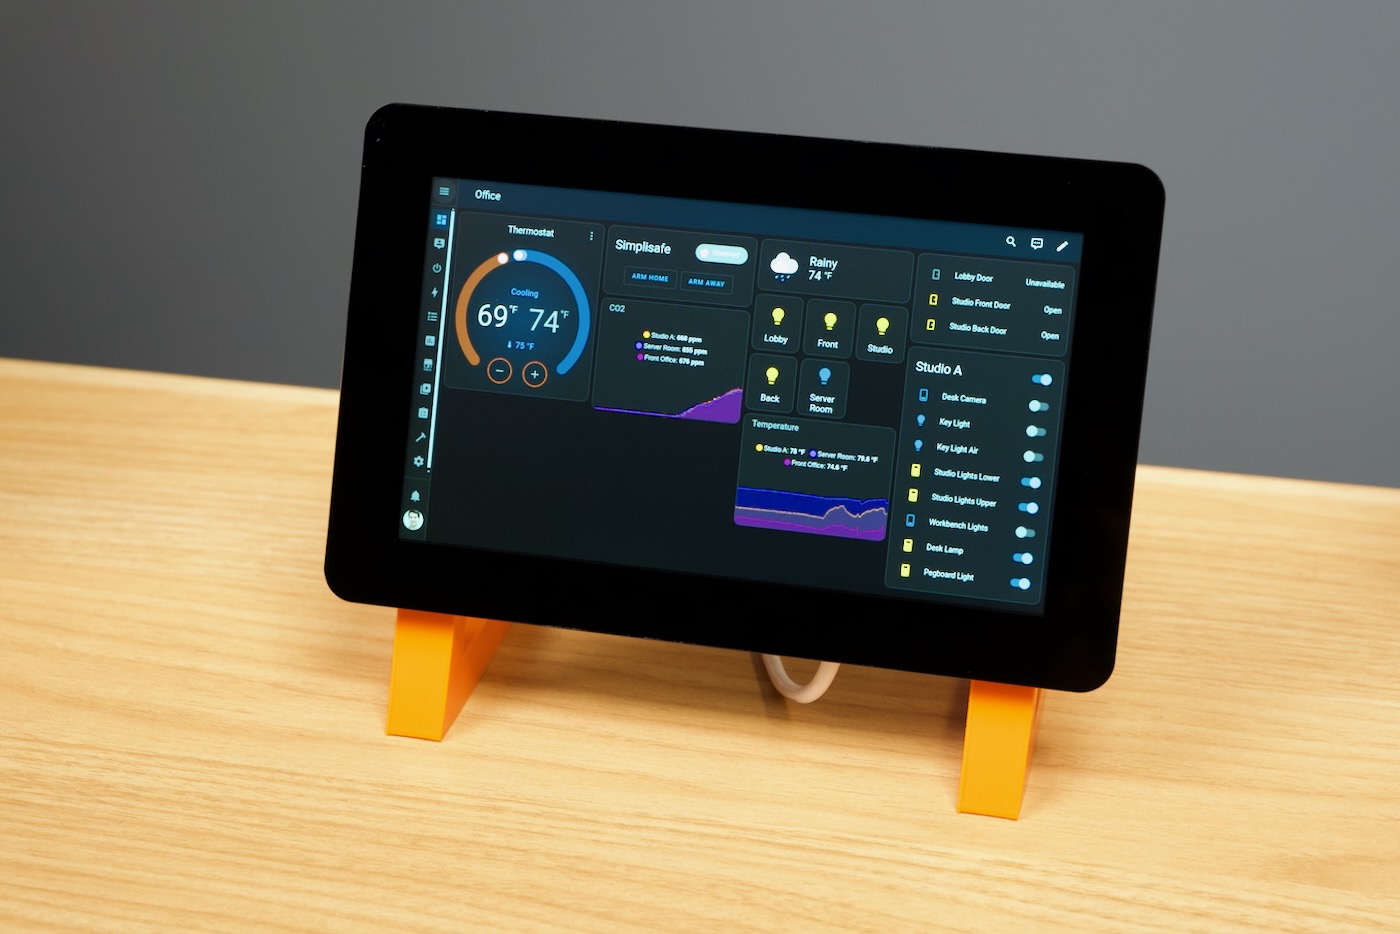
What You Can Actually Do With Home Assistant
Let me be specific instead of saying “automate your home” which means nothing. Here are real automations I use every day:
- Porch light turns on 15 minutes before sunset and turns off at midnight. Every day, automatically. I have not touched the porch light switch in 8 months.
- When my phone connects to home WiFi, the living room AC turns on if the room temperature is above 28 degrees C.
- When I leave home (phone disconnects from WiFi for 10+ minutes), all lights and fans turn off, the geyser switches off, and I get a notification if any door or window was left open.
- My inverter sends a notification when the battery drops below 30%. If the power has been out for more than an hour and it is daytime, the solar inverter data shows up on my dashboard too.
- At 10 PM, if the front gate camera detects a person, the porch light flashes twice and my phone gets a snapshot of whoever is standing there.
None of this requires a cloud subscription. None of it sends data to Google, Amazon, or any third party. It all runs on a little box in my living room that draws 5 watts of power.
Step 1: Pick Your Hardware
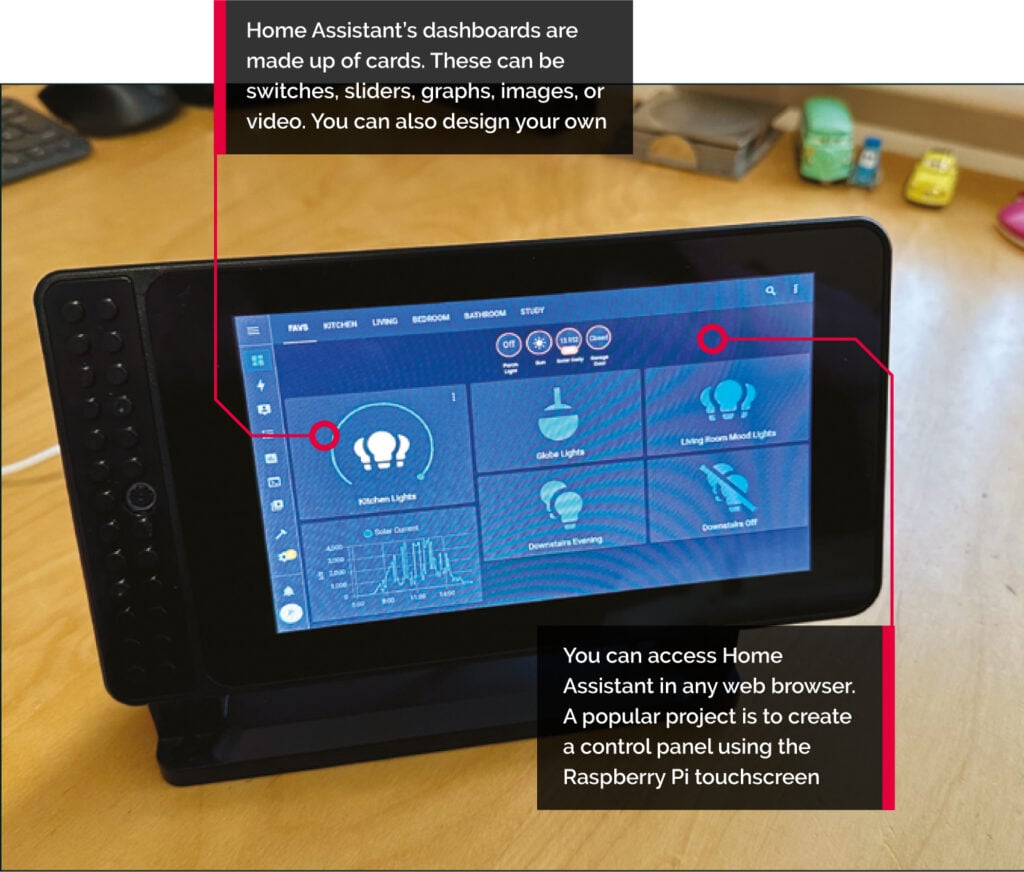
Home Assistant needs a computer that runs 24/7. It can be a Raspberry Pi, an old laptop, a mini PC, or a virtual machine on your existing home server. Here are your best options in mid-2026:
| Hardware | US Price ($) | India Price (Rs) | Good For | Power Use |
|---|---|---|---|---|
| Raspberry Pi 4 (4GB) | $55 | Rs 5,500 | Beginner, 10-20 devices | 5W |
| Raspberry Pi 5 (8GB) | $80 | Rs 7,500-8,500 | Best Pi option, 30+ devices | 7W |
| Home Assistant Green | $99 | Rs 16,500 (import) | Plug and play, no SD card hassle | 4W |
| Beelink Mini S12 (N100, 16GB/500GB) | $160 | Rs 16,000 | Power user, also runs Frigate NVR | 10-15W |
| Old laptop (i3/i5, 4GB+) | Free if you have one | Rs 5,000-8,000 used (OLX) | Budget, built-in battery backup | 15-25W |
My Recommendation for Indian Users
If you are starting fresh and can spend Rs 8,000-10,000: get a Raspberry Pi 5 (8GB) from robu.in or Amazon India, a Samsung Pro Endurance 128GB microSD card (Rs 1,400), the official Pi 5 power supply (Rs 800), and the official Pi 5 case with active cooler (Rs 500). Total: roughly Rs 10,500-11,500. This setup will run Home Assistant for years without issues.
The Raspberry Pi 5 8GB model is usually Rs 7,500-8,500 on Amazon India but stock fluctuates. Robu.in and thingbits.net are reliable Indian sellers. If Amazon shows Rs 10,000+, wait a week or check robu.in. Do not buy from unknown sellers on Amazon with inflated prices — the Pi is not worth Rs 15,000.
If you have an old laptop sitting in a drawer, use that instead. Even a 10 year old i3 laptop with 4GB RAM runs Home Assistant perfectly. The built-in battery acts as a free UPS. When the power goes out (and in India it will), your smart home stays running. This is genuinely better than a Pi for Indian conditions. Install Ubuntu Server on it, then install Home Assistant in Docker. I will cover the Docker method later in this guide.
A note about the Home Assistant Green: it is a purpose built device sold by the Home Assistant team. It is fantastic. Plug it in, wait 2 minutes, and Home Assistant is running. No SD card, no power supply shopping, no case. But it costs Rs 16,500 in India because it is not officially sold here — you have to import it or buy from a reseller. At that price, the Beelink Mini S12 is a better value because it gives you a full PC that can also run Frigate, Plex, and a dozen other things.
Step 2: Install Home Assistant on a Raspberry Pi
I am showing the Pi install because it is the most common. If you are using a mini PC or old laptop, skip to the Docker section after this.
Download Raspberry Pi Imager
Go to raspberrypi.com/software and download the imager for your computer (Windows, Mac, or Linux). Install it. Plug your microSD card into your computer using a card reader.
Flash Home Assistant OS
- Open Raspberry Pi Imager
- Click “Choose Device” and select Raspberry Pi 5 (or Pi 4 if that’s what you have)
- Click “Choose OS” and scroll down to “Other specific-purpose OS” then “Home assistants and home automation” then “Home Assistant” then “Home Assistant OS (Raspberry Pi 5)” or the correct version for your Pi
- Click “Choose Storage” and select your microSD card
- Click “Next”
- When it asks “Would you like to apply OS customization settings?” click “EDIT SETTINGS” — this is important
- Under General: set a hostname (like “homeassistant” so you can access it by name), set a username and password (this is your Pi login, not your HA login), configure your WiFi SSID and password (Home Assistant works much better on Ethernet, but WiFi is good for initial setup)
- Under Services: enable SSH with password authentication
- Save, then click “Yes” to apply and “Yes” to erase the SD card
The imager will write Home Assistant OS to the card. This takes about 5 minutes. Once done, eject the card and put it in your Raspberry Pi.
First Boot
Connect your Pi to power and Ethernet (or rely on the WiFi you configured). The first boot takes 5-10 minutes. The Pi will download the latest Home Assistant updates automatically. You will know it is ready when you can access it from a browser.
Open your browser and go to http://homeassistant.local:8123 on Windows/Mac, or http://homeassistant:8123 on Linux. If that does not work, find the Pi’s IP address: open your router’s admin page (usually 192.168.1.1 or 192.168.0.1) and look for “homeassistant” in the connected devices list. Then go to http://that-ip-address:8123.
If neither works, wait 5 more minutes. The first boot really does take time. If it still does not work, plug the Pi into a monitor. You will see a command line showing the boot progress.
Onboarding
When the screen loads, you will create your Home Assistant account. This is separate from the Pi login you set in the imager. Pick a username and a strong password. Write the password down. Seriously. If you lose it, you have to reflash the SD card. There is no “forgot password” email reset because Home Assistant has no cloud servers.
Next, set your home location. This matters because Home Assistant uses your coordinates to calculate sunrise and sunset times for automations. Enter your city or let it detect your location. Set your timezone (Asia/Kolkata for India). Choose your unit system (metric — because India uses Celsius and meters). Click Finish.
Congratulations. Home Assistant is running. The dashboard will be mostly empty, showing maybe your Pi’s CPU temperature and memory usage. That is normal. We are about to fill it with devices.
Alternative: Install Home Assistant in Docker (Mini PC / Old Laptop / NAS)
If you have an existing Linux server, a Synology NAS, or an old laptop running Ubuntu, this is for you:
# Install Docker if you do not have it
sudo apt update && sudo apt install docker.io -y
sudo systemctl enable docker

# Run Home Assistant container
docker run -d
  --name homeassistant
  --restart=unless-stopped
  --privileged
  -v /home/YOUR_USER/ha_config:/config
  -v /etc/localtime:/etc/localtime:ro
  --network=host
  ghcr.io/home-assistant/home-assistant:stable
Wait 2 minutes, then go to http://your-server-ip:8123. Same onboarding as the Pi method. The Docker method is actually my preferred way because you can back up the entire /ha_config folder by copying it to an external drive. If the server dies, you restore that folder to a new Docker install and everything comes back exactly as it was.
Step 3: Connect Your First Smart Devices
Home Assistant talks to devices over three main protocols: WiFi, Zigbee, and Bluetooth. Most people start with WiFi devices because they are the cheapest and most common in India. Here is what to buy and how to connect it.
WiFi Smart Plugs and Switches (Easiest Start)
The fastest way to get a “smart home” feeling: buy a WiFi smart plug, plug your lamp or fan into it, and control it from your phone. Here are the best options in India:
| Device | India Price | Protocol | Notes |
|---|---|---|---|
| Wipro 16A Smart Plug | Rs 699 | WiFi (Tuya) | Works with HA via Tuya integration. Supports geysers and ACs (16A). Best value. |
| TP-Link Tapo P110 | Rs 1,299 | WiFi (Tapo) | Also has energy monitoring. Shows you exactly how much power your devices use. |
| Sonoff S26R2 | Rs 599 | WiFi (eWeLink) | Flash with Tasmota for fully local control. The best option for tinkerers. |
| Fingers Wi-Fi Smart Plug | Rs 499 | WiFi (Tuya) | Cheapest option. Works. Nothing fancy. |
The Wipro smart plug at Rs 699 is my go-to recommendation for Indian users. It is a 16A plug, which means it handles high power devices like water heaters and air conditioners without melting. Most smart plugs are 10A and cannot handle a 2kW geyser. The Wipro one can. It uses the Tuya platform, and Home Assistant has a built-in Tuya integration. You install the Tuya Smart Life app on your phone, set up the plug, then add the Tuya integration in Home Assistant (Settings > Devices & Services > Add Integration > Tuya).
One warning about WiFi smart devices: if your WiFi goes down, you lose control of them. That is why serious smart home setups use Zigbee instead. But WiFi is the right place to start because it needs zero additional hardware.
Zigbee: The Upgrade Path (Buy a Coordinator First)
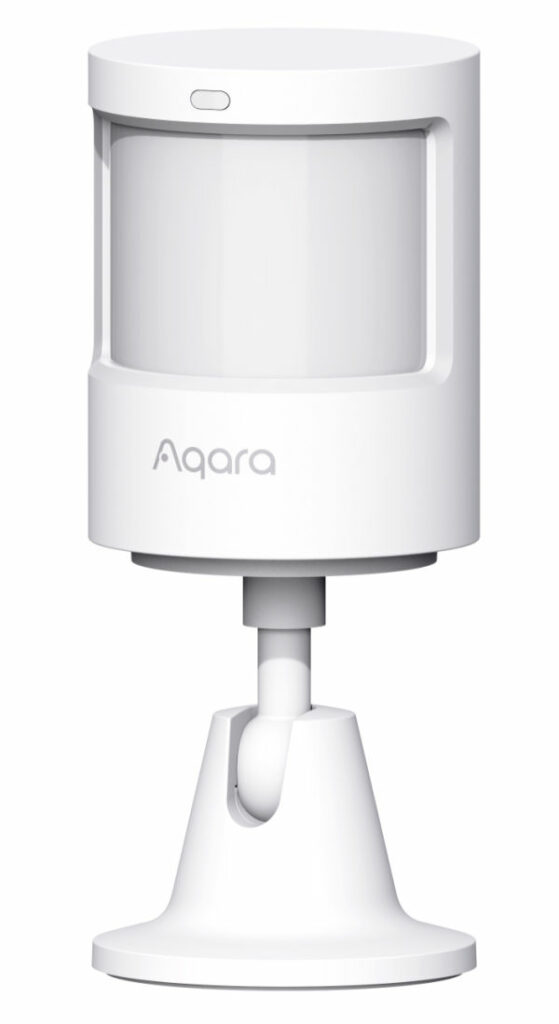
Zigbee is a low power wireless protocol that creates its own mesh network. Each Zigbee device acts as a repeater, so the network gets stronger the more devices you add. It does not depend on your WiFi. It is faster, more reliable, and uses less power. But you need a Zigbee “coordinator” — a USB stick that plugs into your Pi or server and acts as the hub.
| Coordinator | US Price | India Price | Recommendation |
|---|---|---|---|
| Sonoff Zigbee 3.0 USB Dongle Plus (ZBDongle-P) | $25 | Rs 1,800-2,200 (Amazon India, robu.in) | Best overall. Works with ZHA and Zigbee2MQTT. |
| ConBee II | $40 | Rs 3,500+ (rare in India) | Good, but overpriced compared to Sonoff. |
| Home Assistant SkyConnect | $30 | Not available in India (import only) | Official HA dongle. Also supports Thread/Matter. |
Get the Sonoff ZBDongle-P from Amazon India at around Rs 2,000. Plug it into your Pi, then in Home Assistant go to Settings > Devices & Services > Add Integration > Zigbee Home Automation (ZHA). It will detect the dongle automatically. Now any Zigbee device you pair will show up in Home Assistant.
Once you have Zigbee, here is what to buy:
- Aqara Temperature and Humidity Sensor: $15 (Rs 1,500 on Amazon India). Stick one in every room. Automate your AC based on actual room temperature, not the thermostat setting.
- Sonoff SNZB-02P Temperature Sensor: Rs 800-1,000. Cheaper than Aqara, slightly less polished.
- Sonoff ZBMINI-L2 Zigbee Smart Switch Module: $12 (Rs 1,000 on Amazon India). This goes behind your existing wall switch and makes it smart. Your switch still works physically, but now Home Assistant can control it too. This is the most important device for Indian homes because our wall switches are standard and these modules fit behind them.
- Ikea Tradfri Bulbs: Available at Ikea India (Hyderabad, Navi Mumbai, Bengaluru). Rs 699-999 per bulb. Zigbee bulbs that pair directly with your Sonoff dongle. Skip the Ikea hub.
For Indian homes specifically, the Sonoff ZBMINI-L2 is a game changer. Most of us live in rented apartments where we cannot replace the wall switches. This module fits behind the existing switch plate and does not require any visible change. Your landlord never knows. Your switch still works exactly as before. But now your lights turn off automatically when you leave the house.
Smart Lights and Bulbs Available in India
Skip the Philips Hue if you live in India. They cost Rs 4,000+ per bulb and need a Rs 8,000 hub. Instead:
- Wipro Garnet Smart LED Bulb (9W): Rs 399-499 on Amazon India. WiFi, Tuya-based, works with Home Assistant via the Tuya integration. 16 million colors. At Rs 400 per bulb, you can outfit your entire house for the cost of one Hue starter kit.
- Syska Smart Bulb: Rs 449-599. Also Tuya-based. Slightly better build quality than Wipro.
- Philips Wiz Smart Bulb: Rs 699-899. WiFi, works locally via the Wiz integration in Home Assistant. Better light quality than Wipro but costs more.
The Wipro bulbs are genuinely good for the price. I have 6 of them running for over a year and none have failed. The color reproduction is not as accurate as Philips, but for Rs 400 per bulb, I am not complaining.
Step 4: Build Your Dashboard
The default Home Assistant dashboard is functional but ugly. Here is how to make it look good in 15 minutes:
Install HACS (Home Assistant Community Store)
HACS is like an app store for Home Assistant. It gives you access to thousands of custom themes, cards, and integrations that are not in the official store.
Installation for Home Assistant OS (Pi method):
- Go to Settings > Add-ons > Add-on Store
- Click the three dots (top right) > Repositories
- Add:
https://github.com/hacs/integration - Find “HACS” in the store, install it, start it
- Open HACS, search for your add-ons
Must Have HACS Add-ons
- Mushroom Cards: Beautiful, minimal cards for your dashboard. Replaces the ugly default entity cards.
- Mini Graph Card: Shows temperature, humidity, or power usage over time in a small graph.
- Browser Mod: Lets you send notifications to your browser tab and detect which device is viewing the dashboard.
- Auto Entities: Automatically shows or hides cards based on conditions. If no lights are on, the “Turn off all lights” button disappears.
Quick Dashboard Layout
Go to your dashboard, click the pencil icon (top right), then “Add Card”. Start with:
- A Mushroom Chips Card at the top (shows time, weather, number of lights on)
- Mushroom Title Card: “Living Room”
- Mushroom Light Cards for each bulb
- Mushroom Template Card showing room temperature
- A Mini Graph Card showing temperature over 24 hours
- Mushroom Title Card: “Security”
- Mushroom Entity Card showing front gate camera snapshot
This sounds complicated. It is not. You pick each card from a dropdown, select the entity (device) you want it to show, and drag it into position. It is like arranging widgets on a phone home screen. Fifteen minutes of clicking around and your dashboard will look better than anything Google Home or Alexa can show you.
Step 5: Create Your First Automation
Automations are the whole point of Home Assistant. Here is a simple one to start:
Porch Light at Sunset:
- Settings > Automations & Scenes > Create Automation
- Click “Create New Automation”
- Trigger: “Sun” > “Sunset” > Offset: “-00:15:00” (15 minutes before sunset)
- Action: “Device” > Select your porch light smart bulb/plug > “Turn on”
- Save. Name it “Porch Light On at Sunset.”
Now your porch light automatically turns on 15 minutes before it gets dark, every single day, for the rest of time. You do nothing. It just works.
Here is a second one, slightly more useful:
Turn Everything Off When Nobody Is Home:
- Trigger: “Zone” > Select “home” > “Leave” (this uses your phone’s GPS, but you need the HA mobile app installed first)
- Condition: “Time” > “After 09:00:00” AND “Before 23:00:00”
- Action: Call Service > “light.turn_off” > Select all lights, AND “switch.turn_off” > Select all switches
- Save. Name it “Away Mode.”
Now when you leave the house during the day (phone leaves home zone), all your lights and fans turn off. You will never come back to a house with every light on and the AC running at 18 degrees.
For Indian homes specifically, an automation I strongly recommend: Geyser Timer. Indian water heaters (geysers) are power hungry monsters. A 3kW geyser running for 1 hour costs about Rs 18-24 in electricity (at Rs 6-8 per unit). If you forget to turn it off, it keeps cycling on and off all day to maintain temperature. That is Rs 100-150 wasted daily.
Solution: plug your geyser into a Wipro 16A smart plug, then create an automation that turns it on at 6 AM, runs for 45 minutes, and turns off at 6:45 AM. Optionally, turn it on again at 6 PM for 30 minutes. That is it. Your geyser now runs 75 minutes per day instead of potentially running for hours. Over a month, this saves Rs 1,500-2,000 in electricity. The Rs 699 smart plug pays for itself in about 2 weeks.
Remote Access: Control From Anywhere
By default, Home Assistant only works on your home WiFi. To control it from outside, you have options:
| Method | Cost | Difficulty | Best For |
|---|---|---|---|
| Nabu Casa (official) | $6.50/month (Rs 540) | Click one button | Beginners who want zero hassle |
| Tailscale | Free | Install app on Pi and phone | Everyone. Especially Indian ISP users behind CGNAT. |
| WireGuard VPN | Free | Moderate | Users who already have a VPN server |
| Cloudflare Tunnel | Free (needs domain) | Moderate | Users who want a public URL |
I use Tailscale and it is perfect for India. JioFiber and Airtel Xstream use CGNAT (Carrier Grade NAT), which means you cannot port forward even if you wanted to. Tailscale creates a private mesh network between your devices regardless of what your ISP does. Install the Tailscale add-on in Home Assistant, install the Tailscale app on your phone, and they magically find each other. It takes literally 5 minutes and costs zero rupees.
If you want the absolute easiest path, pay for Nabu Casa (Rs 540 per month). It gives you one-click remote access, easy Google Assistant/Alexa integration, and supports the Home Assistant developers. I use it because I want the project to survive. But you do not need it.
India Specific Tips and Tricks
Power Cuts and Inverter Integration
Most Indian homes have an inverter or UPS. If your inverter has a data port (many Luminous, Microtek, and Exide inverters do), you can read its status into Home Assistant. Look for the “Luminous” or “Microtek” integration in HACS. It reads inverter battery percentage, load, and whether mains power is available. Combine this with an automation: “If mains power is off for more than 30 minutes and inverter battery is below 50%, send a notification to everyone in the house to conserve power.”
If your inverter does not have a data port, buy a Sonoff POW Elite (Rs 1,200) — it is a power monitoring switch rated for 20A. Connect it between your inverter output and your essential load. Now Home Assistant sees exactly how much power your inverter is providing and can estimate battery remaining based on load.
Dealing With Thick Concrete Walls
Indian homes are built with reinforced concrete. WiFi and Zigbee signals struggle through 9 inch thick RCC walls. A few fixes:
- Place your Zigbee coordinator centrally. If your Pi is in one corner of the house, use a USB extension cable to move the coordinator dongle to a more central location.
- Add Zigbee smart plugs in hallways and corridors. Since every mains-powered Zigbee device acts as a repeater, these create signal paths through your house.
- If you have a multi-floor home, get a second Zigbee coordinator for each floor. You can run multiple ZHA networks by using the Zigbee2MQTT add-on instead of ZHA.
AC Control Without Spending a Fortune
Smart AC controllers for Indian split ACs are expensive (Rs 4,000-6,000). A cheaper DIY option: get a Broadlink RM4 Mini (Rs 1,500 on Amazon India). It is a universal IR blaster that can control any AC, TV, or set-top box via infrared — the same signals your remote uses. Pair it with Home Assistant via the Broadlink integration, then use the SmartIR custom component (from HACS) to give Home Assistant full AC control. You get temperature setting, fan speed, mode switching — all from the HA dashboard. Works with every Indian AC brand: Voltas, LG, Samsung, Daikin, Blue Star, Lloyd, Carrier, Godrej, Hitachi, Panasonic, you name it.
Local AI Voice Control (No Internet Needed)
Home Assistant now has built-in voice control with local processing. The “Assist” feature works offline using Whisper for speech-to-text and Piper for text-to-speech. Set up a Raspberry Pi with a USB microphone in your living room and you have a private Alexa alternative. It is not as polished as Google Assistant, but it works without sending audio recordings to a server in California. For privacy-conscious Indian users, this is huge. The DPDP Act (India’s data protection law) makes local voice processing relevant — data that never leaves your house cannot be misused.
Common Beginner Mistakes
- Buying devices before checking compatibility. Always search the Home Assistant integrations page before buying a device. If the brand is not listed, it might still work via Tuya or MQTT, but check first.
- Using a cheap no-name SD card. Home Assistant writes to the SD card constantly. A Rs 300 card from a local shop will die in 3 months and you will lose your entire setup. Spend Rs 1,400 on a Samsung Pro Endurance. I am not exaggerating. I killed two cheap cards before learning this lesson.
- Not setting up backups. Home Assistant has a built-in backup system. Go to Settings > System > Backups, create a backup, and download it to your computer. Do this every month. Better yet, install the Google Drive Backup add-on from HACS. It automatically uploads backups to your Google Drive every night. If your SD card dies, you restore from the backup and lose nothing.
- Adding too many devices at once. Add one device, make sure it works, then add the next. If you add 10 devices at once and something goes wrong, you will not know which one caused it.
Total Cost: What You Actually Need to Spend
A reasonable “starter smart home” in India, with Home Assistant controlling 4 lights, 2 fans, 1 AC, and 1 geyser:
| Item | India Price (Rs) | US Price ($) |
|---|---|---|
| Raspberry Pi 5 (8GB) + case + power + SD card | Rs 10,500 | $140 |
| Sonoff Zigbee Dongle Plus | Rs 2,000 | $25 |
| 4x Sonoff ZBMINI-L2 (behind existing switches) | Rs 4,000 | $48 |
| 2x Wipro 16A Smart Plug (geyser + AC) | Rs 1,400 | N/A (India only) |
| 3x Aqara Temp Sensor | Rs 4,500 | $45 |
| Broadlink RM4 Mini (AC control) | Rs 1,500 | $25 |
| TOTAL | Rs 23,900 | $283 |
Rs 24,000 for a fully automated home with remote access, local control, and zero monthly fees. Compare that to buying individual smart devices that each need their own app and cloud account. You cannot even get a full Alexa or Google Home setup with this many devices for that price, and even if you did, it would stop working the moment your internet drops.
Start with the Pi and one smart plug. Rs 11,000. Control one lamp from your phone. That feeling when you turn off the bedroom light without getting out of bed — that is the moment you understand why people go down this rabbit hole. Everything after that is just adding more of the same.
What to Do When Things Go Wrong
Home Assistant has an incredible community. If you get stuck:
- The Home Assistant Community Forum has answers to almost every question. Search before posting.
- The r/homeassistant subreddit is active and helpful.
- There is a “Home Assistant India” group on Facebook and Telegram. Smaller community, but they understand Indian hardware and ISP issues.
- YouTube channels: “Everything Smart Home,” “Smart Home Solver,” and “The Hook Up” have excellent Home Assistant tutorials.
And if you are stuck on something specific, leave a comment below. I read every comment. Tell me what hardware you are using, what you have tried, and where exactly you are stuck. I will reply.
Next in this series: the best self hosted alternatives to Ring and Nest cameras — including a full cost comparison showing how much money you save by going the DIY route. Spoiler: it is a lot.
Product links (India):
- Raspberry Pi 5 8GB: Robu.in | Amazon India
- Sonoff Zigbee Dongle Plus: Amazon India | Robu.in
- Wipro 16A Smart Plug: Amazon India
- Sonoff ZBMINI-L2: Amazon India
- Broadlink RM4 Mini: Amazon India
- Aqara Temperature Sensor: Amazon India
- Samsung Pro Endurance 128GB microSD: Amazon India
Product links (US):
- Raspberry Pi 5 8GB Kit: Amazon US
- Home Assistant Green: Amazon US
- Sonoff Zigbee Dongle Plus: Amazon US
Keep Reading
- How to Set Up Frigate NVR With Any IP Camera
- Best Self-Hosted Alternatives to Ring and Google Nest
- How to Install and Update Proxmox Without a Subscription
- Hard Drives That Pair Perfectly With Any NAS
- How to View Reolink Cameras on Your PC
- How to View Reolink Cameras on Your PC
- How to View Eufy Cameras on Your PC
- How to View Eufy Cameras on Your PC