Android 16 landed in mid-2025 and brought a handful of under-the-hood changes that broke some of the older rooting workflows. The good news: Magisk v30.7 and KernelSU both handle Android 16 fine as long as you patch the right partition. The bad news for Samsung owners — nothing has changed there, you’re still stuck in Odin territory with a separate guide.
This walkthrough assumes a Pixel or any GKI 2.0 device (which is basically every non-Samsung phone launched from 2022 onward). If your device ships with a kernel older than 5.10, KernelSU won’t work out of the box and you’ll want Magisk instead.
What Changed With Android 16
Google tightened verified boot slightly, which means you’ll see the “Your device is corrupt” splash more aggressively on some builds. Functionally it’s harmless. What actually matters for root:
- init_boot remains the target partition for GKI devices — same as Android 15.
- Play Integrity checks got stricter, so stock DenyList alone won’t fool Google Wallet anymore without an extra module.
- Some OEMs (Xiaomi, OnePlus) ship their own init_boot variants, so make sure you extract the file from firmware matching your exact build number.
If you’re upgrading from a rooted Android 15 install, don’t just take the OTA — you’ll lose root and likely bootloop. Restore stock init_boot first, let the update land, then re-patch against the new build.
What You Need
- A PC running Windows, macOS, or Linux
- Platform-tools (adb + fastboot) — grab them from developer.android.com
- Your device’s exact-match factory image (for Pixels: developer.android.com/theme/images/factory-images)
- Magisk v30.7 APK from github.com/topjohnwu/Magisk/releases
- Battery above 50%, quality USB cable, 30 minutes of patience
Warning worth repeating: unlocking wipes everything. Photos, chats, saved two-factor seeds — gone. Export WhatsApp backups to Google Drive, screenshot any authenticator QR codes before wiping them, and copy your DCIM folder somewhere safe.
Step-by-Step Root Process
1. Enable Developer Options
Settings → About phone → tap Build number seven times. Then Settings → System → Developer options → enable OEM unlocking and USB debugging.
2. Boot Into Fastboot Mode
Plug into PC and run:
adb reboot bootloader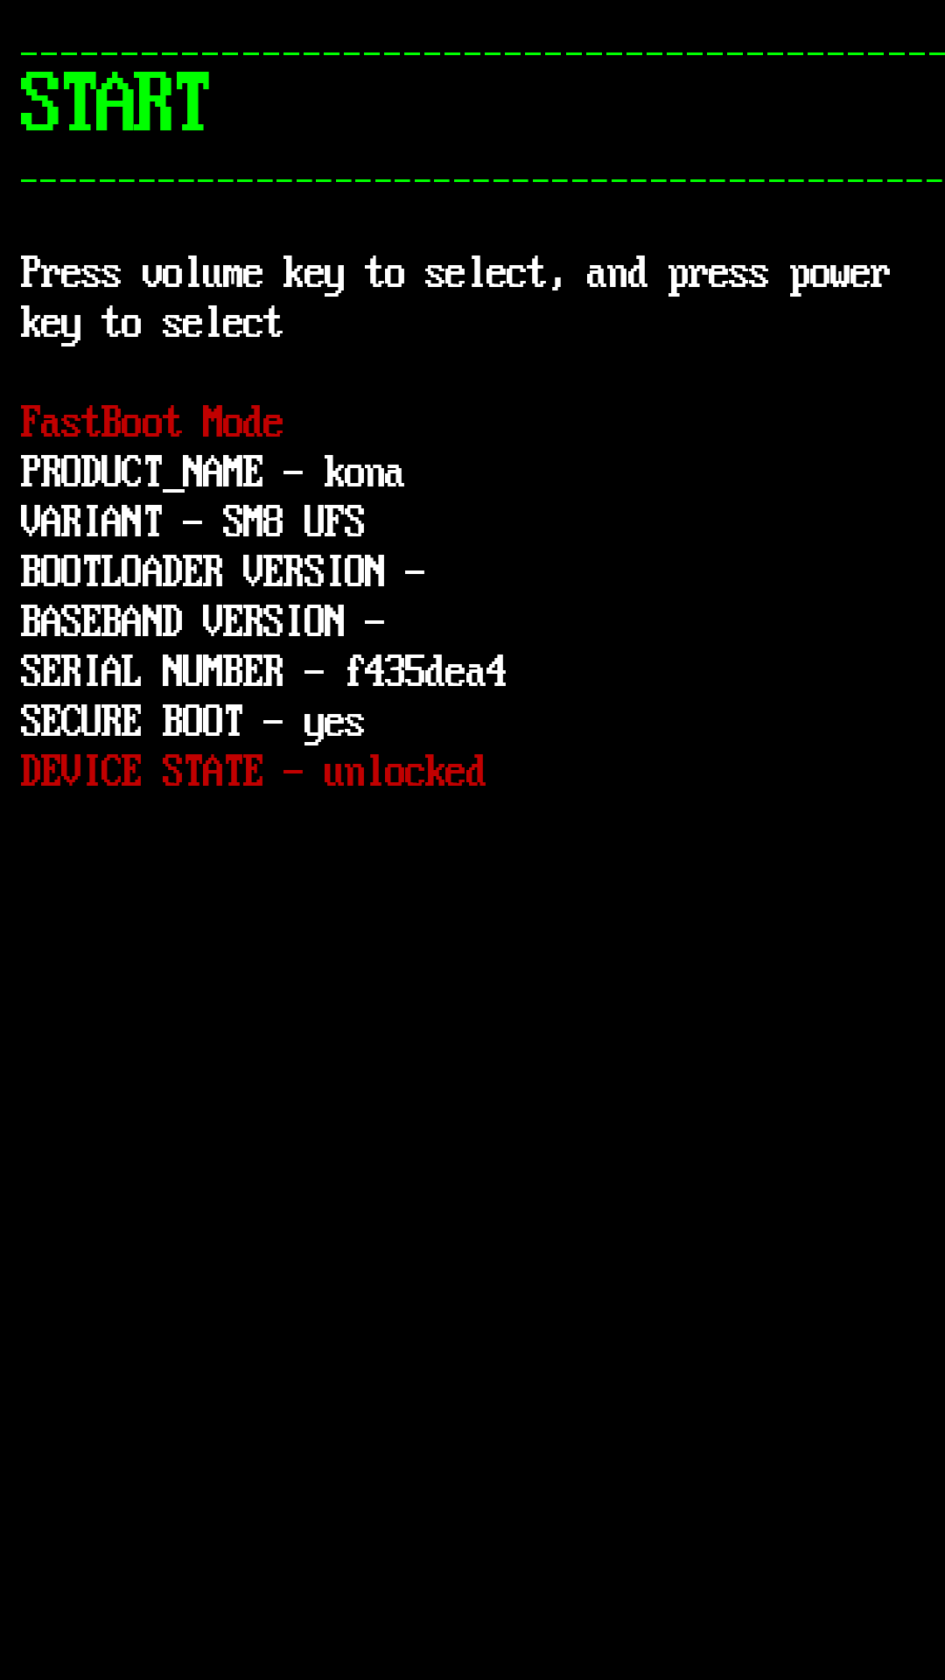
Verify connection:
fastboot devices3. Unlock the Bootloader
fastboot flashing unlockConfirm on-screen using volume keys + power button. Phone wipes itself and reboots. Redo step 1 after setup.
4. Pull init_boot.img From Your Firmware
Download the factory image matching your exact build number (Settings → About phone → Build number). Unzip the outer archive, then unzip the inner image-*.zip. Inside you’ll find init_boot.img. Copy it to your phone’s Download folder.
Xiaomi users: grab the fastboot ROM (.tgz), extract, and look inside the images/ subfolder. OnePlus users: check the payload.bin using a tool like payload-dumper-go since they use A/B OTA packages now.
5. Patch With Magisk
Sideload the Magisk APK onto your phone (adb install Magisk-v30.7.apk). Launch Magisk, tap Install next to the Magisk card, choose “Select and Patch a File,” pick your init_boot.img. It’ll spit out something like magisk_patched-30700_A1B2C.img in Downloads.
Pull it back to your computer:
adb pull /sdcard/Download/magisk_patched-30700_A1B2C.img .6. Flash the Patched Partition
adb reboot bootloader
fastboot flash init_boot magisk_patched-30700_A1B2C.img
fastboot reboot
First boot will take longer than usual — up to five minutes on some devices. Let it sit.
7. Confirm Root Works
Open Magisk. Under the Magisk card it should say “Installed” without asking you to reinstall anything. Try installing a module like AdAway or run a root checker — you should get the superuser prompt and be able to grant access.
Passing Play Integrity on Android 16
Stock DenyList handles most apps but not Google Wallet or Netflix HD. You’ll need:
- Zygisk enabled in Magisk settings
- Play Integrity Fix module installed via Magisk
- DenyList configured with your banking apps added
As of early 2026 this combo still passes basic integrity on most builds. Google tightens detection every quarter or so — if a specific app suddenly stops working, check the Play Integrity Fix GitHub issues page; someone usually posts an updated fingerprint within days.
Troubleshooting Android 16 Rooting Issues
Bootloop after flashing: hold power + volume down for 10 seconds to force restart into bootloader, then flash the original unpatched init_boot.img back. That undoes root and gets you bootable again.
“Failed to boot” or corrupt warning loop: you probably flashed to the wrong slot on A/B devices. Try fastboot flash init_boot --slot=all magisk_patched.img instead.
Banking apps detect root despite DenyList: some apps use hardware attestation now, which no software fix can bypass. Check if your bank offers a web version or accept that those apps won’t work rooted.
OTA updates break: expected behavior. Flash stock init_boot first → take OTA → re-extract new init_boot → re-patch → re-flash. Annoying but reliable.
Should You Actually Root Android 16?
If you’re reading this far, you probably have a reason. Common ones in 2026: system-wide ad blocking, custom DNS rules per-app, LSposed modules for app tweaks, better backup granularity, and running apps that need elevated permissions. If none of those apply, skip rooting — Android 16 is polished enough that the trade-offs outweigh the gains for casual users.
Questions about a specific device? Leave a comment below and I’ll point you toward the right thread or fix.