I spent three weekends setting up Frigate NVR at my place. By the third weekend I had 4 cameras running, object detection working, and zero monthly fees. But the first weekend was a disaster. I had the wrong cameras, a Raspberry Pi that kept overheating, and RTSP streams that would not stay connected for more than 20 minutes. This guide exists so you skip all that.
Frigate is an open source NVR (Network Video Recorder) built for Home Assistant users. It does not need a cloud subscription. It does not phone home to some server in another country. All your footage stays on a hard drive you control. And the AI object detection — telling the difference between a person at your gate and a stray dog in the driveway — runs locally on a Coral TPU the size of a USB stick. It is honestly better than any subscription camera I have used.
This guide works whether you are in Mumbai, Ohio, or anywhere with an internet connection. I have included prices for both India and the US because hardware availability and pricing are wildly different in these two markets. If I mention a camera and it is only available on Amazon.com, I will note that and give you the Indian alternative.
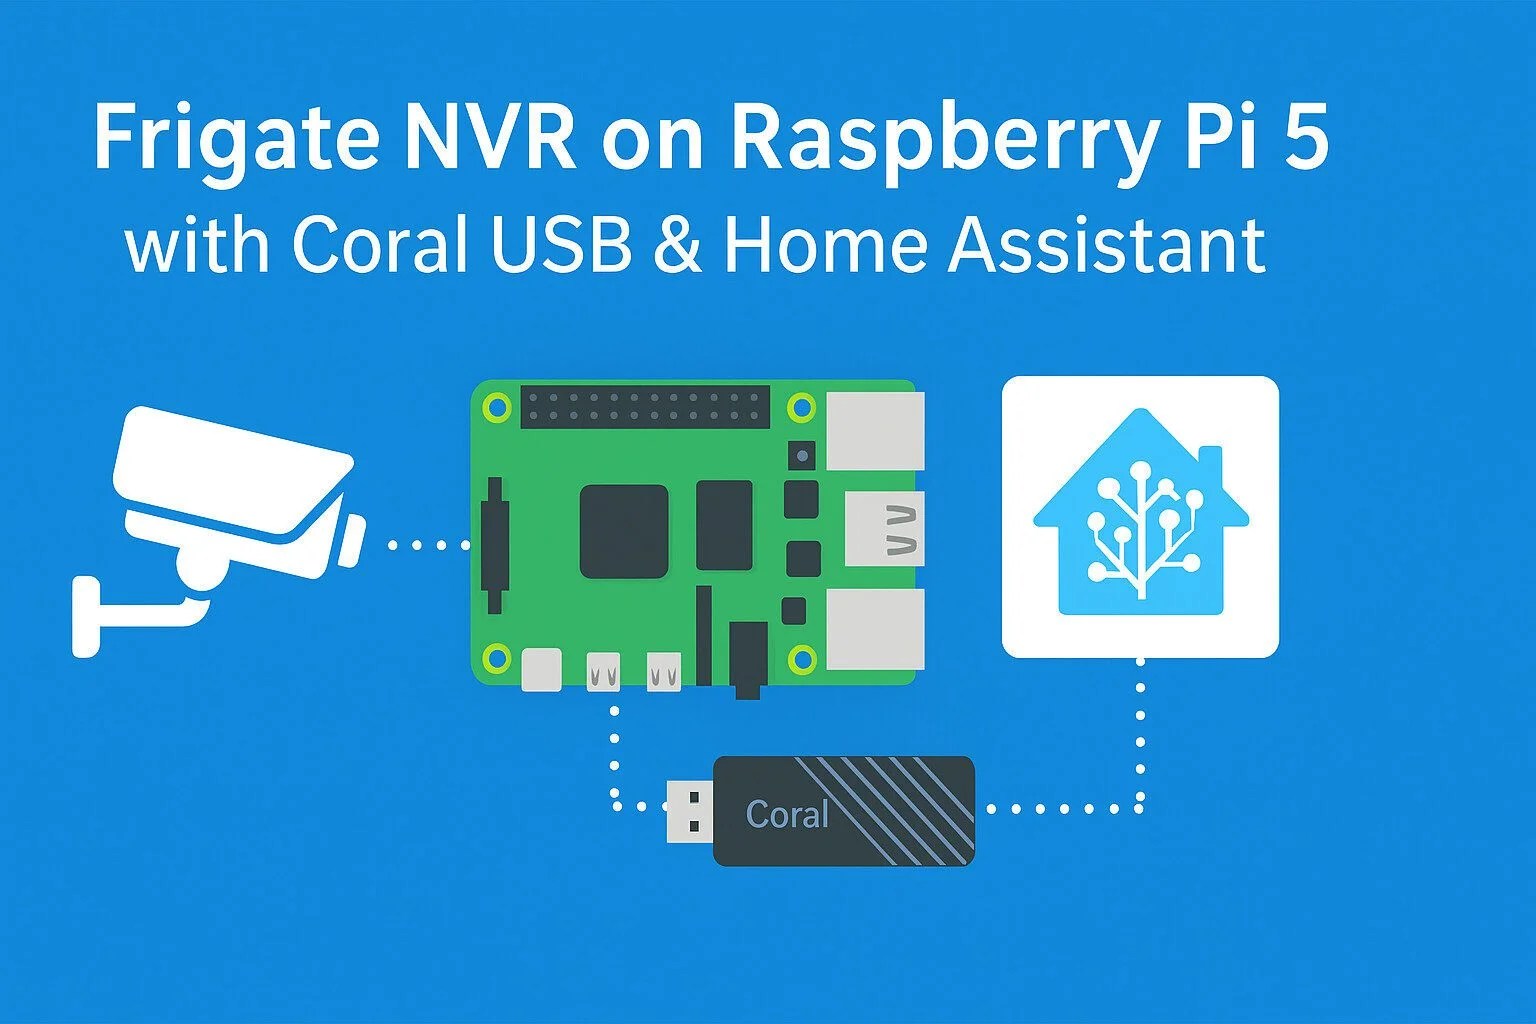
What Frigate Actually Does (And What It Does Not)
Frigate is not a plug and play system like a Tapo or a Ring camera where you scan a QR code and you are done. It is software you install on a computer — a Raspberry Pi, an old laptop, a mini PC, or a Docker container on your NAS. You tell it where your cameras are (RTSP URLs), what to detect (people, cars, animals, packages), and where to save the recordings. It then processes every frame of video in real time and decides which clips to keep.
What you get: 24/7 recording or event-based recording, AI powered object detection with labels, a clean timeline view inside Home Assistant, mobile notifications when someone is at your door, and zero monthly costs.
What you do NOT get: a mobile app (you use Home Assistant or the Frigate web UI), cloud storage, or a customer support number to call. You are the support team. This matters because if you just want something that works out of the box, buy a Tapo C200 for Rs 1,799 ($20) and call it a day. Frigate is for people who want full control.
Step 1: Pick Your Hardware (The Part Where People Waste Money)
The single most expensive mistake I see is people buying hardware before reading the documentation. Here is what you actually need, broken down by budget level and country.
The Brain: What Runs Frigate
| Option | US Price | India Price | Best For |
|---|---|---|---|
| Raspberry Pi 4 (4GB) | $55 | Rs 5,500 (Amazon India, robu.in) | 2-3 cameras, 720p streams |
| Raspberry Pi 5 (8GB) | $80 | Rs 7,500-8,500 (Amazon India) | 3-5 cameras, 1080p streams |
| Used Dell/Lenovo mini PC (i5 8th gen) | $120 (eBay) | Rs 8,000-12,000 (OLX India, refurbished sellers) | 5-8 cameras, 4K streams |
| Beelink Mini S12 Pro (N100) | $160 | Rs 14,000-18,000 (Amazon India) | 8+ cameras, the best value |
| Home Assistant Green | $99 | Rs 16,500 (import or reseller only) | Beginner HA users, 2-3 cameras max |
My honest recommendation: skip the Raspberry Pi unless you already own one or need very low power consumption (
If you go the mini PC route, install Debian or Ubuntu Server, then install Docker. Frigate runs beautifully in Docker. There are hundreds of YouTube tutorials on “install Docker on Ubuntu” and I will not repeat them here. Just make sure you also install Portainer if you want a graphical interface for managing containers.
The AI Brain: Coral TPU
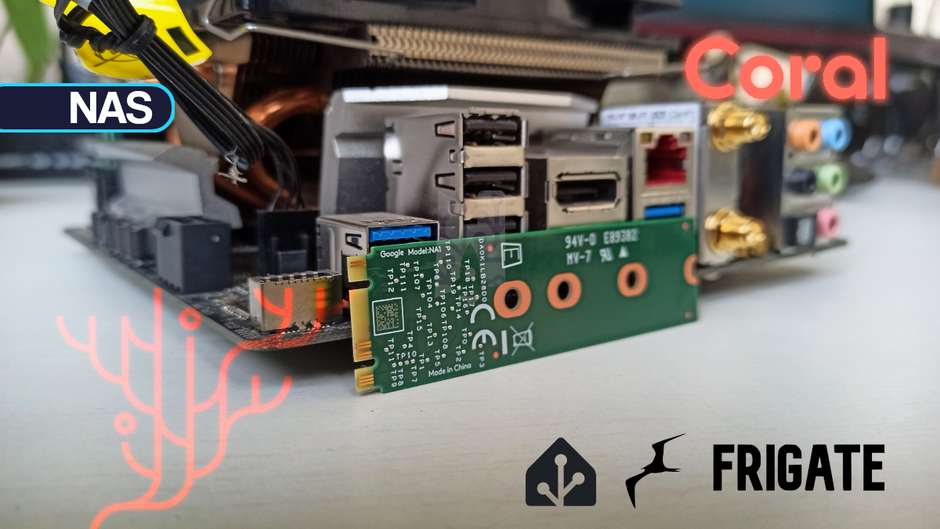
This is the secret sauce. Without a Coral TPU, Frigate uses your CPU for object detection and it will max out even a modern processor. With a Coral, detection takes 8-12 milliseconds per frame and the CPU barely notices.
| Variant | US Price | India Availability |
|---|---|---|
| Coral USB Accelerator | $60-85 (Amazon US, Mouser, Seeed Studio) | Rs 8,000-16,000 (Amazon India, rarely in stock; try robu.in, fabtolab.com, or thinkrobotics.com) |
| Coral M.2 (PCIe) | $25-40 (Mouser) | Rs 3,500-6,000 (import only, try silverlineelectronics.in) |
| Coral Mini PCIe | $30-40 | Same as above |
The Coral situation in India is bad. Google discontinued the retail Coral line in late 2024, so stock is drying up. Your best bet: join Indian home automation WhatsApp groups or the Home Assistant India Facebook group and ask if anyone has extra stock. Alternatively, use Frigate’s OpenVINO detector with an Intel CPU (it is slower but free, and works fine for 2-3 cameras on an i5). The Beelink N100 has Intel QuickSync which Frigate can use for video decoding. Combine that with OpenVINO and you might not need a Coral at all for a small setup.
If you have someone coming from the US, ask them to bring a Coral USB. It fits in a wallet. Mouser and Seeed Studio ship to India but customs duties are unpredictable — expect to pay 30-40% extra on the declared value.
Storage: Where Your Footage Lives
Frigate writes constantly. A regular microSD card will die within months. You need either a high endurance microSD (Samsung Pro Endurance or SanDisk Max Endurance) or an SSD. For a Pi, get an NVMe SSD with a Pi 5 NVMe hat (Rs 800-1,200 on robu.in) or use a USB 3.0 to SATA adapter with a 2.5 inch SSD. For a mini PC, any SATA SSD or NVMe drive works.
Storage sizing: a 1080p camera recording continuously at 15fps uses about 30-40GB per day. Four cameras means 120-160GB per day. A 1TB SSD gives you roughly 6-8 days of continuous footage. If you switch to event-based recording (only save clips when motion or objects are detected), a 500GB SSD can easily hold a month of footage from 4 cameras.
| Drive | US Price | India Price |
|---|---|---|
| Samsung Pro Endurance 128GB microSD | $18 | Rs 1,400 (Amazon India) |
| Crucial BX500 1TB SATA SSD | $55 | Rs 4,800 (Amazon India) |
| WD Blue SN580 1TB NVMe | $60 | Rs 5,500 (Amazon India) |
| Seagate Barracuda 4TB HDD (for NAS/long retention) | $85 | Rs 8,500 (Amazon India) |
Power Backup (Important for India)
If you live in a part of India where power cuts are frequent (which is most of India), your Frigate server needs a UPS or at minimum a good power bank that supports pass-through charging. A Raspberry Pi with a 20,000mAh power bank will run for 8-12 hours. A mini PC needs a proper UPS. The APC BX600C (Rs 2,800 on Amazon India) will keep a mini PC and router running for 30-45 minutes, which covers most power cuts. If you want something smarter, the Zebronics Zeb-U725 (Rs 1,600) or the Artis 600VA (Rs 1,800) are decent budget options.
Step 2: Pick Your Cameras (This Is Where India and US Diverge)
Frigate works with any camera that outputs an RTSP stream. That includes almost every IP camera made in the last decade. But NOT all RTSP streams are created equal. Some cameras output a clean h264 stream that Frigate loves. Others output h265 with weird encoding that makes Frigate stumble. Here is what I recommend after testing a bunch of cameras.
Best Budget Camera: TP-Link Tapo C200 / C210
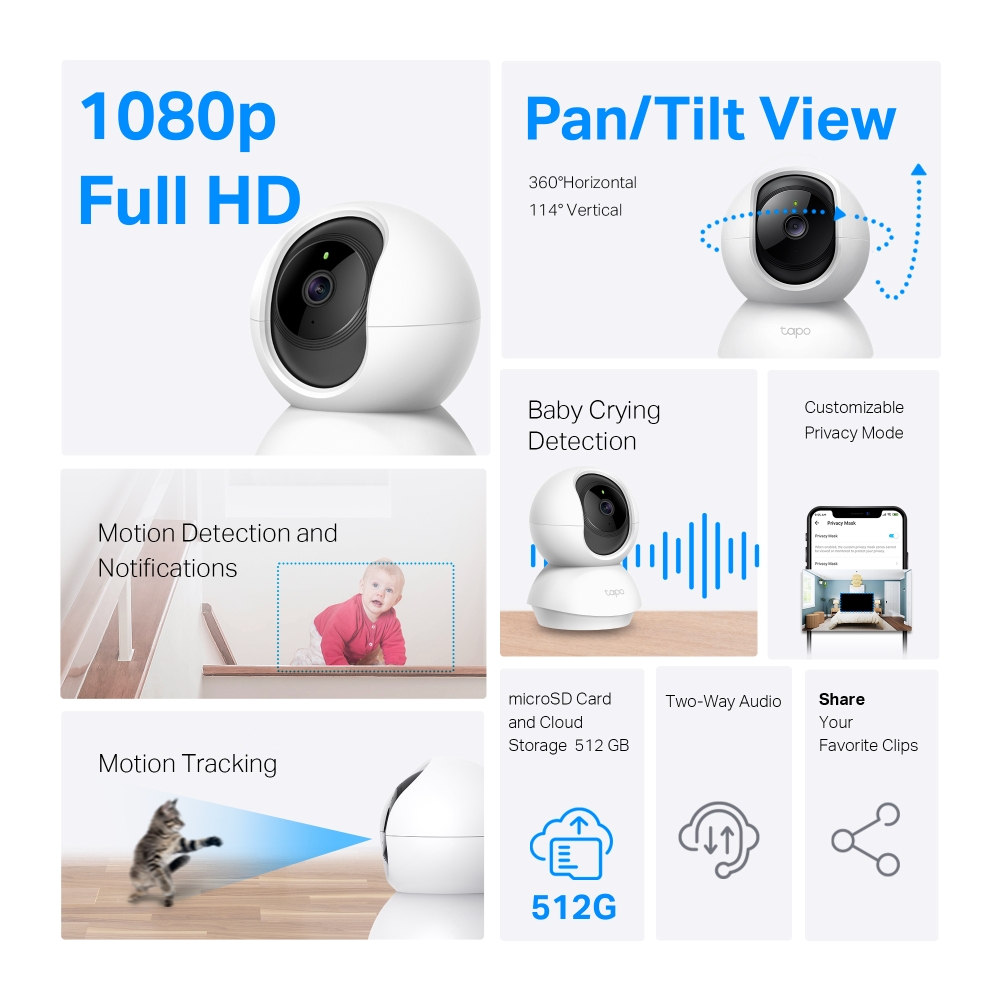
- Price: Rs 1,799 on Amazon India, $20-25 on Amazon US
- Resolution: 1080p (C200) or 2K 3MP (C210 at Rs 2,399)
- RTSP: Works, but you need to enable it in the Tapo app first. Go to Settings > Advanced Settings > Camera Account and create a username/password.
- Pan/Tilt: Yes, controllable from the Tapo app (not from Frigate)
- Night vision: Yes, decent up to 30 feet
- Storage: microSD slot (local recording as backup)
This is the camera I recommend to everyone starting out. It costs less than a dinner for two at a decent restaurant and the RTSP stream is stable. I have two C200 units running 24/7 on Frigate and they have not dropped once in 4 months. The RTSP URL format is: rtsp://username:password@camera-ip:554/stream1
One caveat: Tapo cameras default to DHCP. Assign them a static IP in your router settings so the RTSP URL does not change after a power cycle. Nothing is more frustrating than Frigate losing cameras because DHCP reassigned their IPs.
Best Mid-Range: Reolink RLC-520A / RLC-810A (PoE)
- Price: $55-75 on Amazon US. In India, Reolink is available on Amazon India but prices are inflated — Rs 7,000-10,000. Sometimes cheaper to import or buy from a local CCTV shop.
- Resolution: 5MP (520A) or 4K 8MP (810A)
- RTSP: Excellent. Reolink cameras have the best RTSP implementation I have tested. Stable streams, clean h264 sub-streams for detection.
- Power: PoE (Power over Ethernet), so you need a PoE switch or injector
- Build: Metal housing, IP66 weatherproof
If you are running Ethernet cables in a new house, go Reolink. The PoE means no separate power cable and the metal build survives Indian summers and monsoons. Use the sub-stream for detection (640×480, 5fps) and the main stream for recording. This keeps the Coral TPU load low while your recordings stay high quality.
Best Budget India-Only Option: CP Plus / CP Plus ezykam
- Price: Rs 1,200-1,800 on Amazon India and Flipkart
- Resolution: 1080p to 2MP
- RTSP: Available but sometimes hidden. You typically need to enable “ONVIF” in settings, then use the RTSP URL provided in the camera’s web interface.
- Build: Plastic, indoor use recommended
CP Plus is India’s largest CCTV brand. Their consumer IP cameras are rebranded OEM hardware but they work. The RTSP implementation varies by model, so check the specific model’s manual before buying. The CP Plus ezykam 2MP WiFi camera (Rs 1,499 on Flipkart) is a Tapo C200 competitor with slightly worse software but identical hardware capability. If you are on a very tight budget, these work.
Best Outdoor / Premium: Amcrest / Dahua / Hikvision
- Price: $60-150 on Amazon US. In India, Dahua and Hikvision cameras are widely available through local CCTV dealers at Rs 2,500-8,000 depending on model.
- RTSP: All models support RTSP. These are professional CCTV cameras with excellent stream reliability.
- Best models: Amcrest IP5M-T1179EW (5MP turret, $60), Dahua IPC-HDW2431T-AS-S2 (4MP, Rs 3,500-4,500 from Indian dealers)
Hikvision and Dahua dominate the Indian CCTV market. Any local electronics market (Lamington Road in Mumbai, SP Road in Bangalore, Nehru Place in Delhi) will have dozens of shops selling genuine Dahua cameras at wholesale prices. Get the turret style, not the bullet style. Turrets are harder for someone to knock off the wall and they collect less spider webs.
Step 3: Install Frigate
I will cover the Docker install because it works on everything — Raspberry Pi, mini PC, old laptop, Synology NAS. If you use Home Assistant OS with the Frigate add-on, the config is identical, just skip the Docker steps and install via the add-on store.
Install Docker (skip if you have it)
# For Debian/Ubuntu (mini PC or old laptop)
sudo apt update && sudo apt install docker.io docker-compose -y
sudo systemctl enable docker
sudo usermod -aG docker $USER
# Log out and back in for group change to take effect
Create Your Frigate Directory Structure
mkdir -p ~/frigate/config
mkdir -p ~/frigate/storage
mkdir -p ~/frigate/media
Write the Config File
This is the file that makes everything work. Create ~/frigate/config/config.yml:
mqtt:
  host: 192.168.1.100  # Your MQTT broker IP (or Home Assistant IP if using HA MQTT)
  user: mqtt_user
  password: your_mqtt_password

detectors:
  coral:
    type: edgetpu
    device: usb

cameras:
  front_gate:
    ffmpeg:
      inputs:
        - path: rtsp://tapo_user:[email protected]:554/stream1
          roles:
            - detect
            - record
      hwaccel_args: preset-intel-qsv-h264  # Remove this line if on Raspberry Pi
    detect:
      width: 1280
      height: 720
      fps: 5
    record:
      enabled: true
      retain:
        days: 7
        mode: motion

  backyard:
    ffmpeg:
      inputs:
        - path: rtsp://admin:[email protected]:554/stream1
          roles:
            - detect
            - record
      hwaccel_args: preset-intel-qsv-h264
    detect:
      width: 1280
      height: 720
      fps: 5
    record:
      enabled: true
      retain:
        days: 7
        mode: motion

record:
  enabled: true
  retain:
    days: 7
    mode: motion

snapshots:
  enabled: true
  retain:
    default: 10

objects:
  track:
    - person
    - car
    - dog
    - cat
  filters:
    person:
      min_area: 5000
      max_area: 100000
Save this. Read every line. The RTSP URLs are the most important part. Test them in VLC first: open VLC, go to Media > Open Network Stream, paste your RTSP URL. If it plays in VLC, it will work in Frigate. If it does not play in VLC, fix your camera settings first.
Create the Docker Compose File
Create ~/frigate/docker-compose.yml:
version: "3.9"
services:
  frigate:
    container_name: frigate
    restart: unless-stopped
    image: ghcr.io/blakeblackshear/frigate:stable
    privileged: true
    shm_size: "256mb"
    volumes:
      - /etc/localtime:/etc/localtime:ro
      - ./config:/config
      - ./storage:/media/frigate
      - type: tmpfs
        target: /tmp/cache
        tmpfs:
          size: 1000000000
    ports:
      - "5000:5000"
      - "8554:8554"   # RTSP restream
      - "8555:8555/tcp" # WebRTC over TCP
      - "8555:8555/udp" # WebRTC over UDP
    environment:
      FRIGATE_RTSP_PASSWORD: "your_rtsp_password"
    devices:
      - /dev/bus/usb:/dev/bus/usb  # Coral USB passthrough
Start Frigate
cd ~/frigate
docker compose up -d
# Check logs
docker compose logs -f frigate
Open your browser to http://your-server-ip:5000. You should see the Frigate UI with your cameras. If you see black screens, check the logs. 90% of the time it is an RTSP URL issue — wrong IP, wrong port, wrong username/password. The other 10% is the camera outputting h265 when your hardware cannot decode it. Switch the camera to h264 in its settings if that happens.
Step 4: Fine Tune and Go Live
Set Up Motion Masks
Motion masks tell Frigate to ignore certain parts of the frame. If you have a tree that moves in the wind or a road with passing cars you do not care about, mask them out. In the Frigate UI, go to your camera, click Debug, draw a mask zone, and copy the coordinates into config.yml. This cuts false alerts by 80%.
Get Notifications on Your Phone
The easiest method: install the Frigate integration in Home Assistant (Settings > Devices & Services > Add Integration > Frigate). Once added, create an automation:
- Trigger: Frigate event (person detected on front_gate)
- Action: Send notification to your phone via the Home Assistant mobile app
- Include a snapshot image in the notification so you see who is at the gate without opening the app
If you do not have Home Assistant yet (you will after reading my next guide), you can use Gotify for notifications. Gotify is a self-hosted push notification server. Install it in Docker, get the Android app, and configure Frigate to send events to Gotify. I will cover this in a separate post because it deserves its own walkthrough.
Remote Access Without Opening Ports
Do not port forward Frigate to the internet. Please. If you need to view cameras from outside your home network, use one of these:
- WireGuard VPN on your home server (free, fast, secure)
- Tailscale (free for personal use, stupidly easy to set up, works even behind CGNAT which most Indian ISPs use)
- Cloudflare Tunnel if you want a web-accessible dashboard (free, but requires a domain)
I use Tailscale. It took 5 minutes to install on my server and my phone. Now when I am anywhere with an internet connection, I open the Frigate app or Home Assistant and see my cameras like I am sitting at home. Indian ISPs like JioFiber and Airtel Xstream use CGNAT, which means you cannot port forward anyway. Tailscale solves this. It is the single best free tool for Indian self-hosters.
Total Cost Breakdown
Here is what a solid 4 camera Frigate setup costs in both markets, using the hardware I actually recommend:
| Component | US | India |
|---|---|---|
| Beelink Mini S12 Pro | $160 | Rs 16,000 |
| Coral USB TPU | $65 | Rs 10,000 (if you find stock) |
| 1TB Crucial BX500 SSD | $55 | Rs 4,800 |
| 4x TP-Link Tapo C200 | $80 | Rs 7,200 |
| TP-Link 5-port Gigabit switch | $16 | Rs 900 |
| CAT6 cables (assorted) | $15 | Rs 500 |
| TOTAL | $391 | Rs 39,400 |
Compare that to a Ring Alarm Pro with 4 cameras and a Protect subscription: $500 upfront plus $200 per year. After 2 years, Ring costs you $900 and keeps charging. Frigate costs $391 once and you never pay another rupee or dollar. The math is not even close.
If you skip the Coral and use OpenVINO on the Intel CPU, drop another Rs 10,000 / $65 from the total. If you buy a used mini PC from OLX instead of new, save another Rs 5,000-8,000. A bare minimum 4 camera Frigate setup in India can cost as little as Rs 22,000 total — less than the price of one Nest Cam Outdoor.
Common Problems and Their Solutions
- “My camera shows a green or grey screen.” Your camera is outputting h265 and your hardware cannot decode it. Switch to h264 in the camera settings. If the camera does not support h264, add
hwaccel_args: preset-vaapito the camera config. - “Frigate says no frames received.” The RTSP URL is wrong. Open it in VLC. If VLC cannot play it, Frigate cannot either. Check the IP, port, and credentials.
- “Detection is slow (2+ seconds per frame).” Your Coral is not being detected. Run
lsusbon the host and look for “Google Inc.” If it is not there, try a different USB port or a powered USB hub. - “My Pi 5 keeps overheating.” Get a heatsink case. The official Pi 5 active cooler costs Rs 500. Without active cooling, the Pi 5 throttles under constant Frigate load.
- “Recordings stop after a few days.” Your storage is full. Frigate automatically deletes old recordings, but check your retention settings. If you set retain days to 30 with 4 cameras on a 256GB card, you will run out of space.
Final Thoughts
Frigate is genuinely great software. It is also genuinely frustrating to set up the first time. The documentation assumes you know what RTSP means and how Docker works. If this guide helped you skip some of that frustration, I am glad. If you get stuck, leave a comment below with your camera model and the exact error message from the Frigate logs. I read every comment and I will try to help.
In the next post, I cover installing Home Assistant from scratch — because once you have Frigate running, you will want to automate everything else in your house too.
Product links (India):
- TP-Link Tapo C200: Amazon India | Flipkart
- Raspberry Pi 5 8GB: Robu.in | Amazon India
- Coral USB TPU: Fabtolab | Robu.in (check stock)
- Crucial BX500 1TB SSD: Amazon India
- Dahua 4MP Turret Camera: Available at local CCTV shops or Amazon India
Product links (US):
- TP-Link Tapo C200: Amazon US
- Beelink Mini S12 Pro: Amazon US
- Coral USB TPU: Amazon US | Mouser
- Reolink RLC-520A: Amazon US
Keep Reading
- How to Install Home Assistant on a Raspberry Pi or Old PC
- Best Self-Hosted Alternatives to Ring and Google Nest
- Live View TP-Link Tapo Camera on Your Computer
- Live View Xiaomi Mi Security Camera on Your Computer
- Hard Drives That Pair Perfectly With Any NAS
- How to View Reolink Cameras on Your PC
- How to View Reolink Cameras on Your PC
- How to View Eufy Cameras on Your PC
- How to View Eufy Cameras on Your PC