For those who already know about rooting and have experience with rooting devices, click here to skip to the section with instructions. This article will explain how to root android 11.
Beginning with the basics:
Rooting is a process to gain “root” access to an Android device. “Root” access enables users to overcome limitations and to alter/replace system settings and applications. In short, it gives a little more flexibility to Android Mobile.
There is no universal way of rooting Android devices. Different smartphone brands have their methods of unlocking the bootloader.
So, before you proceed with rooting your android device, do a quick google search about unlocking the bootloader of your respective device.

Also Read:
- How to Root any Android 10 Q Device in 2021 the Easy Way?
- How to Root Any Android 9.0 Device – The Right Way
- How to Unlock Bootloader of Any Android Device
- How to Unlock Bootloader in OnePlus Devices
How to Root Android 11
With Android 11, certain smartphone manufacturers have restricted users to unlock the bootloader. Here’s a list of manufacturers that do not allow unlocking bootloaders with Android 11:
- Realme
- Oppo
- Vivo
- iQOO
If you don’t have a PC, it is not worth going through the process. It won’t be possible to restore anything should something go wrong; you will end up with an expensive paperweight.
It’s either hard or not worth the effort. Some apps claim to root your smartphone without a PC. But, they usually don’t work. Your search ends here. Find the steps for how to root android 11 right below.
Pre-requisites to the Rooting process:
- Unlocked Bootloader. Check here for instructions for your device.
- Installed Custom Recovery on your smartphone.
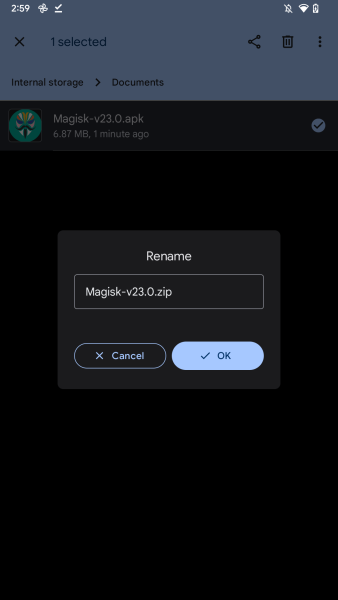
- Magisk Zip file. Download here. Download the latest apk file and simply rename the file to .zip instead of .apk
- Enable Developer Options on your smartphone. It is a generic process that is usually the same for all android smartphones.
- Go to the phone Settings -> About Phone.
- Find the build number of your device and tap on the build number 7 times to enable developer options.
- Open Developer Options -> Find OEM Unlocking and enable it.
- Now, find USB Debugging, and enable that too.
- Connect your smartphone to your PC and allow USB debugging when asked on your smartphone.
Let’s begin the process of root!
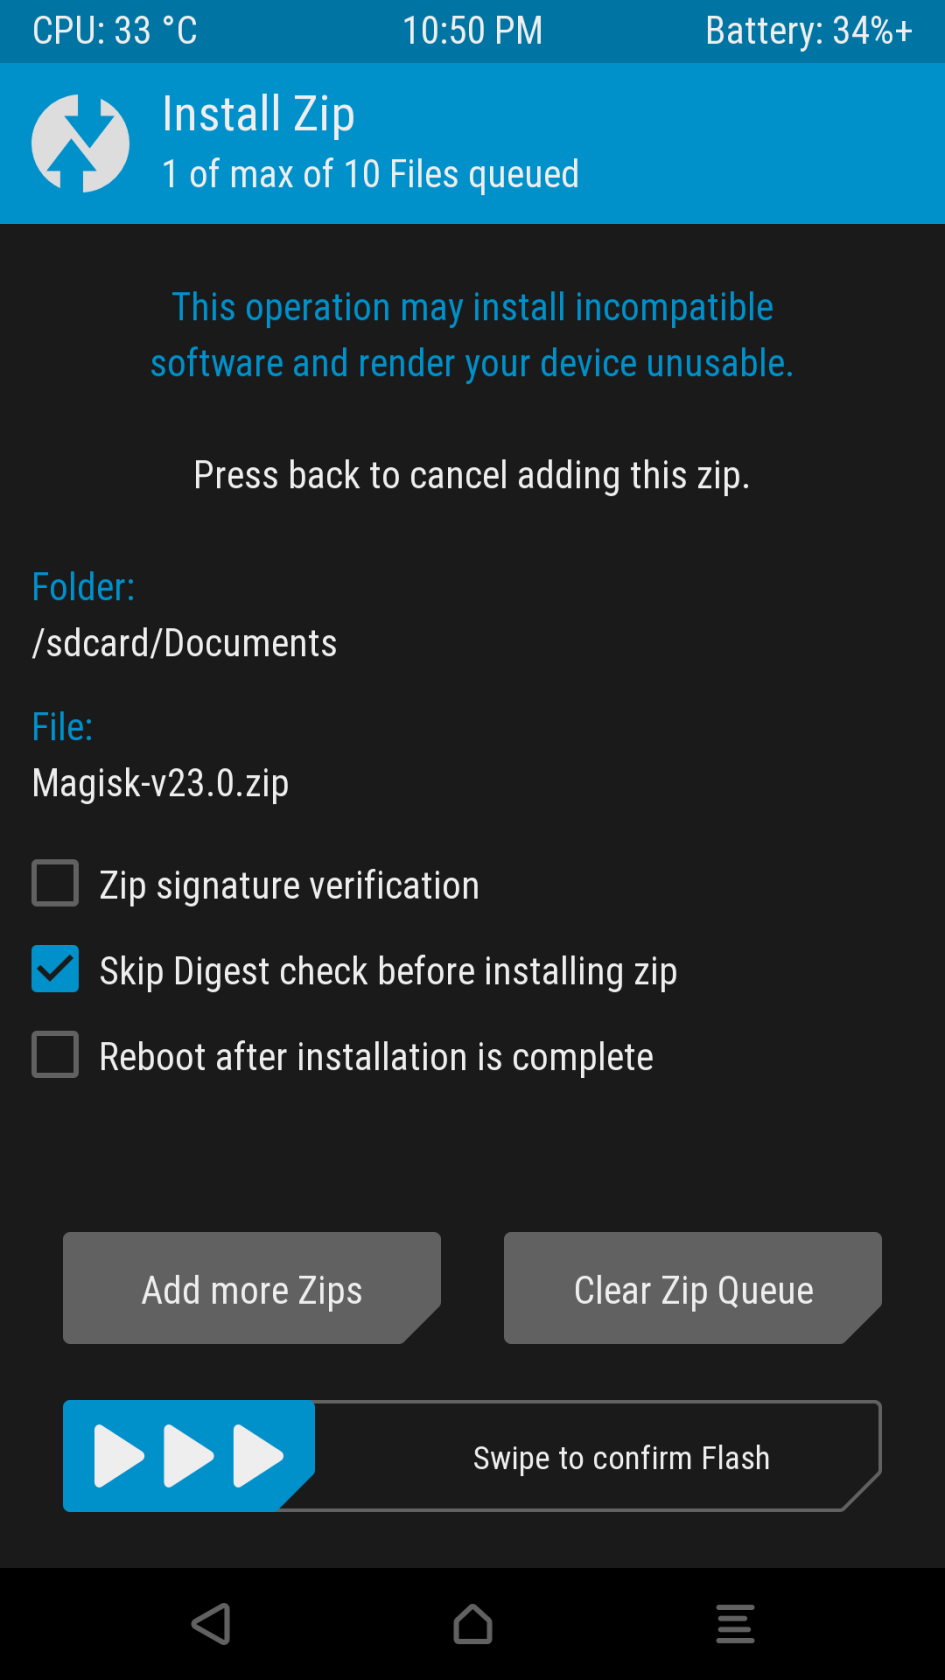
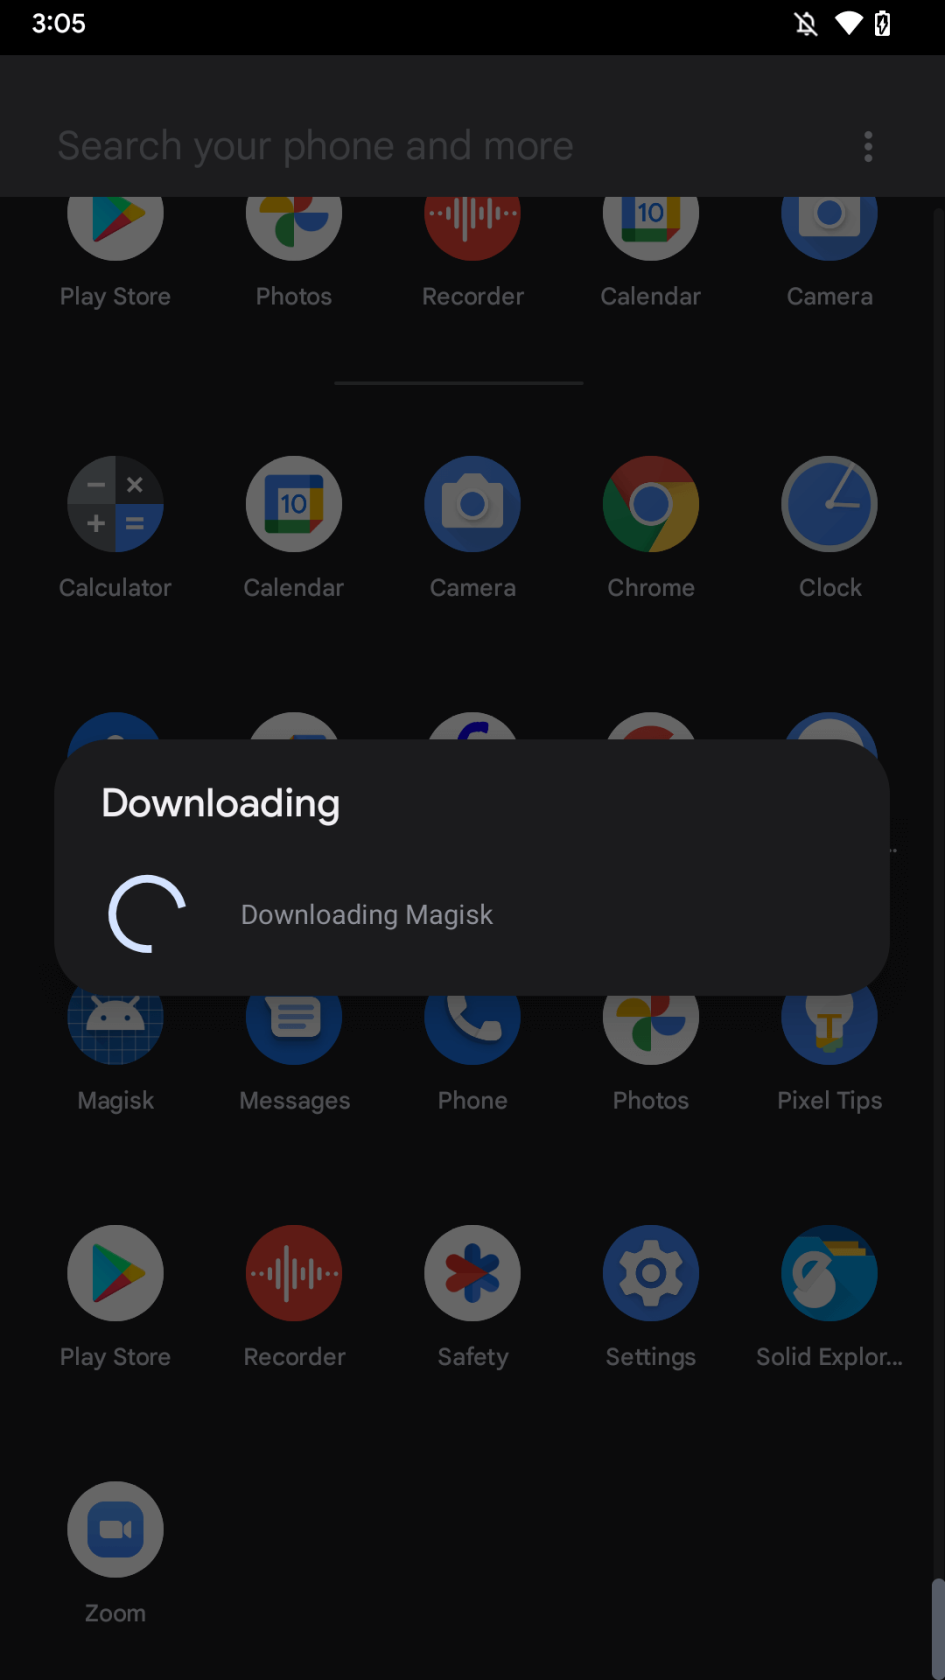
As mentioned above, your device must have an unlocked bootloader and a custom recovery for this process to work. Download and place the zip file on your storage and then reboot your android smartphone into recovery.
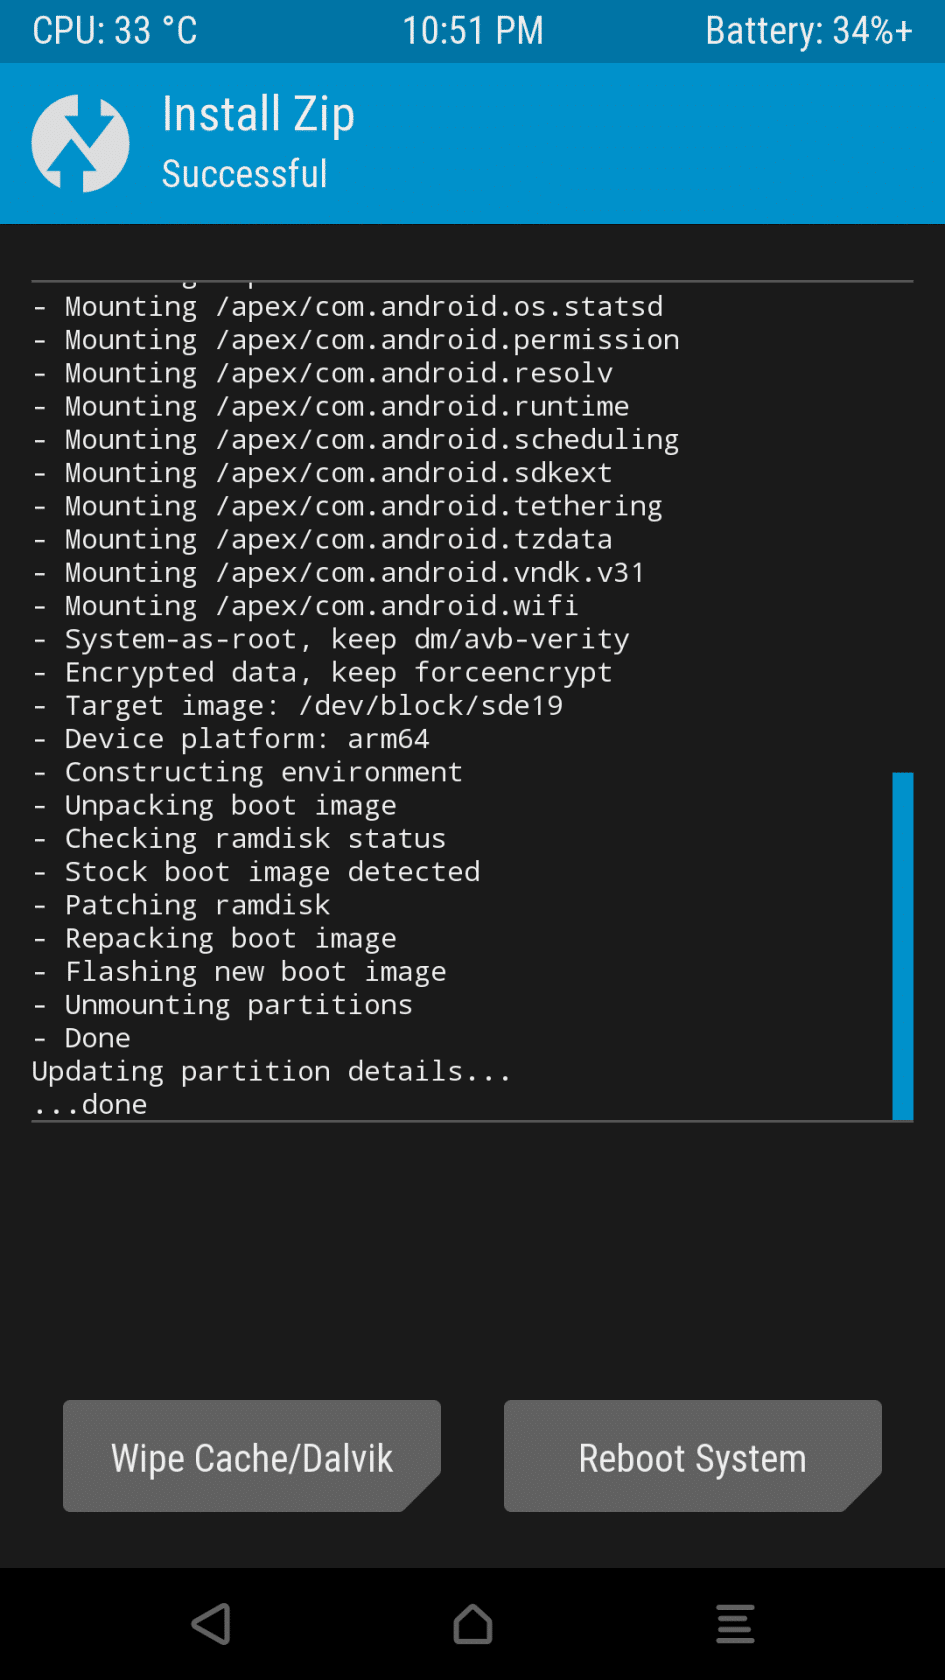
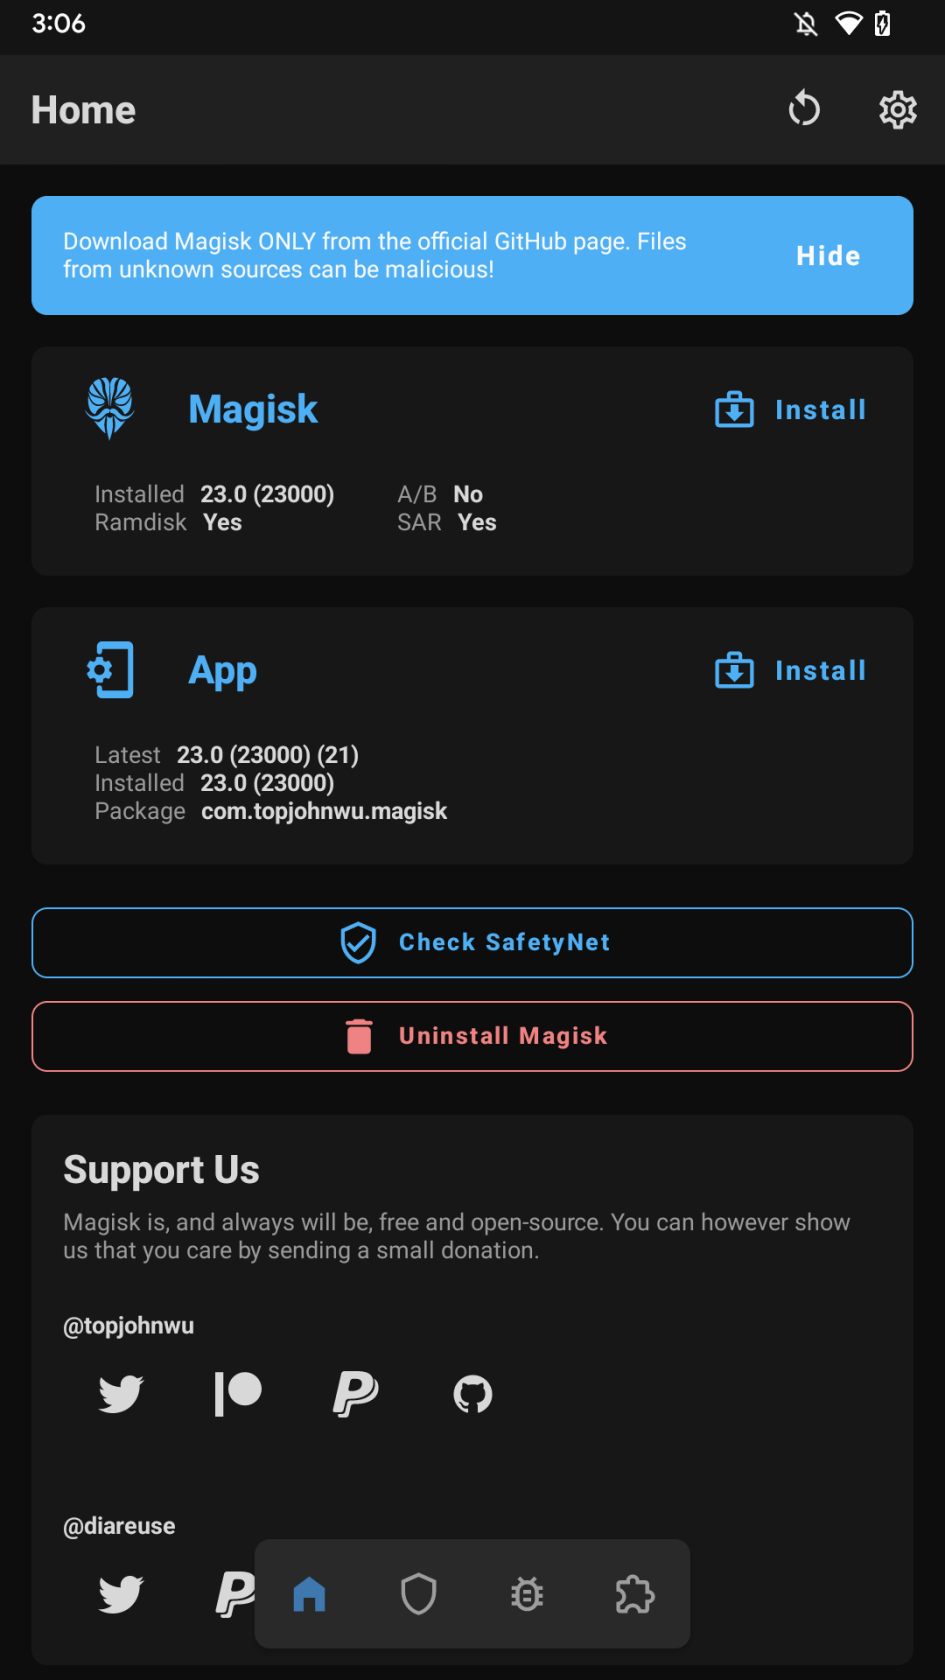
After booting into Recovery mode, navigate to and install Magisk.zip. Once done, reboot your smartphone.
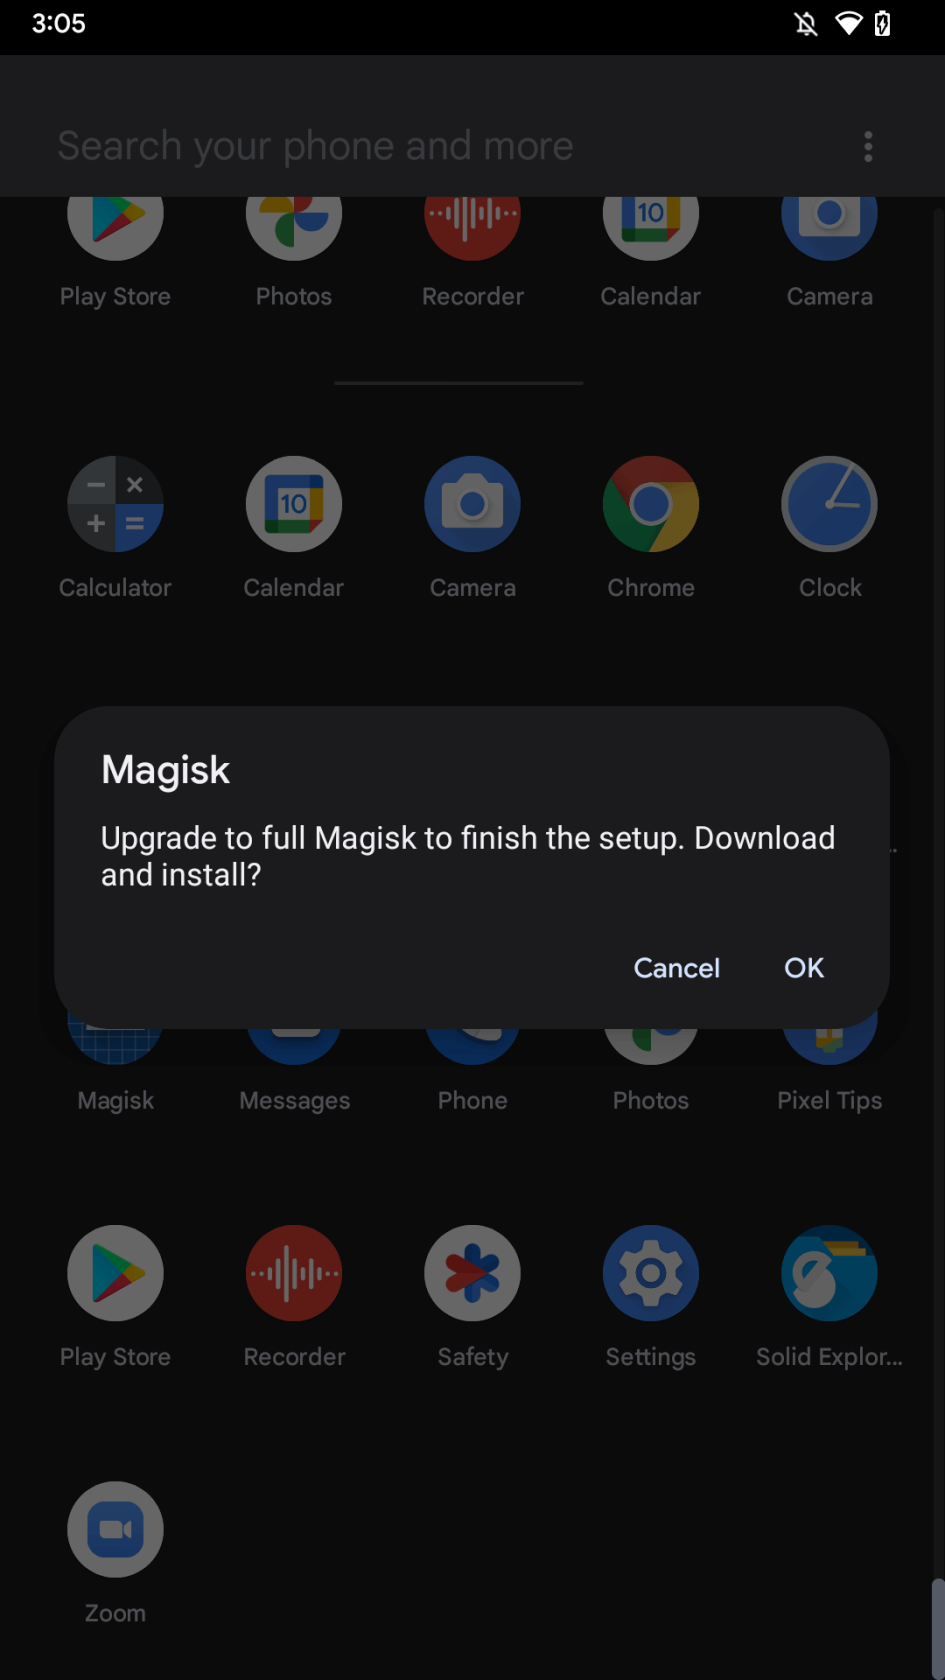
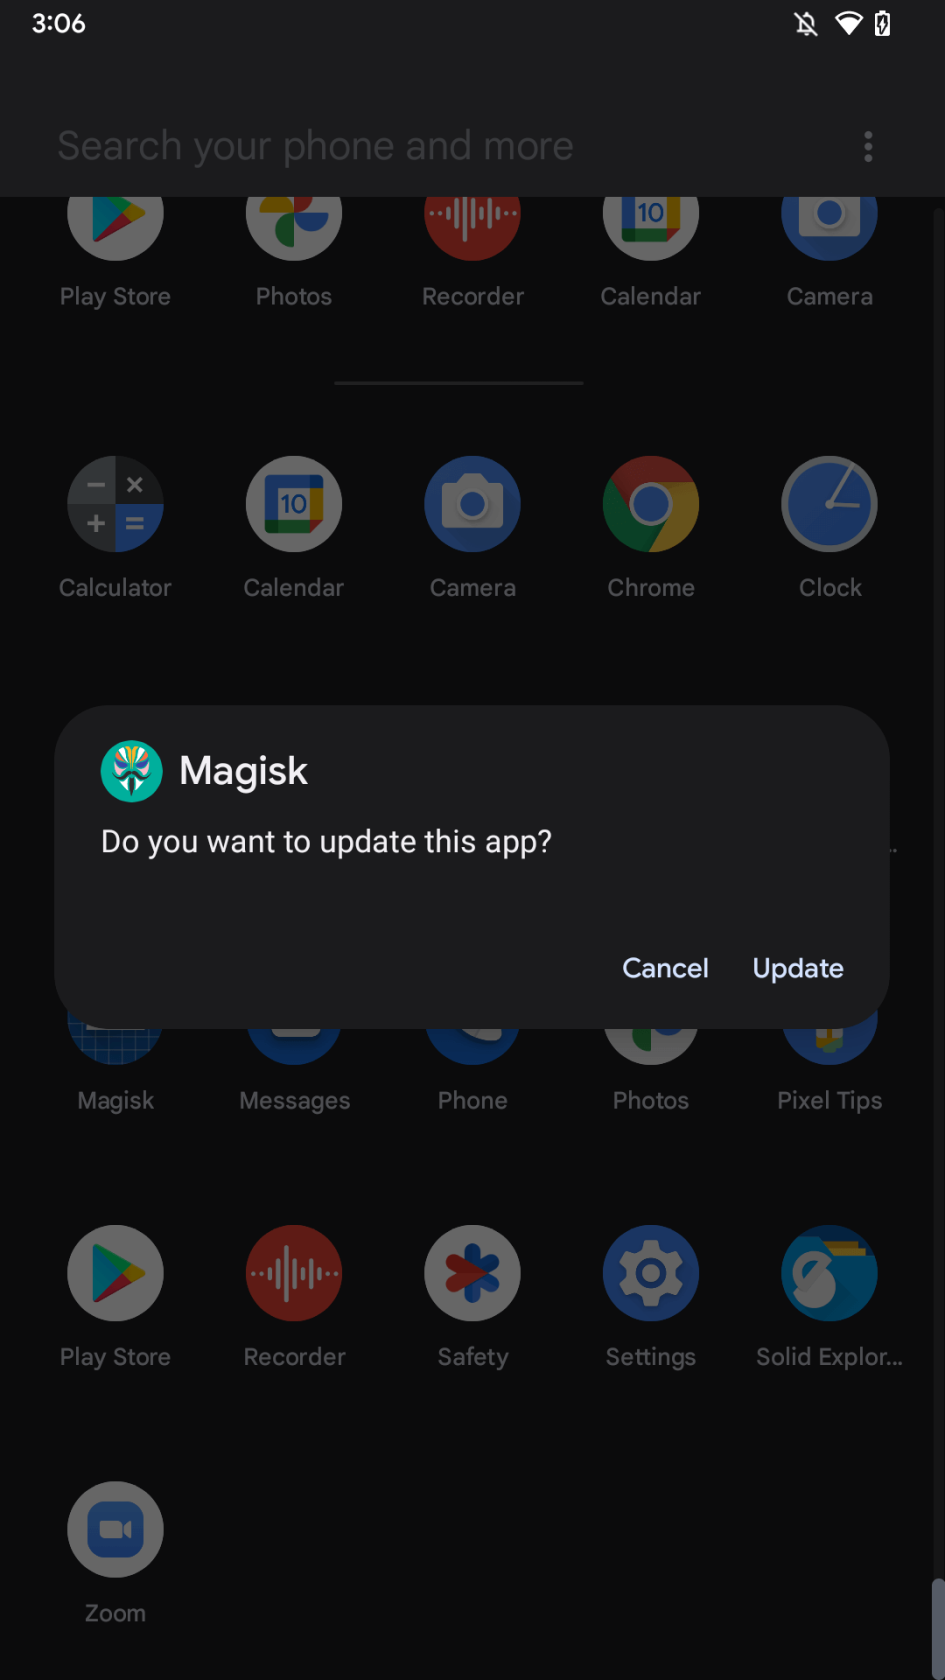
If you find Magisk installed on your smartphone, you have successfully rooted your android device. But, this is not it! After rooting an Android device, some settings need to be changed so that everything works fine as it is supposed to. When you open Magisk for the first time, you need to upgrade to full Magisk like shown in the picture below:
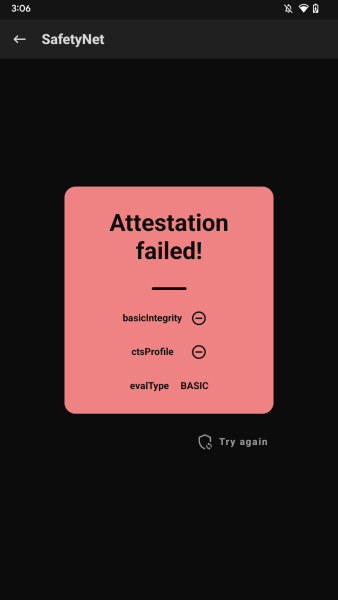
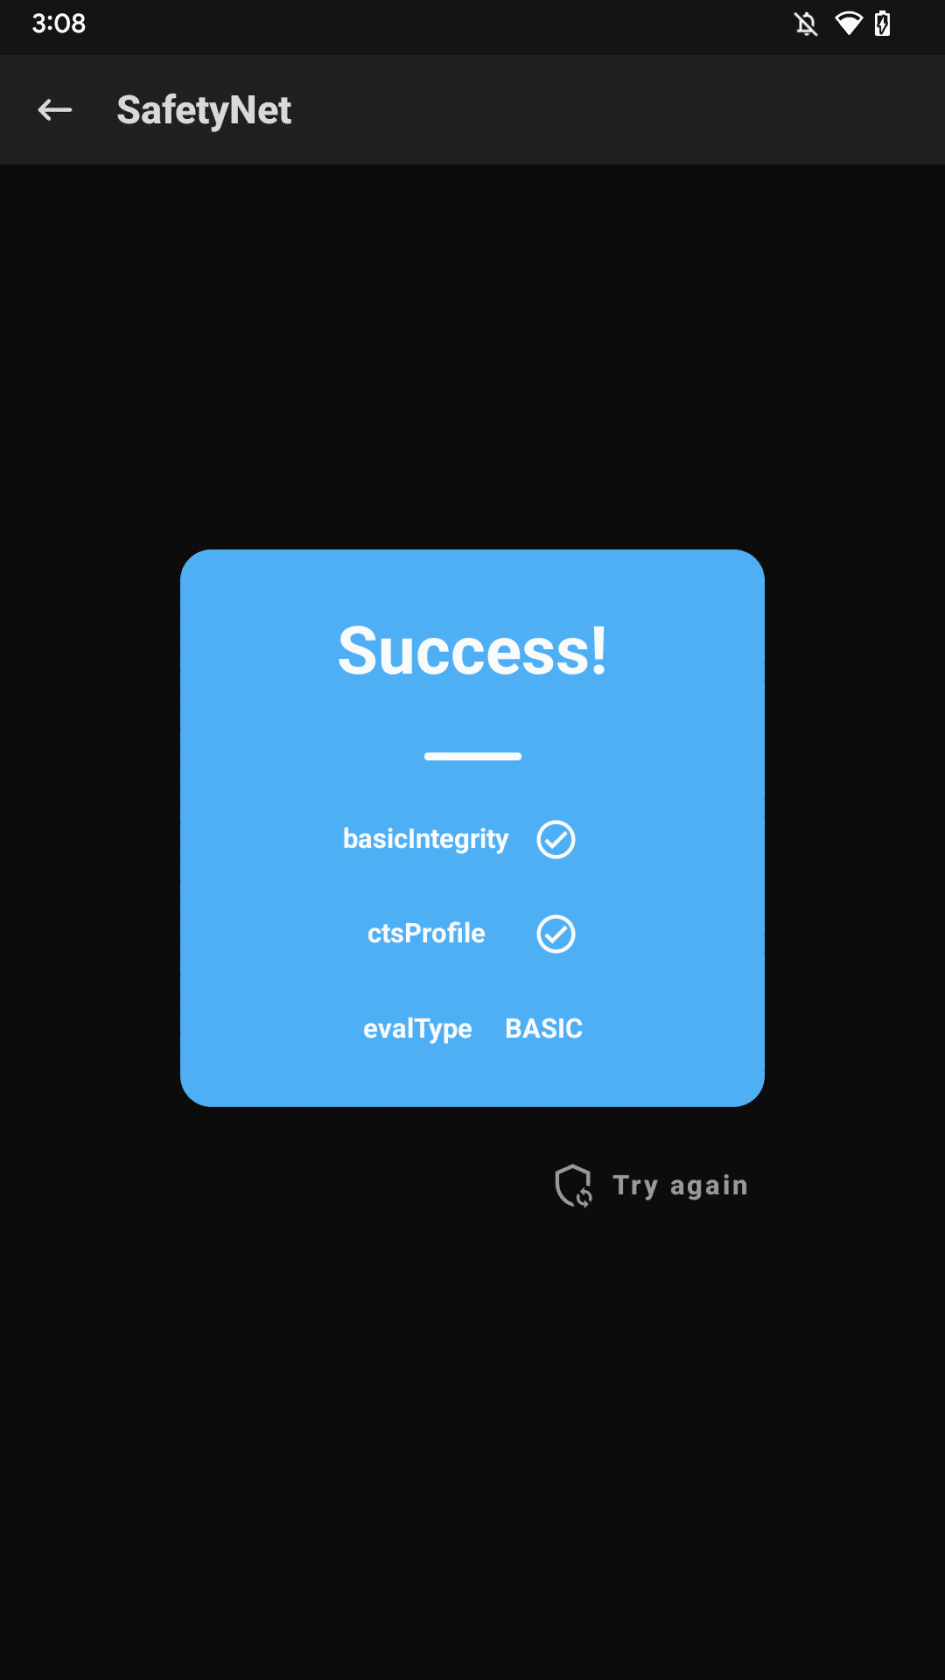
When a device is rooted, SafetyNet status fails. SafetyNet is a service by Google that helps protect Android devices against security threats, potentially harmful apps, etc. If the status of an android device fails SafetyNet, it is exempt from receiving any security and software updates.
In addition, all banking apps on your device will be disabled. So, after installing Magisk, make these few mentioned changes in the settings to make everything work like before. So after knowing how to root android 11, let us configure Magisk.
Configuring Magisk to Enable SafetyNet
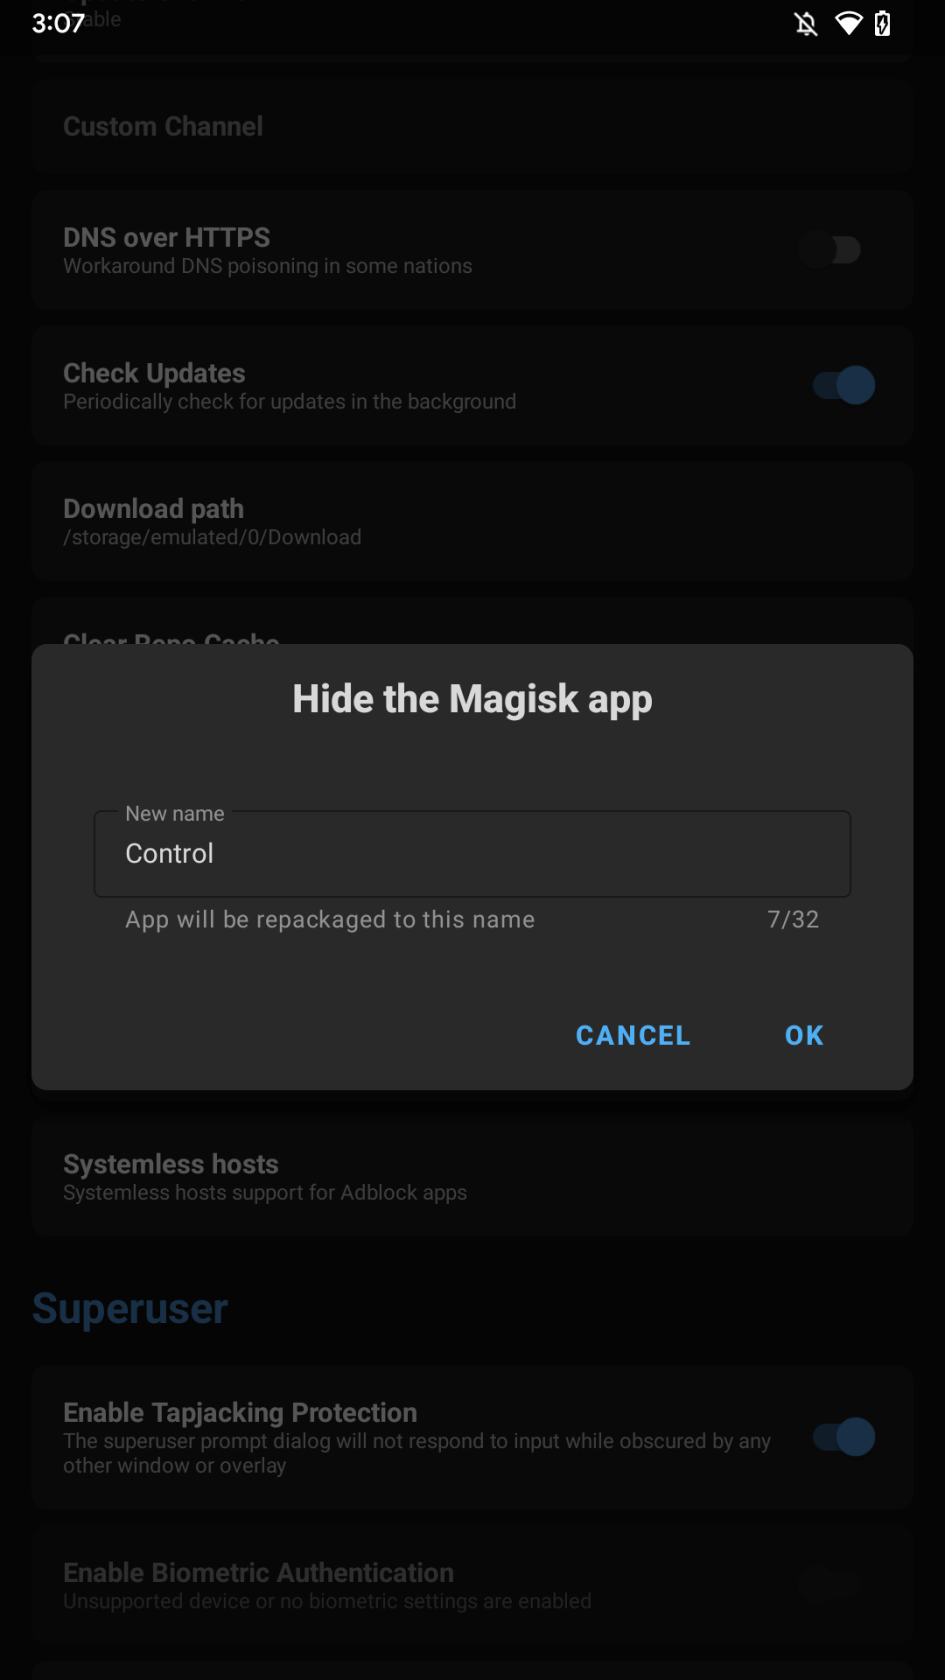
Step 1: Open Settings -> Enable Magisk Hide. Now, click on “Hide the Magisk app“.
Rename the app and click Ok. What this does is makes Magisk invisible to all the apps.
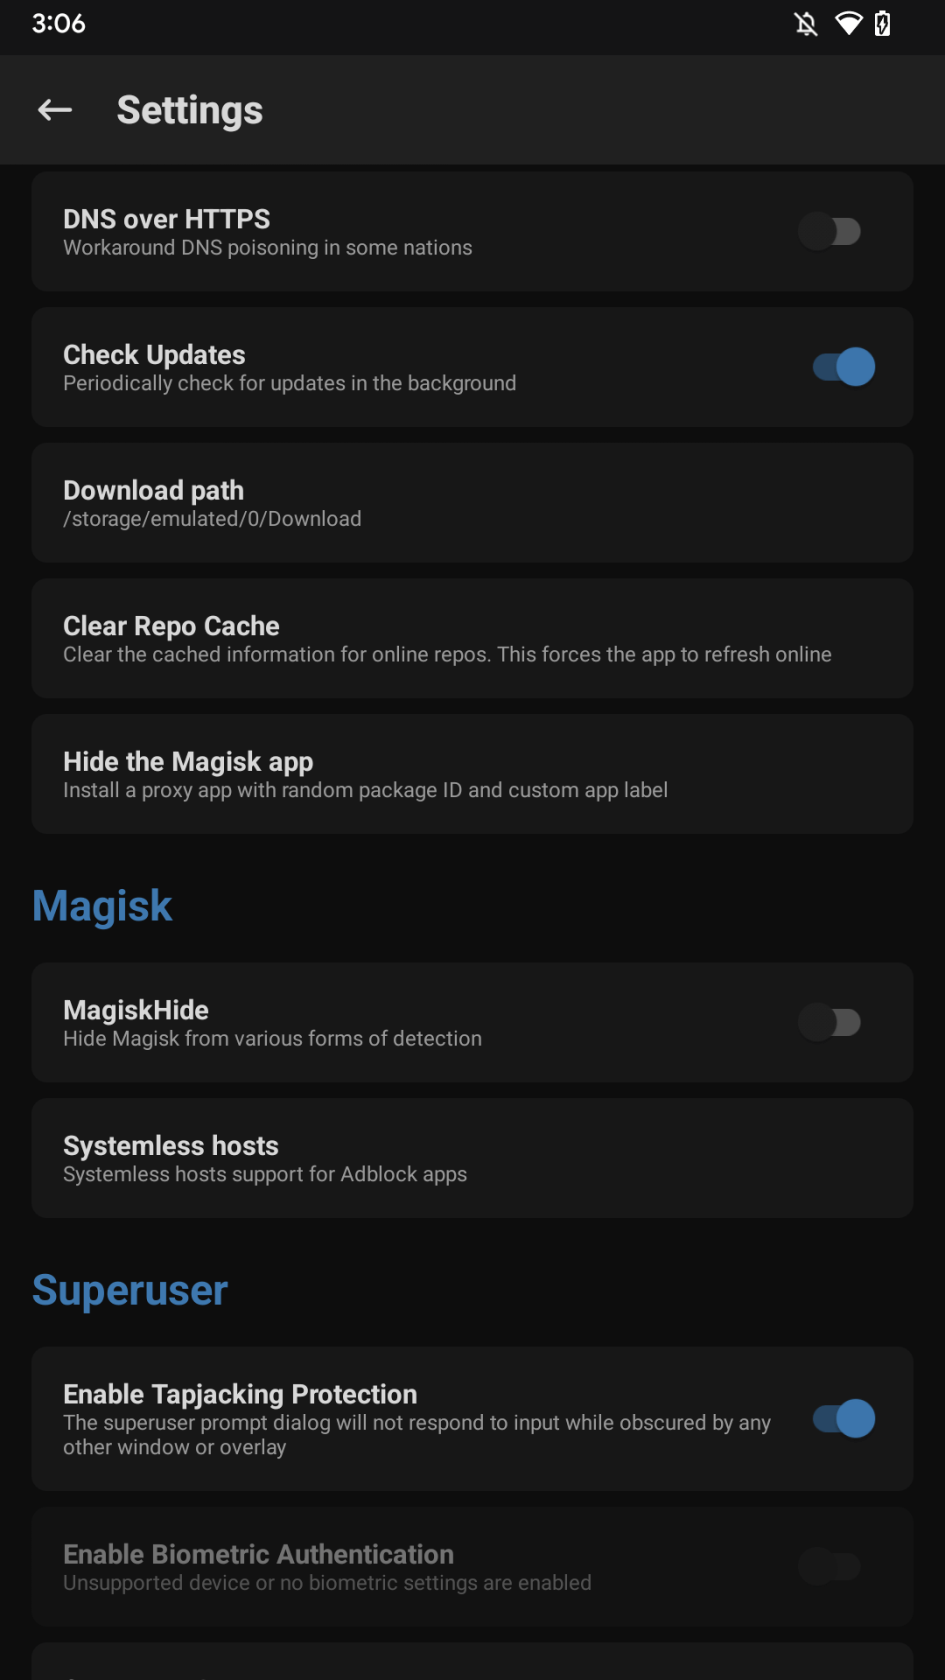
Step 2: Go to Magisk hide settings and select all apps that do not require root, such as all the banking apps.
This must fix the SafetyNet status of your Android device. You can check the status of SafetyNet in the Magisk App itself. There are a lot of apps available on the Play store too that serve this purpose. So now you know how to root android 11 and configure Magisk so that your device runs smoothly.
Magisk is the most secure way to root an Android device. It has a large community of users and is kept up-to-date. So, if you have been wondering how to Android 11, here is your answer – Magisk. Safe, secure, and, up-to-date.

This article is very knowledgeable and helpful. I think these are the best strategies to work. Thanks for sharing such kind of article.
Looking forward to reading more articles like that. Thank you!
you can buy pre-rooted androids at privacyportal co uk saves bricking your phone!