What is Virtualmin / Webmin Control Panel?
If you have ever involved in Web Hosting field then you might have heard about CPanel, CPanel is a full featured easy to use most popular Web Control Panel for web Administrators, so you might be thinking why are we using Virtualmin instead of CPanel, well that’s because Virtualmin is absolutely free and Open Source and on the other hand Cpanel costs about $400 for an standard license. in short Virtualmin or Webin is a powerful and flexible web hosting control panel for Linux and UNIX systems. It makes it easy to manage your virtual domains, mailboxes, databases, applications, and the entire server, from one comprehensive and friendly interface.
Setting up Email Accounts in Virtualmin
Prerequisites :
- A Linux or Unix Server or VPS
- Running with fully functional Virtualmin Control Panel
- A domain name hosted in virtualmin.
How to create Email Accounts?
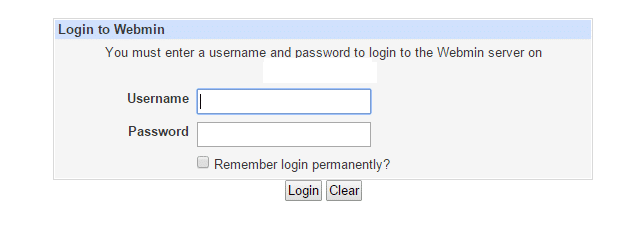
Step 1 : Access your Virtualmin Control Panel by going to https://your-domain:10000 and loggin in with your admin account.
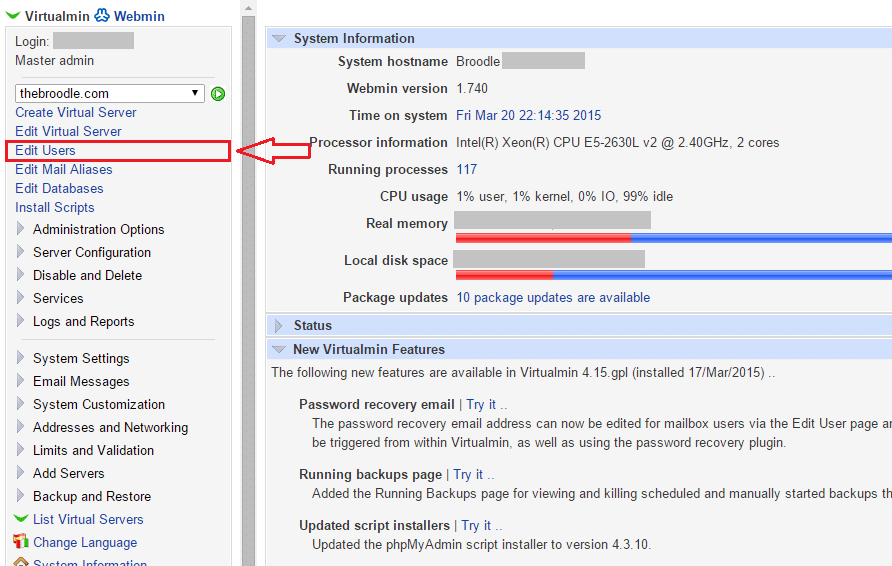
Step 2 : After logging in to the Virtualmin select your primary domain from left side panel (if you don’t have one then add a domain) and then click on Edit Users (See the below picture for reference).
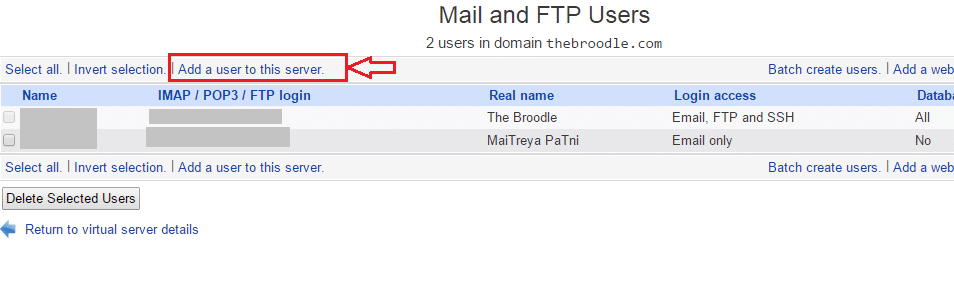
Step 3 : Now from the Mail and FTP Users page click on Add a new user to this server (See the below image for reference).
Step 4 : Now in Create User page Fill up Email Address, Real Name, Password, leave the quota and home directory settings, Email Settings, Mail forwarding settings and Other User Permissions as default, if you want to forward this address to some other email then in Mail forwarding settings enable forward and enter your email address, after that click on Create to create your Email Address.
Step 5 : That’s it, your Email Address has been created, if you want to create more then follow the same step again.
Step 6 : For accessing your Email Addresses you can install a Webmail Client like Roundcube or SquirrelMail, to install them follow our tutorials :
- How to install Roundcube Webmail in Virtualmin / Webmin
- How to Install SquirrelMail Webmail in Virtualmin
That’s it, If you face any problem the feel free to comment below.